27 Countertop Coffee Stations: Stylish, Space-Savvy Ways to Set Up Your Brew Corner
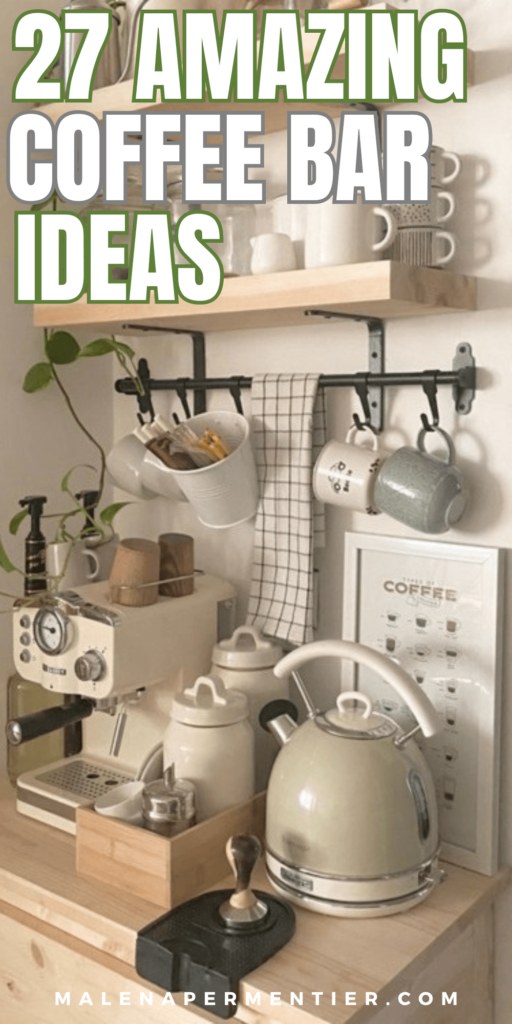
Your kitchen countertop can be more than a place for appliances—it can be a thoughtfully styled coffee station that streamlines morning routines and elevates the room’s look. Whether you have a wide expanse of marble or a crammed stretch beside the sink, the goal is the same: create a defined brewing zone with intentional storage, easy flow, and personality. Start by choosing an overall mood—think warm wood and moody black for contrast, bright minimal for airy mornings, or a cozy farmhouse vibe—and build outwards from a single anchor piece like a grinder, espresso machine, or compact pour-over setup.
Think in layers: anchor your station with an everyday tray or cutting-board base, add a curated canister trio for coffee, sugar, and tea, and install a rail or stacked organizer for mugs to keep counters clear. For tight spaces, go vertical with a narrow shelf or a compact mug tree; for luxe impact, weave in warm metallics and textured ceramics. Small details—recipe flip displays, a tiny potted herb, or a styled cookbook backdrop—turn practical storage into a welcoming vignette. This article breaks down approachable styling moves, from built-in nooks to portable countertop arrangements, so you can pick the elements that fit your space and routine.
1. Moody Black and Warm Wood Coffee Nook
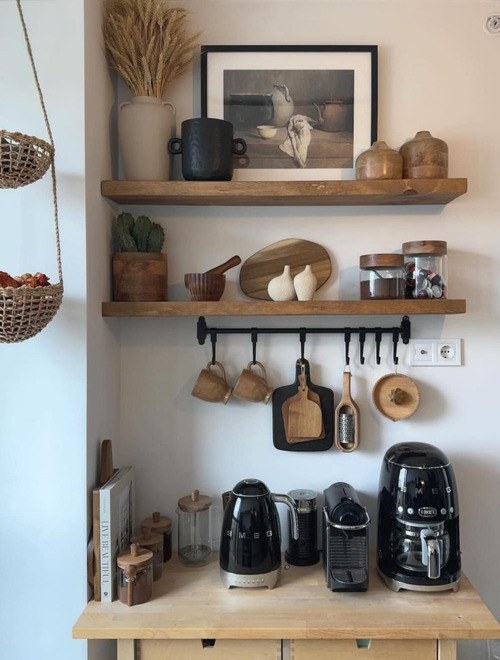
Warm wood paired with matte-black hardware creates a modern, cozy coffee station. Anchor pieces on a small wooden tray, add two black canisters, and mount a narrow black shelf above for mugs or a small plant.
Place the coffee maker centered, leave room for a mug, and use a vertical cutting board to add height.
Ingredients / Materials
- Small wooden tray
- Two matte-black canisters
- Narrow floating shelf with black brackets
- Black mug hooks or small rack
- Vertical wooden cutting board or paddle
Instructions
- Set the wooden tray on the countertop and place the coffee maker centered on it.
- Group the canisters to one side and prop the cutting board upright behind them for height.
- Install the floating shelf 12–18 inches above the counter and hang mugs from hooks.
- Add a small plant and keep any electrical items supervised and away from flammable materials.
2. Mini Coffee Station Garden
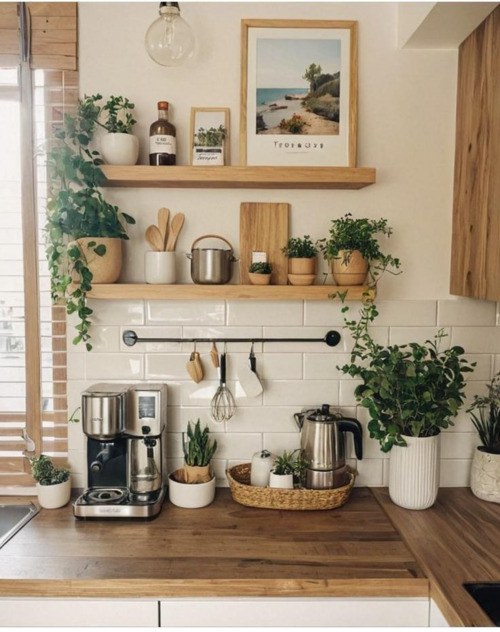
Add a splash of greenery to your coffee station to soften hard lines and brighten the routine. Select small, low-light plants—succulents, a trailing pothos, or a petite fern—for easy maintenance.
Anchor them on a shallow tray and vary pot heights for a curated, clutter-free look. Add river stones or a tiny scoop for tactile interest.
Ingredients / Materials
- 3–5 small potted plants (succulent, pothos, fern)
- 1 shallow tray or saucer
- 2–3 small ceramic or terracotta pots
- Handful of pebbles or decorative stones
- Mini watering can or dropper
Instructions
- Wipe and dry the tray; arrange pots by height and leaf texture.
- Put a thin pebble layer in saucers for drainage and set pots on top.
- Tuck decorative stones and a tiny scoop or card to complete the vignette.
- Water sparingly, wipe spills promptly; keep appliances away from moisture and supervise any lit candles.
3. Black Accents to Anchor Your Coffee Station
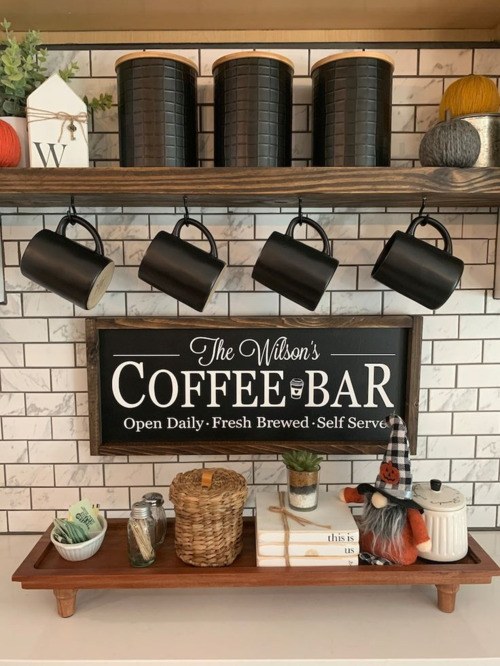
Anchor a bright countertop coffee station with a few black accents — one grounding tray plus one or two contrasting black pieces for balance.
Mix matte metal, black ceramics, and warm wood for texture. Repeat black sparingly in mugs, a canister, and a small sign. Keep cords tidy and supervised for lamps or kettles; never leave candles unattended or near flammable materials.
Ingredients / Materials
- Matte black tray or shallow board
- Black canister with lid
- One or two black mugs (vary finish)
- Small black-framed chalkboard or label
Instructions
- Set the tray where it’s most useful.
- Place the tallest black piece at the back and a low item up front to add depth.
- Arrange mugs, canister, and label in an odd-number group and mix textures.
- Add a small plant or sign for contrast; tidy cords and never leave candles or electrical items unattended.
4. Coffee Recipe Flip Display
Create a tidy, attractive flipbook of your favorite coffee preparations and place it on a shallow tray near the brewer. Choose a consistent color palette for cards and containerry, and position the display so recipes are easy to read but out of direct steam, splash, or heat.
Use different colored dividers for categories—espresso classics, iced drinks, seasonal specials—so guests can flip to inspiration quickly. Keep the tray clutter-free: a few labeled jars and a spoon rest will make the whole vignette feel curated.
Ingredients / Materials
- Heavy cardstock or index cards (4×6 or 5×7)
- 1–2″ binder ring or decorative O-ring
- Small easel, acrylic stand, or mini clipboard
- Shallow tray or wooden catchall
- Hole punch and permanent pen; optional battery LED clip light
Instructions
- Design concise recipe cards with title, ratio, and one-line note; print on cardstock and optionally laminate sleeves.
- Punch a single hole at the top corner of each card and thread onto the binder ring, adding a cover card and dividers.
- Set a small easel or stand on the tray and lean the flipbook there; arrange jars and a spoon nearby, keeping the display away from steam and splashes.
- Clip on a battery LED light if needed for evening use—keep lights supervised and away from flammable materials—and refresh cards seasonally.
5. Built-In Coffee Nook
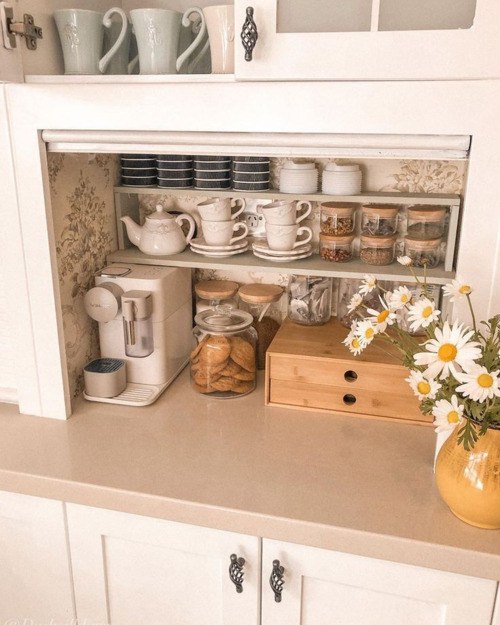
Turn an unused cabinet run or shallow alcove into a built-in coffee nook that reads like a small cafe corner. Choose warm wood tones or painted cabinetry, a durable countertop, and an easy-clean backsplash; open shelves above keep mugs visible and within reach while a shallow drawer tucks away scoops and filters.
Conceal cords with a dedicated outlet and cord channels for a seamless look. Add under-cabinet LED lighting to illuminate prep, and keep heat-producing appliances on a heat-resistant mat. Always supervise electrical items and candles, and keep them away from flammable materials.
Ingredients / Materials
- Base cabinet or shallow shelving unit sized to your recess
- Durable countertop material (butcher block, laminate, or engineered stone)
- Peel-and-stick backsplash panel or tile
- Under-cabinet LED strip lights
- Dedicated grounded outlet and cord-management channels
- Drawer organizer and heat-resistant appliance mat
Instructions
- Measure the space and sketch the layout; mark where outlets and lighting will go and consult an electrician if adding wiring.
- Install the base cabinet or shelving and attach the countertop; secure the backsplash panel for an easy-clean surface.
- Mount under-cabinet lighting, install the outlet and run cord channels behind cabinetry so cords stay concealed.
- Arrange brewer, jars, mugs and tools on a tray; use the drawer for small items and place appliances on the heat-resistant mat. Supervise electrical items and any candles; keep flames away from fabrics and paper.
6. Purposeful Finishing Touches
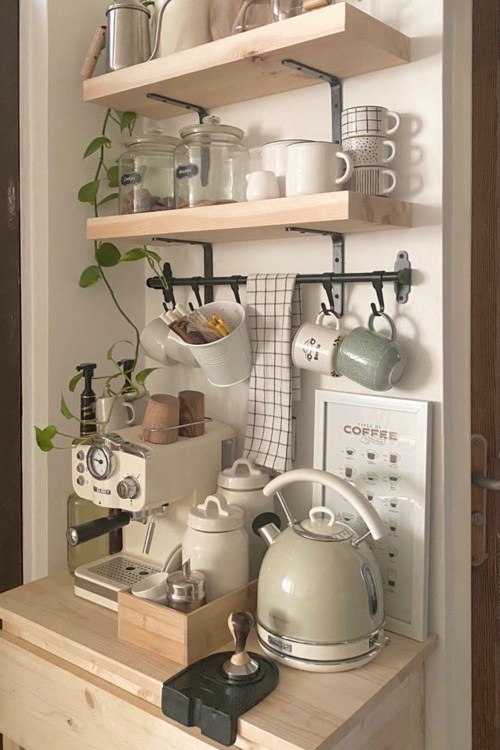
Finishing touches make a coffee station feel intentional. Think tactile layers: a tray to corral mugs, labeled canisters for beans and sweeteners, and a folded linen for color. Choose one small plant and one useful tool so the vignette looks curated but works well.
Ingredients / Materials
- Shallow tray (wood or metal)
- 2–3 glass or ceramic canisters with lids
- Linen napkin or bar towel
- Small potted succulent or herb
- Spoon rest and small scoop
Instructions
- Clear the countertop and place the tray near the coffee maker to act as an anchor.
- Group everyday items (mug, scoop, sugar jar) on the tray; position bulk canisters behind or to one side.
- Add the plant and fold the linen where it softens the display; keep tools you use most within easy reach.
- Finish with simple labels, tuck cords out of sight, and if you add a candle keep it supervised and away from flammable materials.
7. Curated Canister Trio for a Clutter-Free Coffee Corner
Choose three matching canisters in graduated sizes—one for beans, one for grounds, and one for sweeteners—to create an intentional, easy-to-use coffee station. Anchor them on a slim tray to define the space, protect the countertop, and keep spills contained.
Mix textures for visual interest (matte ceramic, clear glass, or brushed metal) and place the most-used canister at the front. Small scoops inside each jar and consistent, legible labels make mornings smoother and keep clutter minimal.
Ingredients / Materials
- Three canisters (small, medium, large) with lids
- Slim wooden or metal tray and a non-slip pad
- Small scoops or measuring spoons
- Adhesive or chalkboard labels and a marker
- Optional small jar for pods or single-serve items
Instructions
- Position the non-slip pad and tray where you want the station; measure so the area doesn’t block appliances.
- Place canisters on the tray with the largest at the back and most-used in front for easy reach.
- Fill each canister, insert a scoop, and apply labels so contents are obvious.
- Add extras (pod jar, napkins) and tuck cords; if you use a candle or any electrical items, keep them supervised and away from flammable materials.
8. Curated Coffee Print Gallery
A small curated gallery of coffee-themed prints instantly anchors a countertop coffee station. Choose a mix of typographic pieces, simple illustrations, and warm photography that echo your kitchen’s palette; varying frame sizes keeps the display lively without overwhelming the counter.
Hang frames at eye level in a compact cluster above the station, or lean them on a shallow floating shelf for a relaxed look. Keep artwork away from direct steam, splashes, and heat sources to protect paper and frames.
Ingredients / Materials
- Printable art files or small ready-made prints (3–6 pieces)
- Assorted frames or mats in complementary finishes
- Measuring tape, pencil, and small level
- Picture hanging hooks or removable mounting strips
- Optional shallow floating shelf or shelf brackets
Instructions
- Lay prints on the floor or cut kraft paper templates to experiment with layout; mark the center and total width above the station.
- Frame and mat each piece so margins are consistent; secure backing.
- Install hanging hardware or use removable strips per weight; hang the largest print first, then fill around it, checking alignment with a level.
- Add a small shelf or lean frames, place mugs below, and keep any candles or electrical equipment supervised and away from flammable materials and heat sources.
9. Everyday Coffee Tray
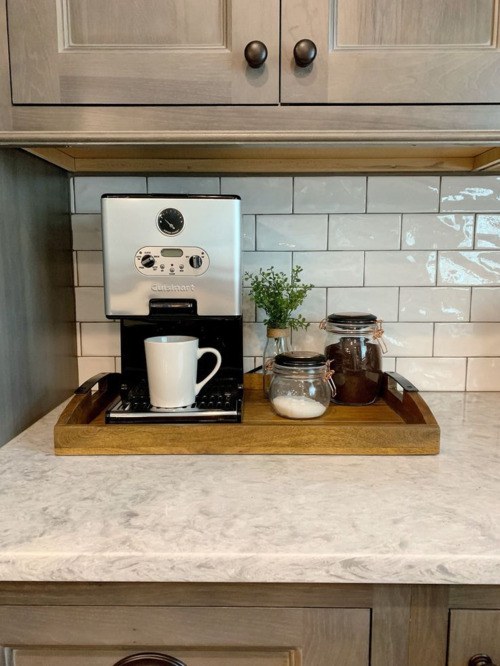
Design a compact coffee tray that corrals morning essentials and looks intentional. Choose a tray that matches your counter depth, mix textures, and vary heights for visual interest.
Ingredients / Materials
- Tray (wood or metal)
- Lidded jar for sugar or grounds
- Small vessel for spoons/stirrers
- Milk pitcher or small creamer
- Two matching mugs and a small plant or tealight (supervise candle)
Instructions
- Place the tray where the brewer is reachable but the countertop still has breathing room.
- Anchor with a jar or pitcher at the back; arrange mugs and containers toward the front for easy access.
- Group like items together, keep daily-use pieces at the front, and store refills behind to simplify restocking.
- Tidy cords and set hot appliances on a non-slip mat; if you include a candle or electrical item, keep it supervised and away from flammable materials.
10. Vertical Coffee Nook for Tight Counters
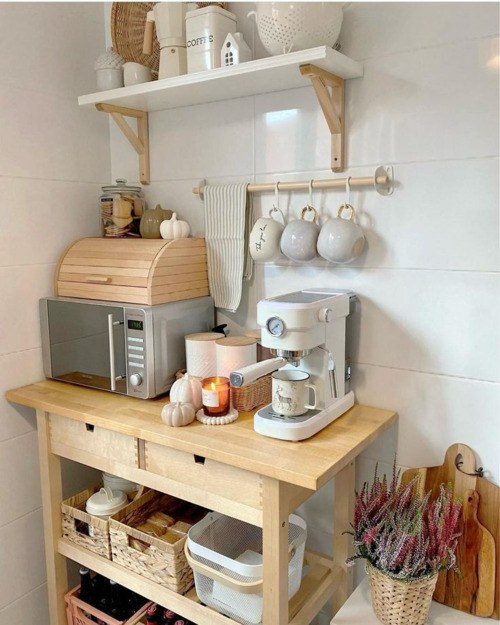
When counter space is tight, build up instead of out. A narrow floating shelf over a small tiered riser creates layered storage for mugs, beans, and tools; limit visible items to keep it calm.
Ingredients / Materials
- Narrow floating shelf
- Mug hooks (adhesive or screw)
- Two-tier counter riser
- Clear canisters or jars for beans/grounds
Instructions
- Choose a spot near power, measure for shelf height so mugs and appliances fit.
- Mount the shelf and attach mug hooks per directions; keep electrical cords tidy and candles supervised and away from flammable materials.
- Place the riser on the counter, group daily essentials in canisters, and store backup items on the shelf.
- Add one small plant or cloth napkin for warmth and return items to their spots each day.
11. Bright Minimal Coffee Nook
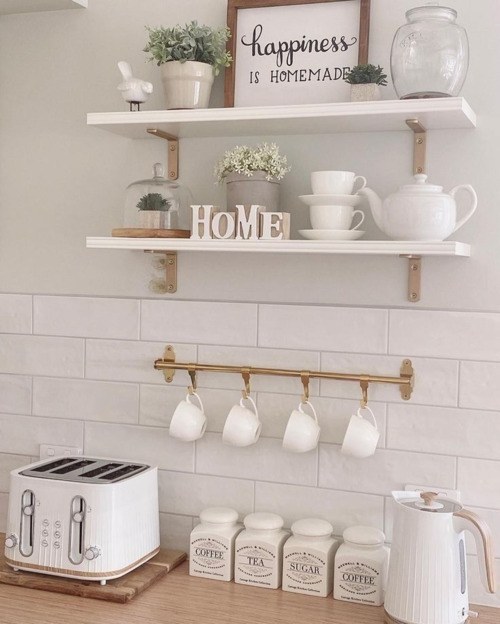
Create a bright, clean countertop coffee station with a restrained palette—white, pale wood, and clear glass—and keep surfaces clutter-free. Corral essentials on a small tray, add one small plant and a folded tea towel for warmth.
Ingredients / Materials
- Small tray (white or pale wood)
- Clear lidded canister for beans or grounds
- Compact coffee maker or French press
- Small potted plant (succulent or herb)
- Two neutral ceramic mugs
- Cloth tea towel
Instructions
- Clear the counter, place the tray near an outlet and tuck cords with clips.
- Arrange the coffee maker at the back, canister and mugs grouped in front, plant at one side.
- Fold the towel under the tray edge for softness and leave open space around the group.
- Wipe surfaces daily and refresh weekly; supervise candles and lamps when in use and keep them away from flammable materials, and unplug appliances when not in use.
12. Warm Countertop Coffee Nook
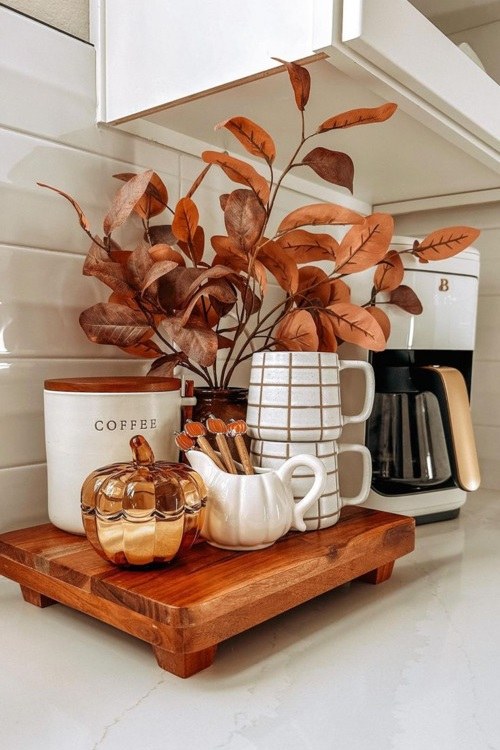
Create a cozy fall coffee corner by grouping essentials on a small tray and layering warm textures—wood, woven fibers, and matte ceramics. Choose a restrained palette (rust, cream, olive) and keep counters tidy so the vignette feels intentional, not cluttered.
Ingredients / Materials
- Small tray or cutting board
- Compact coffee maker or French press
- Two to four ceramic mugs and small milk pitcher
- Woven placemat and a small vase with seasonal sprigs
- Optional: battery tea light or small lamp (supervise candles and cords)
Instructions
- Clear a 24-inch stretch of counter and set the tray as the anchor.
- Place the coffee maker to one side and arrange mugs on the other.
- Add the pitcher, spoon holder, placemat, and vase; use a shallow bowl for small items.
- Finish with soft lighting—battery tea light or lamp—and keep candles and electrical items supervised and away from flammable materials.
13. Cutting-Board Coffee Tray
A wide cutting board makes an instant coffee-station base that corrals your brewer, jars and mugs. Choose a board large enough for your coffee maker and two small containers; place heavier items at the back and smaller items in front.
Protect the counter with felt pads or a heatproof mat and keep cords tidy. If you use a candle, never leave it unattended and keep it away from flammables.
Ingredients / Materials
- Large wooden or bamboo cutting board
- Two small glass jars with lids
- Small tray for spoons and mugs
- Adhesive felt pads or a silicone mat
Instructions
- Pick a board that fits your counter; sand and oil if needed.
- Anchor the coffee maker or kettle on the board and place a heatproof pad beneath it.
- Cluster jars, spoons and mugs into tidy zones.
- Tidy cords and wipe spills after use; re-oil wood occasionally, and never leave candles or hot appliances unsupervised.
14. Stacked Coffee Nook Organizer
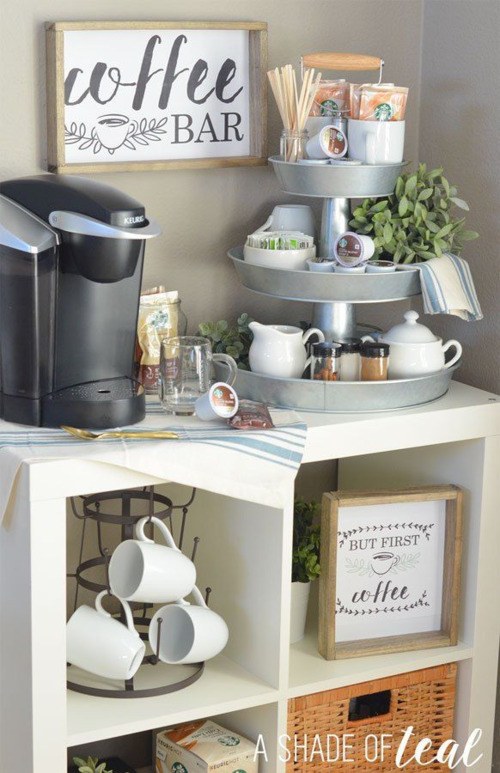
Turn a tiny countertop corner into a tidy, vertical coffee nook that keeps daily essentials within reach. Use a small tiered stand or stackable platforms to make the most of limited space; keep heavier items low, everyday mugs and spoons on middle tiers, and a tiny plant or decorative jar on top for height and personality.
Choose a cohesive palette—natural wood, matte metal, or white ceramics—to make the station feel intentional rather than cluttered. Add a few adhesive hooks on the side for mugs and a non-slip liner under each tier to keep everything steady.
Ingredients / Materials
- Small tiered tray or two stackable cake stands
- Threaded risers or wooden dowels with screws
- Small glass or ceramic jars with lids
- Non-slip pads or shelf liner
- Adhesive mug hooks or S-hooks
- Optional battery LED puck light
Instructions
- Clear and measure a corner of the countertop, then place the base tier so it sits level and stable.
- Assemble tiers using risers or dowels, tightening fasteners so each level is secure and evenly spaced.
- Style by function: heavy items (canister, French press) on the bottom, daily mugs and spoons in the middle, decorative or small plants on top; hang mugs on hooks.
- Add non-slip pads and tuck any cords out of the way. If you include lights or candles, keep electrical items supervised and away from flammable materials.
15. Shelved Charm: Hanging Mug Coffee Nook
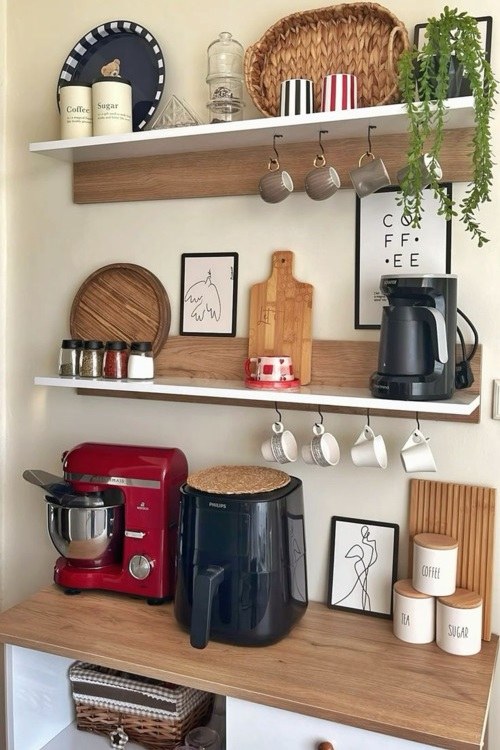
Create a warm, efficient coffee nook by pairing open shelving with under-shelf mug hooks. Floating shelves free up counter space and let your favorite mugs become a decorative focal point—mix wood, metal, and ceramics for a layered look.
Install screw-in hooks beneath the lowest shelf so mugs hang comfortably; keep everyday cups within easy reach and store extras or decorative pieces higher. Use trays and canisters to corral grounds, filters, and spoons for a tidy, cafe-style setup.
Ingredients / Materials
- 1–2 floating shelves (wood or metal)
- Screw-in mug hooks or an under-shelf hanging rail
- Small tray or canisters for coffee essentials
- Non-slip shelf liner and basic mounting hardware
- Optional under-shelf LED light (supervise cords; keep away from flammables)
Instructions
- Measure, mark, and securely mount the shelf.
- Screw hooks evenly beneath the shelf, spacing for handles.
- Group coffee gear on trays; place heavier items near the wall.
- Add optional light; supervise cords and keep away from flammables.
16. Cozy Winter Countertop Coffee Nook
Choose a small countertop corner and create a cozy winter coffee nook. Anchor essentials on a shallow tray, use warm textures like wood and ceramic, and tuck mugs and a thermal carafe within easy reach.
Soften light with battery LEDs; keep jars for spoons and a sealed canister for grounds. If you use candles, keep them supervised and away from flammable materials; unplug lights when not in use.
Ingredients / Materials
- Shallow tray
- Insulated carafe
- Mugs and spoon jar
- Sealed canister for grounds
- Battery LED lights (optional candle supervised)
Instructions
- Place tray on a heat-resistant mat and arrange carafe, mugs, canister, and spoon jar.
- Group items for easy reach and a tidy flow; leave a small prep space for making drinks.
- Add LEDs or a small lamp for soft light. If using candles, keep them in sturdy holders, supervised, and away from flammables.
- Restock daily, wipe spills promptly, and unplug lights when finished.
17. Warm Metallic Accents for a Luxe Coffee Station
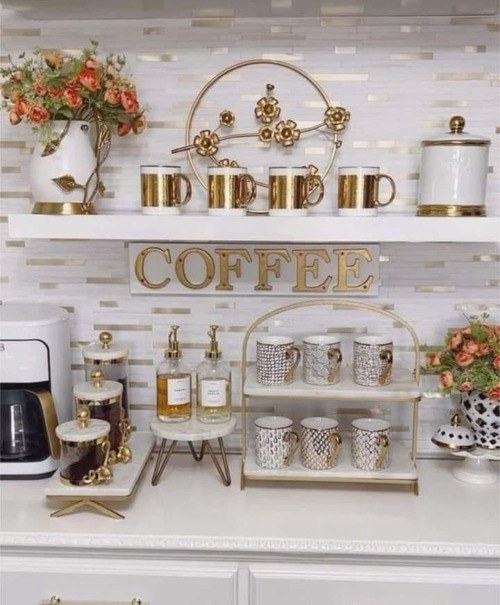
Brushed gold or warm brass accents instantly elevate a coffee station. Choose one statement piece—tray, lamp, or canister—and repeat that finish in two small accessories.
Counterbalance shine with wood, stone, or linen to keep it cozy. Limit metals to two finishes and favor brushed or matte gold for daily use.
Ingredients / Materials
- Brushed gold or brass–finish serving tray
- Gold-finish canister or small storage tin
- Metallic spoon rest or small frame
- Wood or stone coaster
- Adhesive felt pads and non-slip feet
- Small lamp or battery LED puck
Instructions
- Define the station area and place the tray as the anchor.
- Put the brewer at the back; arrange canister, sugar jar, and mugs on or near the tray.
- Add two metallic accents and balance them with wood or stone pieces.
- Add lighting, tuck cords under the tray with felt pads, and supervise candles and electrical items, keeping them away from flammable materials.
18. Style with Cookbooks: A Layered Coffee Station Backdrop
Cookbooks make an unexpectedly stylish backdrop for a countertop coffee station. Use their colorful spines as vertical interest and their covers as little platforms to create a layered, usable vignette beside your brewer.
Mix vertical and horizontal stacks to add height and balance; top a low horizontal pile with a small tray to form a stable surface for jars or a scoop. Keep daily-use items within arm’s reach, heavier books at the bottom, and leave space for your mug collection.
Ingredients / Materials
- 3–6 cookbooks of varying sizes
- Pair of bookends or a heavy decorative object
- Small tray or wooden cutting board
- Airtight jar for sugar or beans
- Mug hooks or a compact mug tree
- Small potted plant or decorative accent
Instructions
- Sort books by size and color; clean covers and keep heavier books for the base.
- Create a mix of vertical (spine-out) and horizontal stacks to build tiers, using bookends to secure verticals.
- Place a tray or cutting board on a horizontal stack and arrange the jar, scoop, and a couple of frequently used mugs (hang mugs on hooks if needed).
- Add a small plant for warmth, tuck cords neatly behind items, and keep candles and electrical items supervised and away from flammable materials.
19. Rustic Countertop Coffee Nook
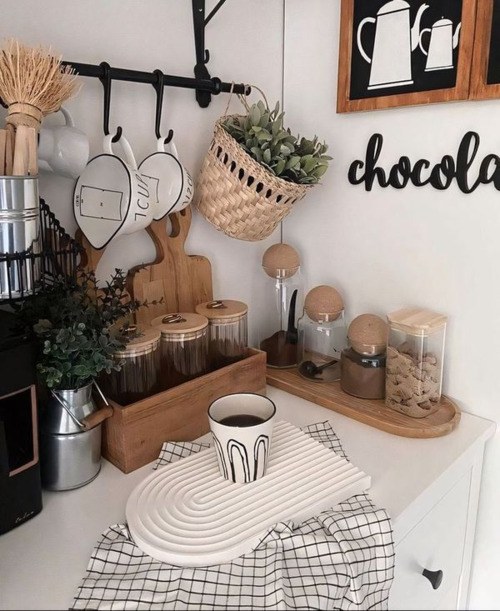
Give your coffee station a lived-in, rustic feel with warm woods, textured ceramics, and a touch of patina. Use a small reclaimed board or wooden tray to anchor the setup and keep accessories simple.
Ingredients / Materials
- Small reclaimed wood tray or cutting board
- Mason jar or wire-topped jar for beans
- Assorted ceramic mugs (2–4)
- Small potted plant or sprig of eucalyptus
- Metal scoop and spoon tray
Instructions
- Choose a visible corner of countertop and clear the surface; wipe it down so the wood grain and ceramics read clearly.
- Place the wood tray as an anchor and position your coffee maker or kettle on one side to create balance.
- Arrange the jar, mugs, and scoop in layers of height; group items by use so daily tools are easy to reach.
- Add the plant and a folded linen napkin for texture; keep electrical items supervised and away from flammable materials.
20. Curate a Simple Coffee Essentials Station
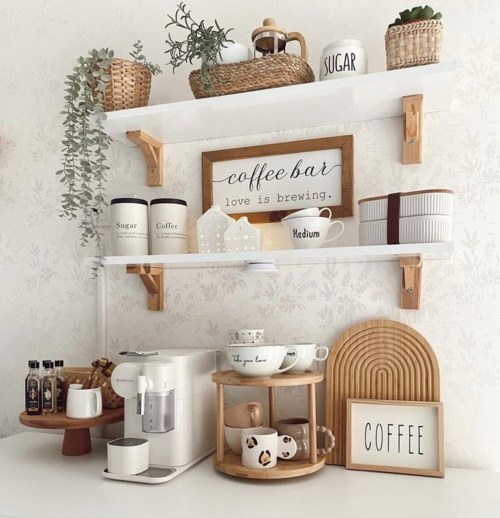
Pick a dedicated spot on your countertop—near an outlet but out of the main prep zone—and anchor essentials on a tray to contain crumbs.
Group items by function: brewing, storing, serving. Keep daily-use pieces front and add one small decorative accent so the area feels styled, not crowded.
Ingredients / Materials
- Tray or shallow board
- Airtight canisters for coffee and sugar
- Mug hooks or compact rack
- Small jar for spoons and a scoop; chalk labels
Instructions
- Clear space and set the tray to define the station.
- Arrange brewer, canisters, jar, and mugs in a simple workflow.
- Label canisters, add hooks or rack, and place one small plant or coaster for texture.
- Wipe surfaces regularly, refill as needed, and always supervise electrical items; keep candles away from flammable materials.
21. Overhead Mug Rail for a Stylish Coffee Nook
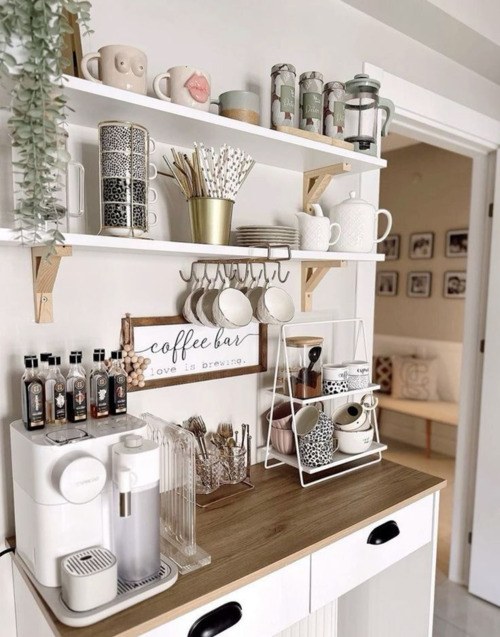
Mount a slim overhead mug rack to free counter space and create an inviting coffee vignette. Match the rail to your cabinet hardware and arrange mugs by color or size for an artful, organized display.
Place the rail so the tallest mugs clear the counter and handles don’t collide. Secure into studs or use proper anchors; measure carefully before drilling.
Ingredients / Materials
- Wall rail or wooden strip with cup hooks
- Screws and wall anchors or toggle bolts
- Stud finder
- Drill, level, measuring tape, and pencil
Instructions
- Find studs and mark the height so mugs hang clear of the counter.
- Use a level to mark the rail position, then pre-drill pilot holes or insert anchors.
- Screw the rail into place, tighten evenly, and hang mugs by their handles.
- Adjust spacing for balance and add a small plant or teapot at one end. If you add decorative lights, keep them supervised and away from flammable materials.
22. Design a Dedicated Coffee Counter
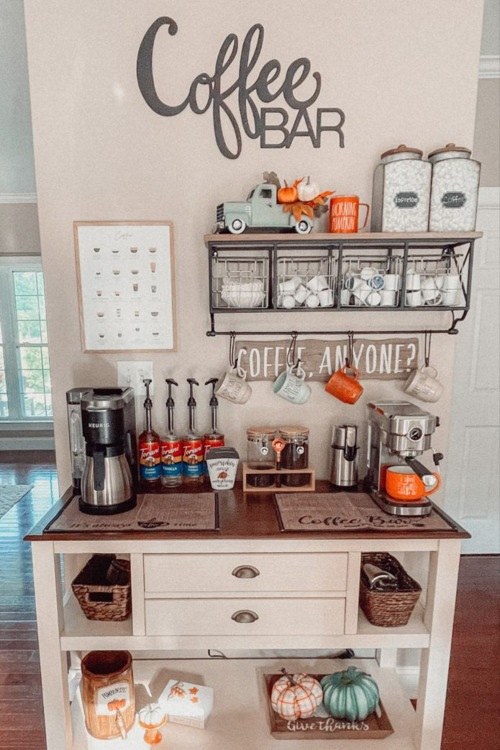
Frame a single stretch of counter with a non-slip mat, a low riser and a tray to corral the brewer, mugs and canister. Keep décor minimal so daily use stays simple.
Use a small shelf or wall hooks for mugs and tuck cords behind the machine. Keep candles and any open flame supervised and away from flammable materials.
Ingredients / Materials
- Non-slip mat or tray
- Small tiered riser or shelf
- Airtight canister
- Mug hooks or rail
- Small container for spoons or pods
Instructions
- Clear a section near an outlet and measure the space.
- Lay the mat and set the riser or tray for the brewer.
- Add the canister, hooks and small container; organize by frequency.
- Secure cords with clips, add one small decorative touch, and supervise candles and electrical items.
23. Compact Coffee Corner
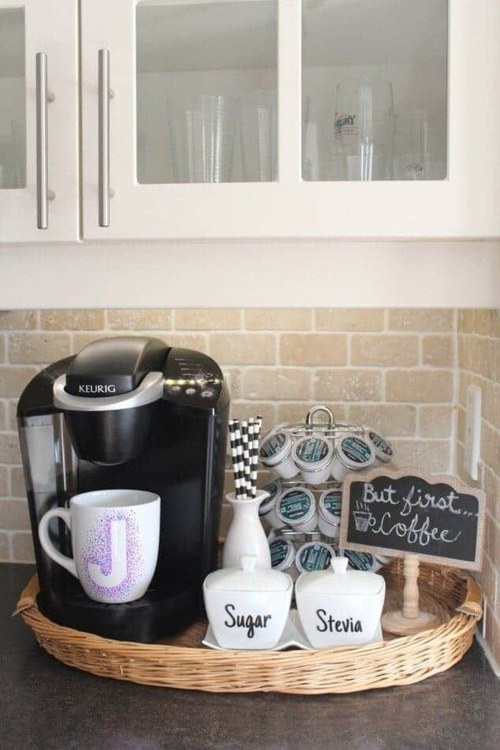
Corral your coffee gear into a narrow tray or single floating shelf so the setup reads intentional, not crowded.
Use three coordinating finishes—warm wood, matte metal, clear glass—and keep daily tools within easy reach while stashing extras nearby.
Ingredients / Materials
- Narrow tray or single shelf
- Small brewer or pour‑over cone and kettle
- Airtight jar for beans; small container for filters
- Mug hooks or compact mug stand; utensil cup
Instructions
- Measure and place the tray near an outlet without blocking prep flow.
- Put heavy items at the back; keep mugs and spoons front. Label containers.
- Hang mugs to save surface space; tuck cords into a small organizer. Keep electrical items supervised and away from flammable materials; if you add a candle, monitor it on a heatproof surface.
- Restock beans weekly and wipe surfaces to keep the station neat.
24. Rustic Farmhouse Coffee Nook
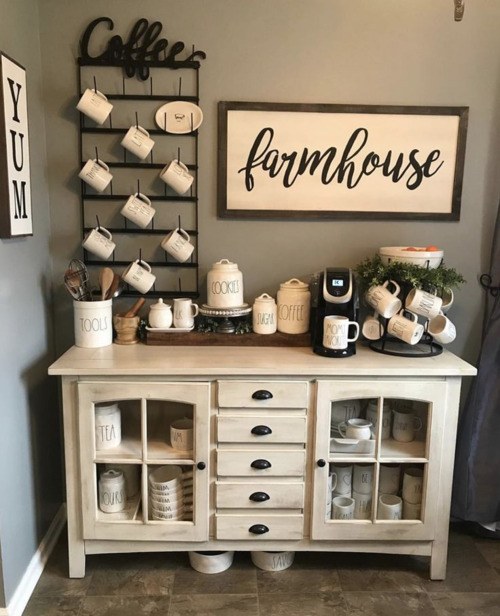
Create a compact, cozy farmhouse coffee nook by anchoring a small area with warm wood and simple ceramics. Use a reclaimed-wood tray or shallow crate to corral the coffee maker, mugs, and jars so the rest of the counter stays clear. Keep colors neutral—cream, soft gray, and black iron—for a timeless look.
Add a narrow floating shelf or peg rail above the station for extra mugs and a small chalkboard sign for the daily roast. A single potted herb or faux greenery softens the arrangement and a folded linen cloth adds texture without clutter.
Ingredients / Materials
- Reclaimed wood tray or shallow crate
- Small floating shelf or peg rail with hooks
- Mason jars or canisters with labels
- Enamel or ceramic mugs (2–4)
- Small potted plant or faux greenery
- Linen cloth or tea towel
Instructions
- Measure a 24–30 inch stretch of counter and place the tray as the anchor point. Ensure the coffee maker fits comfortably.
- Install the shelf or peg rail about 12–18 inches above the counter for mugs and a chalkboard sign; stagger heights for visual interest.
- Group canisters, mugs, and accessories on the tray—store scoops and filters in a jar and tuck a folded linen cloth at the front for soft texture.
- Add greenery and a small battery LED or supervised candle for ambiance; keep candles and electrical items supervised and away from flammable materials, and manage cords neatly behind the tray.
25. Heirloom Farmhouse Coffee Nook
Build a farmhouse-vintage coffee nook around a reclaimed wood shelf or tray. Anchor a compact coffee maker and surround it with enamel canisters, mason jars, and a small metal tray for spoons—mix cream, soft gray, and brass accents.
Corral mugs on hooks, add chalkboard labels, and tuck a small lamp or battery string lights for soft glow. Keep candles and plug-in lights supervised and away from flammable items.
Ingredients / Materials
- Reclaimed wood tray or floating shelf
- Enamel or ceramic canisters and mason jars
- Metal hooks or peg strip for mugs
- Small lamp or battery-operated string lights
- Chalkboard labels and a small vintage tray
Instructions
- Secure shelf or place tray; ensure level and stable.
- Position coffee maker as focal point; allow prep space.
- Group canisters and jars; hang mugs on hooks underneath.
- Add labels, arrange tray with spoons; set lamp or lights; supervise candles/electrical.
26. Compact Mug Tree for Small Countertops
A compact mug tree frees up cabinet space while putting your favorite mugs on display. Choose a slim vertical stand or build a simple dowel-and-base version to fit between the coffee maker and the backsplash; keep handles facing the same direction for a tidy look. Mix solids and patterns, staggering sizes so the tree stays balanced and visually interesting.
Ingredients / Materials
- Wooden dowel (3/4 inch diameter, 10–12 in long)
- Round wooden base (4–6 in diameter)
- Wood glue and a short screw with washer
- Felt pads or rubber feet
- Sandpaper and clear finish (optional)
Instructions
- Mark the center of the base, drill a snug hole, apply glue and insert the dowel; secure from beneath with the short screw and washer.
- Sand any rough edges and apply finish if desired; allow to dry fully.
- Attach felt pads to the base, then hang mugs with the heaviest on the lowest peg and handles aligned for a neat profile.
- Place the tree on a flat, non-slip surface away from heat sources and cords; supervise any nearby electrical items.
27. Compact Mug Rack for Coffee Stations
Create a tidy countertop mug display with a compact peg or single‑rod rack. Lift mugs off the surface, add vertical interest, and keep everyday cups within reach. Pick a finish that complements your station and place a small tray beneath to catch drips.
Ingredients / Materials
- Wooden base or shallow tray (6–12″)
- Wooden dowel or metal rod (12–18″)
- 4 S‑hooks or peg pins
- Wood glue and screws or small bracket; felt pads
Instructions
- Measure the base center, mark, and drill a pilot hole sized for the dowel or bracket.
- Attach the dowel/rod to the base with glue and screws or a small bracket; let adhesive set.
- Add felt pads to the base, hang S‑hooks or pegs evenly, and test stability with one mug.
- Arrange mugs by size and color, place a tray under the rack to catch drips, and keep the rack away from heat or wet zones.
Final Thoughts
Make your coffee station a reflection of how you live—not a fixed design project. Start with inexpensive, high-impact moves: a simple tray to corral tools, thrifted canisters painted to match your palette, or a peg-mounted rail for mugs. Layer in one or two statement pieces—a wood cutting-board base, a black accent piece, or a small potted plant—to create cohesion without clutter.
Measure before you buy and prioritize the habits you want to support: quick mornings may call for an accessible grinder and clear canisters, while weekend ritualists might opt for a display cookbook and a cozy mug rail. With a plan that respects scale and budget, you can craft a countertop coffee nook that’s both beautiful and decidedly yours.