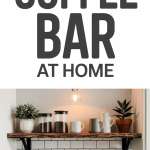
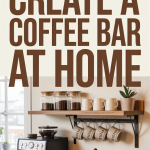
We love the ritual of coffee, the aroma, the pause it gives our morning, and the tiny craftsmanship in every cup. Creating a DIY coffee bar at home lets us turn that ritual into a dedicated, efficient space that fits our budget, aesthetic, and daily routine. Whether we want a compact nook for pour-overs or a full espresso station that impresses guests, this guide walks us step-by-step through planning, gear, design, and upkeep so we can build a functional, beautiful coffee bar that actually gets used.
Why Create A Home Coffee Bar
A home coffee bar is more than a countertop with a machine, it’s an invitation to slow down and to make better coffee without leaving the house. We create a coffee bar for several practical reasons:
- Consistency and quality: When our tools and ingredients are organized, we make better, repeatable cups every day.
- Convenience: No waiting in line, no commuting, our favorite drinks are just steps away.
- Hospitality and style: A well-designed bar becomes a social hub: friends and family can customize their drinks and linger longer.
- Cost savings over time: Making espresso or specialty drinks at home quickly offsets the upfront investment if we drink coffee regularly.
Beyond utility, a home coffee bar reflects our taste. It’s a small, high-impact area where functionality and aesthetics meet, an opportunity to display treasured tools, favorite beans, and a sense of personal ritual. In the sections ahead, we’ll translate that idea into a realistic plan that fits our space, budget, and brewing ambitions.
Planning, Budgeting, And Timeline
Before we buy anything, we plan. Good planning prevents impulse purchases and ensures our coffee bar meets real needs.
- Define goals: Are we aiming for cafe-level espresso? A versatile brewing station? Or a small, low-maintenance setup? Listing our must-haves (espresso, grinder, sink) and nice-to-haves (steam wand, built-in grinder) clarifies priorities.
- Set a budget: Coffee bars can range from under $200 (basic pour-over nook) to several thousand dollars (prosumer espresso machine, integrated cabinetry). We recommend tiered budgeting: Starter ($200–$600), Intermediate ($600–$1,500), and Advanced ($1,500+). Factor in equipment, smallwares, installation, and consumables (beans, filters, cleaning supplies).
- Timeline: A simple setup, counter, machine, and shelves, can be done in a weekend. More complex builds involving countertops, plumbing, or custom cabinets may take 2–6 weeks including ordering and installation. Build in buffer time for shipping delays on specialty items.
- Research and wishlist: We make a shortlist of equipment and materials, compare specs and reviews, and, if possible, test local machines at a cafe or retailer. Add lead times for custom pieces and choose versatile components to avoid future regrets.
- Permissions and trades: If we’re altering plumbing or electrical, we’ll check local codes and, where required, hire licensed professionals. That avoids headaches and keeps the project safe.
Taking time at the planning stage saves money and ensures the final coffee bar works for our daily life, not just as a pretty corner that never gets used.
Choosing Location And Layout
Choosing the right location and layout determines how comfortable and efficient our coffee routine will be. We want a spot that flows with our morning habits, integrates with existing utilities if needed, and allows for a sensible workflow.
Essential Equipment And Consumables
Choosing the right tools is where performance meets preference. We prioritize a reliable grinder and a brewing device that matches our goals. Below we cover core options and what to spend on.
Selecting The Right Coffee Maker: Espresso, Drip, And Pour-Over
Espresso machines:
- Entry-level prosumer: Single-boiler heat exchanger or dual-boiler machines (examples in the $700–$2,500 range) deliver cafe-quality shots with a learning curve for dialing in.
- Pod or super-automatic: For convenience, super-automatic machines grind, dose, tamp, and brew in one step. They’re great for fast mornings but offer less control.
Drip coffee makers and batch brewers:
- Automatic drip: Good for large households: look for options with variable brew strength and showerhead designs for even extraction.
- Batch brewer: If we entertain often or drink multiple cups, a small commercial-style brewer maintains consistent batch quality.
Pour-over:
- Hario V60, Kalita Wave, and Chemex are classic choices. We value control, clarity, and the ritual. They’re affordable and space-friendly.
Match our choice to our goals: espresso for espresso-forward drink lovers, pour-over for clarity and ritual, drip for convenience and volume.
Grinders, Kettles, And Temperature Tools
Grinder first: A quality burr grinder impacts cup consistency far more than an upgrade to the machine. We recommend a stepless or weighted-doser burr grinder for espresso and a conical or flat burr with consistent grind for filter coffee.
Kettles and temperature control:
- Variable temperature kettles: Essential for pour-over and helpful for controlling extraction. Aim for kettles that can hold steady temperatures in the 195–205°F range.
- Gooseneck kettles: Provide precise pour control for manual brewing.
Thermometers and scales:
- A reliable digital scale with a tare function is non-negotiable for repeatable recipes.
- A quick-response thermometer helps when steaming milk or setting pour-over temperature.
We prioritize consistency: grind, water temperature, and dose are the big three variables that determine cup quality.
Must-Have Accessories And Consumables
Accessories that make daily life easier:
- Tamper and tamping mat: For espresso tamping ergonomics and counter protection.
- Knock box or drawer: Fast, clean disposal of spent pucks.
- Pitchers and thermometer: For milk texturing and temperature control.
- Shot glasses and dosing cups: For measuring yield and helping dial-in espresso.
- Filters and filter holder: Paper filters for pour-over and drip: keep a supply on hand.
- Brushes and cleaning tools: Group head brush, grinder brush, and backflush blind for espresso machines.
- Water filtration: A basic pitcher filter or under-sink filtration improves flavor and extends equipment life, especially important in hard-water areas.
Consumables:
- Fresh beans: Buy whole-bean from roasters and store in an airtight container.
- Milk, alternative milks, sweeteners, and syrups: Stock what we and our guests prefer.
These small items add up quickly, but they’re what keep the station usable, tidy, and enjoyable.
Storage, Organization, And Workflow Optimization
A tidy coffee bar speeds up our routine and looks better too. Thoughtful storage and organization are as important as the machine itself.
Open Shelving, Cabinets, And Counter Solutions
Open shelving:
- Pros: Displays mugs, pretty canisters, and plants. Makes everything visible and reachable.
- Cons: Collects dust: requires tidy habits.
Closed cabinets and drawers:
- Great for hiding extra supplies and keeping the aesthetic clean. Deep drawers work well for bags of coffee, pitchers, and cleaning supplies.
Counter solutions:
- Use tiered organizers or risers to maximize vertical space on limited counters.
- A dedicated tray can keep daily tools corralled and make cleaning easier, we lift the tray to wipe the surface.
We balance open and closed storage: open shelves for display and items we reach for daily: closed storage for extras, refill stock, and less attractive gear.
Smart Storage: Containers, Labels, And Portioning
Containers and labels make our bar functional and consistent:
- Airtight containers: Store beans in opaque, airtight canisters to limit oxygen and light exposure. Use clear containers for sugar or frequently used items so we can see levels.
- Portioning: Pre-measured doses in jars or tins save morning minutes (especially for drip or batch brewing). For espresso, measure grams with a scale: for daily drip, we might pre-weigh 50–60g doses.
- Labeling: Use a simple labeling system for grind settings, roast dates, and bean origin. That helps when we taste-test or rotate beans.
These simple practices keep the bar running smoothly and reduce guesswork, especially helpful if multiple household members use the station.
Design, Materials, And Aesthetics
Coffee bars live at the intersection of practicality and style. Choosing durable, easy-to-clean materials ensures the station looks great long-term.
Surface Materials, Backsplash, And Durable Finishes
Countertops:
- Quartz and solid-surface: Durable, low-maintenance, and resistant to staining, great for espresso work and milk spills.
- Butcher block: Warm and classic, but needs regular oiling and care. Good for pour-over stations where we like the aesthetic.
- Laminate: Budget-friendly and surprisingly resilient: choose a higher-end laminate with a water-resistant edge.
Backsplash:
- Tile or stainless steel: Easy to clean and visually striking. Subway tile offers a timeless look: patterned tiles add personality.
- Glass or acrylic panels: Sleek and wipeable, especially behind machines where splashes occur.
Durable finishes:
- Matte or satin finishes tend to hide watermarks better than high-gloss.
- Sealants on porous surfaces (like grout or wood) protect against stains.
We select materials based on how much we’ll use the bar and how involved we want maintenance to be.
Lighting, Color Palette, And Decor Tips
Lighting:
- Task lighting: Under-shelf or puck lights above the work area improve visibility for dosing and tamping.
- Ambient lighting: A pendant or wall sconce sets mood and integrates the coffee bar with the room.
Color palette:
- Neutral bases (whites, greys, warm woods) keep the area timeless.
- Accent colors: Use tile, a painted backsplash, or colored appliances to add personality without overwhelming.
Decor and finishing touches:
- Keep it personal: A framed print, a small plant, or a stack of favorite mugs humanizes the station.
- Balance function and beauty: Avoid cluttering the counter with decorative objects that impede workflow.
Thoughtful lighting and color choices make the bar inviting and encourage us to use it daily.
DIY Installations And Simple Upgrades
Many coffee bar upgrades are DIY-friendly, but some require professionals. We’ll outline safe, practical projects and when to call a pro.
Plumbing, Electrical, And Safety Considerations
Plumbing:
- Small sink installation: Installing a bar or prep sink is often straightforward if a cold-water line is nearby. Adding hot water or a drain requires more work: consult local codes.
- Machine drainage: Some espresso machines need a drain or a drip tray that’s emptied regularly. For plumb-in machines, hire a licensed plumber.
Electrical:
- Dedicated circuit: High-powered machines (especially with boilers) may need a dedicated circuit. Check wattage and consult an electrician if we’re unsure.
- Outlet placement: Place outlets where the machine, grinder, and kettle can reach without running cords across counters.
Safety:
- GFCI outlets near water sources are required in many areas: they protect against shorts and shocks.
- Ventilation: Grinders and machines produce heat: ensure sufficient airflow in enclosed spaces.
When in doubt, and when code compliance matters, hiring a licensed electrician or plumber prevents hazards and costly rework.
Installing Countertops, Backsplashes, And Shelving
Countertops:
- Laminate and butcher block counters can be installed as weekend DIY projects with careful measuring and level surfaces.
- Stone and quartz usually require professional templating and installation.
Backsplashes:
- Peel-and-stick tiles or adhesive panels are quick DIY options and work well behind a small station.
- Ceramic tile requires thinset and grout but is manageable for DIYers with patience and proper tools.
Shelving:
- Floating shelves are a popular and relatively easy project. Use studs or heavy-duty anchors for stability, especially if storing mugs and canisters.
- Pre-made shelving units or brackets provide robust storage with minimal carpentry skills.
We recommend measuring twice and buying a little extra material for mistakes. Start with smaller DIY upgrades to build confidence before tackling complex installs.
Menu Planning, Recipes, And Daily Workflow
A defined menu makes hosting simpler and helps us serve consistent drinks every time. We’ll outline approachable recipes and a daily workflow that minimizes fuss.
Basic Espresso And Milk-Based Drinks (Recipes And Ratios)
Core espresso ratios and recipes we can rely on:
- Espresso (Ristretto / Standard / Lungo): A common starting point is 1:2 ratio (dose:yield). For example, 18g in → 36g out in ~25–30 seconds. Ristretto is shorter (1:1–1:1.5), lungo is longer (1:2.5–1:3).
- Americano: Espresso shot(s) topped with hot water. Adjust ratios to taste (1:2 to 1:4 espresso to water is common).
- Cappuccino: 1/3 espresso, 1/3 steamed milk, 1/3 microfoam. Aim for velvety texture and 150–155°F serving temperature.
- Latte: 1–2 shots espresso with steamed milk and a small layer of foam. Typical serving temps 150–160°F.
- Flat white: Similar to a latte but with a higher espresso-to-milk ratio and microfoam texture.
We keep a small cheat sheet with these ratios and temperatures taped to the inside of a cabinet for quick reference while refining technique.
Alternate Brew Methods: Pour-Over, French Press, And Cold Brew
Pour-over (Hario V60 / Kalita / Chemex):
- Typical ratio: 1:15 to 1:17 coffee to water. For a 12 oz cup, we might use 20g coffee to 300–340g water. Bloom with ~2x weight for 30–45 seconds, then pour steadily.
French press:
- Ratio: 1:12 to 1:15. Coarse grind, steep for 4 minutes, plunge gently. Produces a full-bodied cup with more oils.
Cold brew:
- Ratio: 1:4 to 1:8 (concentrate to water). Coarse grind, steep for 12–24 hours in cold water, then dilute to taste.
We suggest experimenting with grind and dose in small increments: keeping notes helps us identify what we prefer and replicate it.
Creating A Simple Daily Routine And Service Station Setup
A consistent routine reduces decision fatigue. Here’s a simple morning flow for a mixed-use coffee bar (espresso and filter):
- Prep: Turn on equipment, purge steam wand, warm the portafilter or server.
- Grind: We grind fresh for each shot or batch: measure dose by weight.
- Brew: Pull shots or start the pour-over. Time and observe extraction.
- Milk: Steam milk while espresso is resting: texture for the drink we’re making.
- Serve: Clean the steam wand immediately: wipe counters.
Service station setup for guests:
- Create a small self-serve area with labeled syrups, sweeteners, milk options, and cup sizes. Include instructions for the preferred pour-over or a simple button on a super-automatic machine.
- Keep disposable cups or reusable mugs organized on a tray with napkins and stirring spoons.
This routine keeps mornings efficient and makes hosting low-stress.
Maintenance, Cleaning, And Troubleshooting
Keeping our coffee bar clean and well-maintained protects our investment and keeps coffee tasting its best. Regular routines prevent headaches and expensive repairs.
Daily, Weekly, And Monthly Cleaning Routines
Daily:
- Wipe counters and machine exterior.
- Backflush (where applicable) or run water through group heads.
- Purge and wipe steam wand after every use: empty drip trays and knock box.
Weekly:
- Clean portafilters, shower screens, and baskets.
- Descale kettles and clean grinder hoppers: brush grinder burrs.
- Wash pitchers, mugs, and reusable filters.
Monthly:
- Deep clean espresso machine with the recommended detergent and perform a full descaling if needed (frequency depends on water hardness).
- Replace water filter cartridges per manufacturer guidance.
- Check seals and gaskets for wear and replace if necessary.
Consistent cleaning preserves flavor and prevents buildup that affects performance.
Common Problems And How To Fix Them
Channeling, bitter or sour shots, and inconsistent extraction are common issues. Here’s how we address them:
- Bitter espresso: Usually over-extracted. Try a coarser grind, shorter extraction time, or lower dose.
- Sour espresso: Usually under-extracted. Go finer on the grind, increase dose, or lengthen extraction time.
- Channeling (water finding paths through the puck): Ensure even distribution and proper tamping: check for uneven grind.
- Grinder inconsistency: Clean burrs and check alignment: replace worn burrs when necessary.
- Low steam pressure: Check water tank level, descale heater elements, and confirm no blockages in the wand.
When problems persist, consult the manufacturer’s troubleshooting guide or a qualified technician. Keeping notes on changes we make helps us track what fixed (or worsened) the issue.
Conclusion
Building a DIY coffee bar at home is both a practical upgrade and a personal expression. By planning carefully, choosing the right equipment for our goals, and organizing with intention, we create a space that fits our routines and elevates daily rituals. Start small if needed, a well-curated pour-over nook can be just as satisfying as a full espresso station. Above all, iterate: test recipes, adjust layouts, and refine storage until the bar becomes an effortless part of our day. When it’s right, each cup will feel like a small, daily reward for the effort we put into creating it.