How Smart Kitchen Tools Turn Chaotic Weeknights into Stress-Free Family Dinners
It was a Tuesday I still remember in embarrassing detail: school backpacks slung over chairs, soccer cleats under the table, and a pot of marinara bubbling over the stove as I tried to referee a math argument and answer an email at the same time. The clock kept moving, the kids grew hungrier, and I felt like I was failing at the small, sacred ritual of feeding my family. That night I tasted stressed, hurried food more than I tasted dinner, and promised myself something had to change.
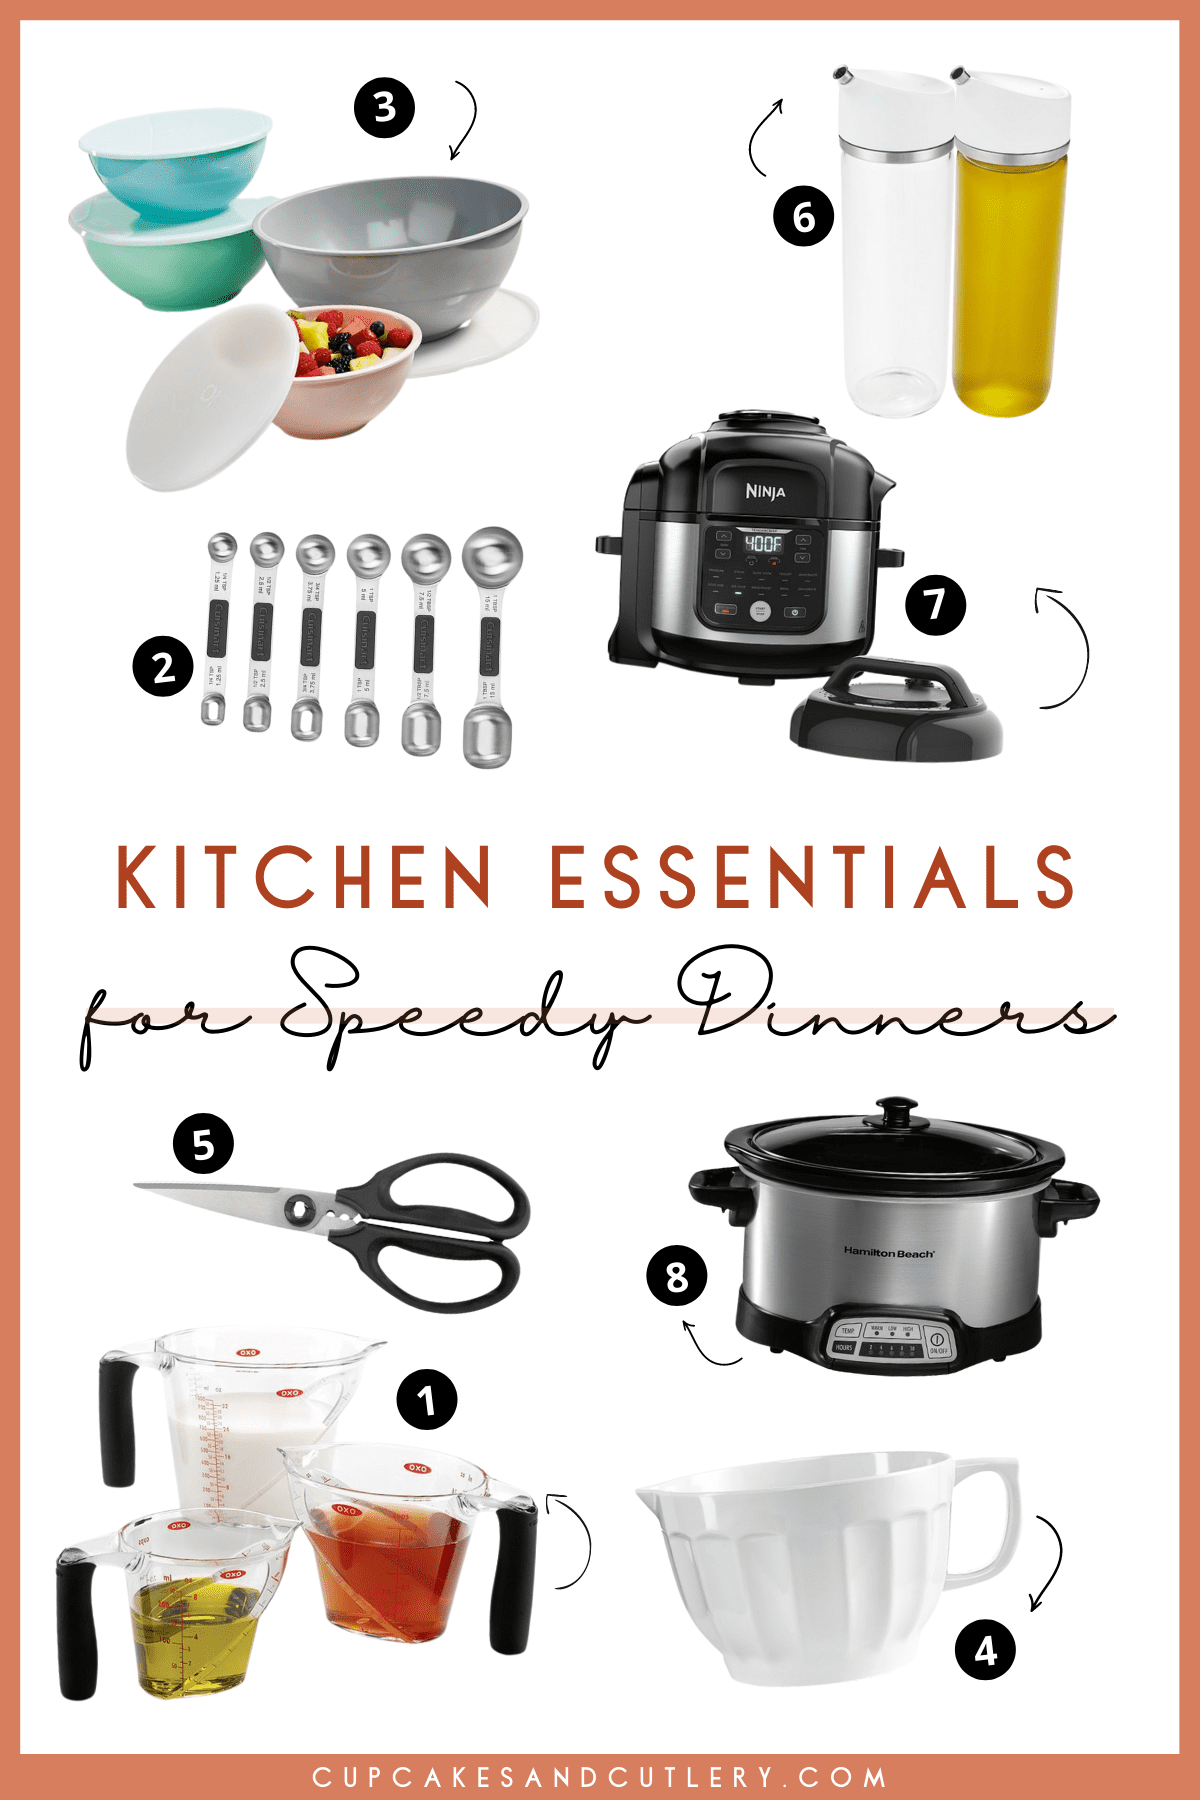
The change didn’t happen overnight. It began with small purchases and small experiments—an appliance to shave minutes off prep here, a simple tool to take the drama out of a tricky recipe there. Each addition felt like a quiet act of kindness toward future-you: a time-saving mandolin for perfect vegetable slices, a reliable set of nesting bowls that actually nest, a cast-iron skillet that could go from stovetop to oven and back again. Slowly, those tools stitched together into a system that turned chaos into calm.
By the end of the month, what had been a weekly panic became a manageable, often joyful ritual. I stopped approaching weeknight dinners as an endurance test and started seeing them as a chance to connect—over real food, real conversation, and the small comforts of a home well-equipped. Below I’ll share the 15 kitchen tools that quietly rewrote our Tuesday nights and made weekday cooking something I actually look forward to.
1. How One Sheet Pan Quieted My Weeknight Chaos
A few months ago I stumbled on a collection of recipes organized like a tiny decision tree — start with whatever’s in the fridge (chicken, beef, fish, veggies, grains) and follow the path to dinner. It felt like a secret: no more staring blankly into the crisper drawer. I tried one sheet-pan recipe on a foggy Tuesday and by the time the oven dinged the kitchen smelled like toasted garlic and lemon, the kids were crowding the counter, and I had only one dish to rinse. That first night felt like cheating in the best way.
What hooked me was how forgiving the method is. You can riff on harissa chicken with chickpeas one week, crispy gnocchi with sausage the next, or a quick shrimp-and-veggie roast when you need everything done in 20 minutes. The texture play is my favorite — blistered tomatoes, caramelized edges on roasted potatoes, a little char on green beans — all happening at once, all on one pan. And the recipes I trusted always told me what pan size to use and whether to use a rim or not, which saved me from half-baked improvisations.
Now sheet-pan night is my reset button. It’s the ritual of tossing everything in a bowl with a splash of oil and spice, sliding the pan into the heat, and letting the oven do its magic while I clear the homework battlefield. The cleanup is quick, the flavors feel layered and intentional, and somehow dinners that used to take an hour feel like neighborhood celebrations. If you only adopt one thing to change your weeknights, this is it.
Weeknight Sheet-Pan Lemon-Herb Chicken (simple, one-pan, feeds 3–4)
Ingredients:
- 4 bone-in, skin-on chicken thighs (or 6 drumsticks)
- 1 pound small potatoes, halved or quartered
- 1 red bell pepper, sliced into strips
- 1 small red onion, cut into wedges
- 3 tablespoons olive oil
- 1 lemon (zest and juice)
- 1 tablespoon chopped fresh rosemary or 1 teaspoon dried
- 1 tablespoon chopped fresh thyme or 1 teaspoon dried
- 3 garlic cloves, smashed and thinly sliced
- 1 teaspoon smoked paprika (or sweet paprika)
- Salt and freshly ground black pepper
- Optional: handful of baby arugula or parsley for finishing
Instructions:
- Preheat the oven to 425°F (about 220°C). Line a rimmed sheet pan with parchment or foil for easy cleanup.
- In a large bowl, whisk together olive oil, lemon zest and juice, rosemary, thyme, garlic, paprika, 1 teaspoon salt and 1/2 teaspoon pepper.
- Add the chicken thighs and toss so the skin gets coated. Set aside to marinate briefly while you toss the vegetables in the same bowl so they pick up any remaining marinade.
- Spread the potatoes on one side of the sheet pan and roast for 10 minutes to get them a head start (they take longest to brown).
- Remove the pan, add the bell pepper and onion, then nestle the chicken pieces skin-side up among the vegetables. Spoon any remaining marinade over the chicken.
- Roast for another 25–30 minutes, until the chicken is golden and cooked through (internal temp about 165°F / 74°C) and the potatoes are tender and crisp at the edges. If you want extra color, finish under the broiler for 2–3 minutes — watch closely.
- Let everything rest for 5 minutes on the pan, then scatter with arugula or parsley and an extra squeeze of lemon before serving.
Trust me: the first inhale when you pull this from the oven is worth the whole effort. It’s bold, simple, and it leaves you with one warm pan and a whole evening left to enjoy.
2. The One Tool That Turned My Chaotic Weeknights into Five-Minute Prep Sessions
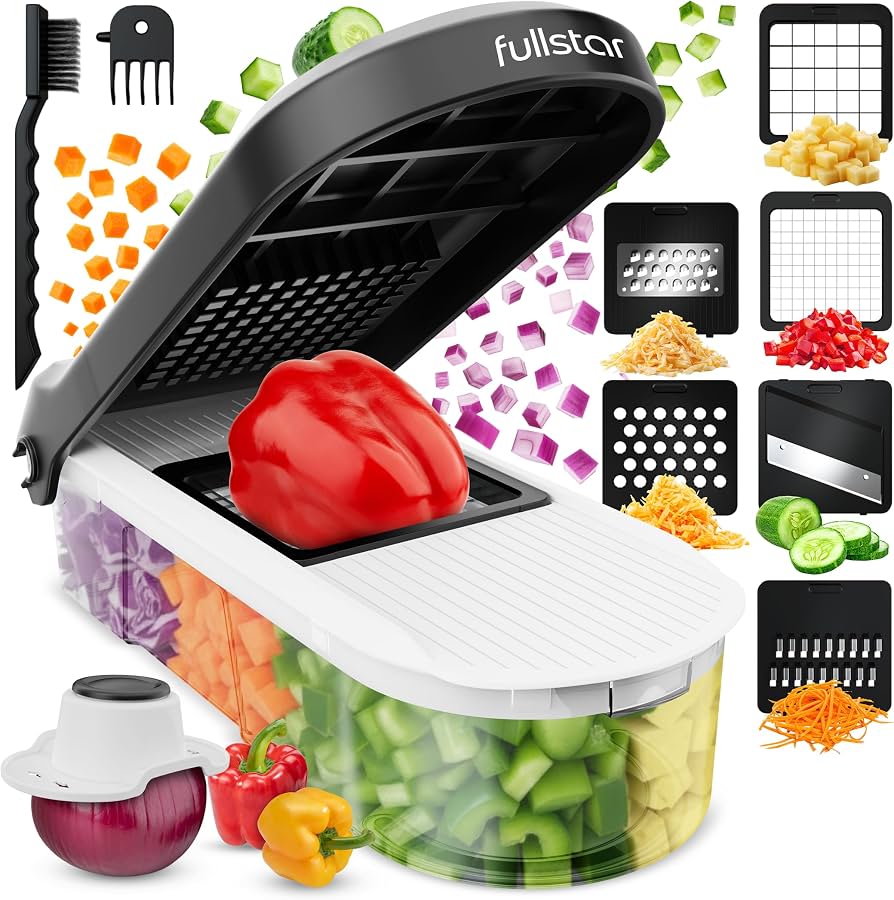
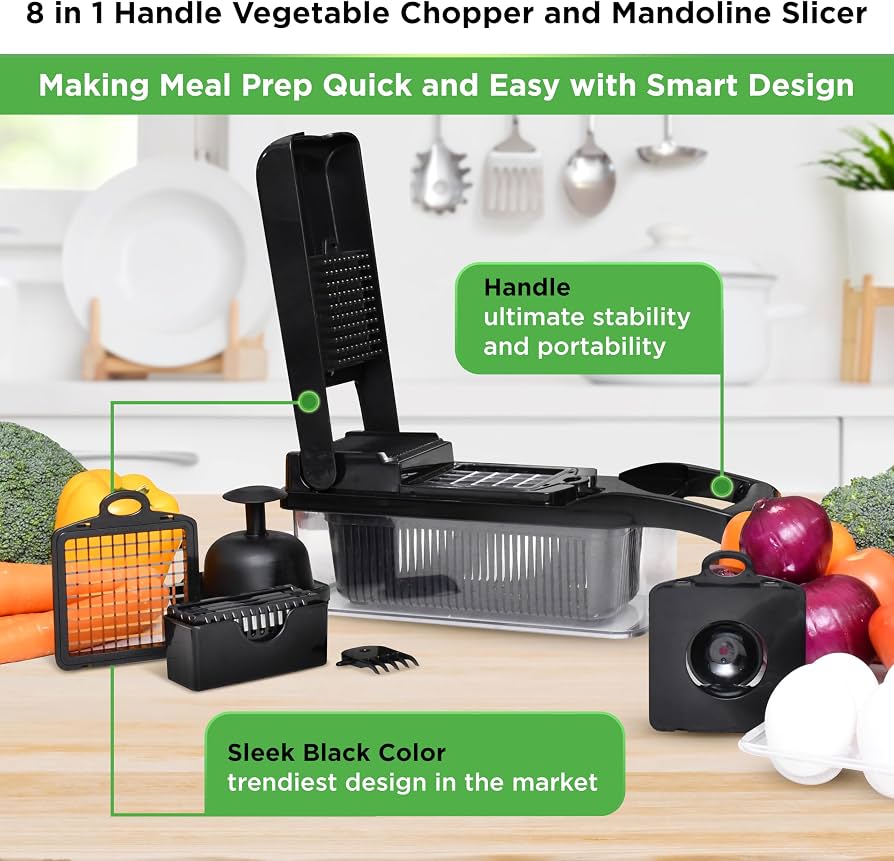
I have to confess: I was the person with a kitchen drawer full of half-forgotten gadgets and a perpetually dull paring knife. Then, on a frantic Tuesday when I was juggling school papers and dinner, I pulled out a little contraption with eight interchangeable blades and it felt like someone flipped a light switch. I remember pressing down on the stainless-steel grid and hearing a satisfying pop — an entire onion transformed into even cubes in about two seconds. My eyes didn’t water, the counter stayed clean, and for the first time all week I actually smiled while cooking.
What sold me wasn’t just the speed. There are two chopper sizes — small and large dice — plus six other inserts that slide in and out for slicing, julienning, grating, or shredding. I used the thin slicer to make paper-thin cucumber ribbons for a salad, the julienne to turn a carrot into delicate matchsticks, and the grater to fluff up a block of cheese without wrestling a box grater. The base snaps in place so you can chop hot peppers without redecorating the countertop, and the uniform pieces mean everything cooks evenly, whether you’re tossing veggies into a skillet or layering them on a sheet pan.
That weeknight when it all clicked, I threw together a dinner in the same amount of time it used to take me to wash a cutting board. The uniform dice made seasoning consistent, the non-mess base meant no redistributing pepper seeds across the counter, and cleanup felt almost fun. If you’re the sort who wants better weeknight dinners without complicated moves, this little tool feels like bringing a calm friend into a hectic kitchen — quick, tidy, and quietly brilliant.
Weeknight Recipe: Quick Pepper-Onion Chickpea Skillet
Ingredients:
- 1 medium onion, diced (use the small chopper)
- 2 bell peppers (any color), diced
- 1 large carrot, julienned or shredded
- 1 can (15 oz) chickpeas, drained and rinsed
- 2 tablespoons olive oil
- 1 teaspoon smoked paprika
- Salt and pepper to taste
- A squeeze of lemon and a handful of fresh parsley or cilantro (optional)
Instructions:
- Fit the chopper with the small-dice blade and quickly dice the onion and peppers; set aside.
- Heat the olive oil in a large skillet over medium-high heat. Add the diced onion and cook 2–3 minutes until translucent and fragrant.
- Add the diced peppers and julienned carrot; sauté another 4–5 minutes until the vegetables are tender-crisp.
- Stir in the chickpeas, smoked paprika, salt, and pepper. Cook for 2–3 minutes until everything is heated through and the flavors meld.
- Finish with a squeeze of lemon and sprinkle with chopped parsley or cilantro. Serve over rice, tucked into warmed tortillas, or alongside a simple green salad.
There’s something deliciously empowering about turning prep time into five minutes of calm. Try this on a busy night and tell me if you don’t feel like you’ve just stolen back an hour.
3. The Pinwheel That Turned My Chaotic Weeknights into Dinner Wins
Picture this: it’s a weeknight, you’ve been juggling work emails and a grocery run, and all you want is a quick dinner. I used to wrestle with a wooden spoon and a pan of clumped-together ground beef — meat sticking, uneven browning, and the little panic of wondering if dinner would ever come together. There’s something oddly deflating about stirring and poking and ending up with giant meaty islands instead of those perfect, toasty crumbles that hold a sauce or taco filling together.
Then I stumbled on a small pinwheel head with five wide, beveled blades and everything changed. The first time I put it into a sizzling skillet, the sound of the meat breaking apart felt almost cinematic — like tiny pattering bits of dinner hitting the pan. The blades slice through the meat, separating it cleanly in seconds without scraping the nonstick surface. It’s made of heat-safe nylon, so you can leave it in a pan that’s hot enough to caramelize onions without worrying about warping or scratching, and it handles ground turkey, sausage, or even a few boiled potatoes when you want a quick mash.
I remember the first week I used it: taco night went from frantic to effortless. I tossed in onions and peppers, added the meat, gave it one confident roll with the pinwheel, and watched the beef crumble into evenly browned, fragrant pieces in about 10 seconds. Cleanup was quick, the pan stayed pristine, and there was a little extra time to set the table and light a candle. It’s become my go-to for any quick crumble job — and honestly, it made me enjoy those busy weeknights again.
If you want a simple weeknight idea to try it on, here’s a recipe that pairs perfectly with that tool. It’s speedy, forgiving, and exactly the kind of thing I make when I need dinner on the table without drama.
Quick Weeknight Skillet Beef & Pepper Tacos
Ingredients:
- 1 lb ground beef (or ground turkey)
- 1 tbsp olive oil
- 1 small onion, thinly sliced
- 1 bell pepper (any color), thinly sliced
- 1 tsp chili powder
- 1/2 tsp ground cumin
- Salt and pepper to taste
- 6–8 small tortillas
- Optional toppings: chopped cilantro, lime wedges, shredded cheese, salsa
Instructions:
- Heat the olive oil in a large skillet over medium-high heat. Add the onion and bell pepper and cook until softened and slightly charred, about 4–5 minutes.
- Push the veggies to the side, add the ground beef to the pan, and let it sit for 30 seconds to start browning.
- Using the pinwheel with five beveled blades, roll and press through the meat until it breaks into even crumbles and cooks through, about 10–20 seconds of active work. Stir everything together.
- Sprinkle in the chili powder, cumin, salt, and pepper, mix well, and let everything cook another minute so the spices bloom.
- Warm the tortillas, assemble with the beef and peppers, and top with cilantro, a squeeze of lime, cheese, or salsa as you like. Serve immediately.
Trust me — once you try that first satisfying crumble, you’ll find yourself reaching for the pinwheel any time dinner needs to come together fast.
4. The Little Gadget That Turned My Weeknights into a Breeze
I still remember the first time I tried it — a hurried Tuesday evening, the sink full, the oven preheating, and me, standing over a zucchini wondering if takeout was the kinder choice. A friend handed me this compact contraption and with a conspiratorial smile said, ‘Trust me.’ In seconds I had a spiral of glossy green noodles that smelled faintly of garden soil and summer. That hum of satisfaction, the little click when a new blade locked into place, felt like finding a secret shortcut in my own kitchen.
It has six stainless steel blades that I now treat like an old friend: one for waffle-cut potatoes that bake up into crinkled, golden fries; one for fine grates that make cheese melt into creamy clouds; a julienne blade for carrots that add that perfect snap; and a spiralizer blade that turns zucchini into silky ribbons. The swap happens with a single mechanism — a quick twist, and you’re done. The safety glove gave me the courage to try closer cuts, the 5-cup catch tray saved me from splattered countertops, and the non-slip grip meant the whole thing stayed steady while I worked. When dinner’s over, I pop the pieces in the dishwasher and tuck the flattened parts into a drawer so they don’t fight for space with my pots.
What really changed my weeknight rhythm was how this little tool made flavor and texture feel fast and deliberate. One pan, twenty minutes: the sound of shrimp sizzling, the lemon brightening everything, the vegetables keeping a crisp, friendly bite. It made me enjoy the process again, like I had time to care — even on nights when I didn’t.
Simple Weeknight Recipe: Lemon-Garlic Zucchini Noodles with Shrimp
Ingredients:
- 3 medium zucchini (spiralized into noodles)
- 10-12 large shrimp, peeled and deveined
- 1 medium carrot (julienned)
- 1 cup cherry tomatoes, halved
- 2 cloves garlic, minced
- 2 tablespoons olive oil
- 1 tablespoon butter
- Zest and juice of 1 lemon
- Salt and freshly ground black pepper, to taste
- A small handful of fresh parsley, chopped
- Grated parmesan or a sprinkle of flaky salt, optional
Instructions:
- Swap in the spiralizer blade and make zucchini noodles into the catch tray; use the julienne blade for the carrot and add to the tray. Pat the shrimp dry and season lightly with salt and pepper.
- Heat olive oil and butter in a large skillet over medium-high heat. Add the garlic and sauté for about 30 seconds until fragrant.
- Add the shrimp and cook 1-2 minutes per side, until pink and just opaque. Remove shrimp to a plate and keep warm.
- Toss the cherry tomatoes into the skillet for about 1 minute, then add the zucchini noodles and julienned carrot. Sauté gently for 2-3 minutes — you want them warmed through but still with a little bite.
- Return the shrimp to the pan, add lemon zest and juice, and toss everything together. Taste and adjust seasoning with salt and pepper.
- Serve immediately, sprinkled with chopped parsley and a dusting of parmesan or a pinch of flaky salt if you like.
This recipe lives in my weeknight rotation because the gadget does the heavy lifting: pretty spirals, neat shreds, and a clean tray that catches everything. It feels a bit like cheating and a lot like a little kitchen miracle — the kind you tell a friend about over dinner.
5. The Little Pinwheel That Saved My Weeknights
There was one weeknight — you know the kind: late, hungry kids, and a pan of ground beef that refused to cooperate. I waged my usual spatula war, chasing clumps that rolled into one unbreakable island in the center of the pan. Then a friend handed me a strange little tool with five curved blades set like a pinwheel and everything changed.
The first time I used it, the sound alone felt like a small miracle: a quick twisting motion and the meat surrendered, breaking apart into even, juicy crumbles that browned evenly on the hot skillet. The sizzle got louder, the smell went from vague hamburger to proper dinner, and in under five minutes I had a perfectly broken-down pound of beef, ready for whatever I planned next. The handle has a satisfying weight that makes the whole thing feel steady in your hand, and I love that it’s heat-resistant up to 430°F — no tiptoeing while the pan is hot. It’s also gentle enough for non-stick pans and just as handy with ground turkey, chicken, or sausage.
What I love most is how it turns a small, annoying step into something almost playful. On chaotic weeknights it feels like a tiny chef’s wand — fast, neat, and oddly satisfying to use. After that first successful taco night, this little pinwheel has become my go-to for any dish that starts with ground meat, and it has seriously cut my evening cook time in half.
Quick Weeknight Skillet Beef & Pepper Tacos
Ingredients:
- 1 lb ground beef
- 1 tbsp olive oil
- 1 small onion, thinly sliced
- 2 bell peppers (any color), thinly sliced
- 1 tsp chili powder
- 1 tsp ground cumin
- 1/2 tsp salt (adjust to taste)
- 1/4 tsp black pepper
- 8 small tortillas
- Optional toppings: chopped cilantro, lime wedges, shredded cheese, sliced avocado
Instructions:
- Heat the oil in a large skillet over medium-high heat until shimmering.
- Add the sliced onion and bell peppers and sauté for 3–4 minutes until they start to soften.
- Add the ground beef to the pan. Use the pinwheel tool to break the meat into small pieces with a few quick twists until evenly crumbled.
- Sprinkle in the chili powder, cumin, salt, and pepper. Cook for 4–6 minutes, stirring occasionally, until the beef is browned and the peppers are tender.
- Warm the tortillas in a dry skillet or microwave. Spoon the beef-and-pepper mixture into tortillas and top with cilantro, a squeeze of lime, cheese, or avocado as you like.
It’s simple, fast, and feels like a small celebration at the end of a busy day — a dinner I can make without drama and with a little flourish from a tool I never knew I needed.
6. The Little Magnetic Spoons That Quietly Changed My Weeknights
The first time I heard that soft, decisive click I was half-cutting an onion and trying not to cry. I reached for a half teaspoon of smoked paprika from a tiny jar on the top shelf, and the spoon slid right into the neck of the jar like it had always lived there. The other end of the spoon stayed magnetically snug with the rest of the stack, so I didn’t have to wrestle a tangled ring of metal over my cutting board. It felt impossibly small and yet, in that moment, wildly generous — one satisfying snap and my whole rhythm in the kitchen resumed.
There’s something about the weight of these stainless steel spoons that makes measuring feel deliberate and calm. One side is an oval narrow enough to fish into spice jars, scooping up dried thyme and coriander without making a mess; flip it and you’ve got a round cup for a splash of soy or honey. A tiny metal edge lets me level off sugar or flour with a clean swipe, and the metric markings stamped into the handles save me from squinting at my phone when a recipe switches systems mid-recipe. They nest into a tidy stack that lives in a drawer but behaves like a tool on the countertop — solid, no flex, and always ready.
What I love most is how this little convenience rewired weeknight cooking from frantic to fluid. Suddenly measuring a pinch of cumin or a half teaspoon of red pepper flakes is a breeze, and I waste less time searching and more time tasting. I’ll admit it: these spoons made me feel like I had my act together on a Tuesday night, standing over a sizzling pan while the whole apartment smelled like garlic and lemon. If you’re the type who cooks after work and wants something simple that actually helps, this is one of those tiny upgrades that quietly becomes indispensable.
Weeknight Lemon-Garlic Shrimp (a fast recipe that shows off the spoons’ strengths)
Ingredients:
- 1 lb raw shrimp, peeled and deveined
- 1 tbsp olive oil
- 2 cloves garlic, minced
- 1/2 tsp smoked paprika
- 1/4 tsp red pepper flakes (optional)
- 1/2 tsp kosher salt
- 1/4 tsp freshly ground black pepper
- 2 tbsp lemon juice (about half a lemon)
- 1 tbsp chopped fresh parsley or cilantro
- Cooked rice or salad greens, for serving
Instructions:
- Pat the shrimp dry and toss them in a bowl with olive oil, minced garlic, smoked paprika, red pepper flakes (if using), salt, and pepper. Use the oval end of the spoon to scoop spices directly from tiny jars without making a mess.
- Heat a large skillet over medium-high heat until shimmering. Add the shrimp in a single layer and let them sear for 1–2 minutes without moving so they get a good color.
- Flip the shrimp and cook another 1–2 minutes, until opaque and curled. Measure the lemon juice with the round end of the spoon for a quick splash of brightness.
- Remove the pan from heat, toss the shrimp with lemon juice and chopped herbs, and use the leveler to scrape any leftover spices from the spoon into the pan.
- Serve immediately over rice or greens for an effortless dinner. Leftovers keep for a day and reheat beautifully.
Give it a try on a hectic night: the tiny ritual of clicking a spoon free, scooping a spice, and snapping it back feels oddly celebratory. It’s a small thing that nudges the whole evening toward better, tastier, calmer cooking.
7. How a Spiral-Bound One-Pan Book Rescued My Weeknights
There was a Tuesday evening when the kitchen looked like a small disaster zone: a tired me, a sink full of glasses, and the sad reality that I had to feed people in thirty minutes. I remember pulling a spiral-bound cookbook off a shelf—a compact thing that lay perfectly flat on the counter like it was made to be used under the hum of the hood light. The spiral was oddly reassuring; I could read a recipe with one hand and stir with the other, no awkward propping, no pages flapping while the timer ticked.
What hooked me wasn’t just the flat-lay convenience but the whole gentle promise of that book: dinners built around a single tool. A sheet pan, a heavy skillet, a Dutch oven, even a smartly wrapped foil packet—each recipe nudged me toward caramelized edges, bright steamed veg, and maybe one pan to wash. The first time I tried it, I loved the crunch of roasted garlic meeting the pop of blistered cherry tomatoes, the way everything smelled like Sunday on a weeknight.
After that first run, I started thinking in single-pan terms. If a skillet could go from sear to oven, my evening routine changed: less rinsing, more talking while things roasted, more time to taste and tweak. My partner and I noticed the difference too—dinner felt less like a production and more like a cozy experiment. The book didn’t make me a short-order cook, it made weekday meals doable and, surprisingly, a little bit fun.
Here’s a simple skillet recipe I fell back on for weeks—the kind of thing I tell a friend about when they groan about dinner. It’s quick, forgiving, and everything cooks in one pan.
One-Skillet Lemon-Herb Chicken with Green Beans and Cherry Tomatoes
Ingredients:
- 4 bone-in, skin-on chicken thighs (or 4 boneless thighs for a quicker cook)
- 1 tablespoon olive oil
- Salt and black pepper, to taste
- 1 teaspoon dried oregano or 1 tablespoon chopped fresh herbs (thyme/parsley)
- 3 cloves garlic, smashed
- 8 ounces green beans, trimmed
- 1 cup cherry tomatoes, halved
- 1 lemon (zested and cut into wedges)
- Optional pinch of red pepper flakes
Instructions:
- Preheat the oven to 400°F (200°C). Pat the chicken dry, season generously with salt, pepper, and the oregano or herbs.
- Heat the olive oil in a large ovenproof skillet over medium-high heat until shimmering. Add the chicken, skin-side down, and sear until golden brown, about 5–6 minutes. Flip and sear the other side for 2 minutes.
- Push the chicken to one side of the pan. Add the smashed garlic, green beans, and cherry tomatoes to the empty side. Scatter lemon zest and red pepper flakes over the vegetables, season with a little salt and pepper, and let everything mingle for a minute.
- Tuck lemon wedges around the chicken, then transfer the skillet to the oven. Roast until the chicken is cooked through and vegetables are tender, about 12–15 minutes (internal temp for thighs should reach 165°F/74°C).
- Remove the skillet, squeeze a bit of the roasted lemon over the top, and let rest for 3 minutes. Taste and adjust seasoning if needed.
- Serve straight from the pan for the least dishes possible—rice, crusty bread, or a simple salad are great companions.
That first week I made this, the kitchen stayed calm, the timer didn’t feel like an enemy, and I actually had time to sit down and breathe between plating and eating. One pan, one timer, one happy weeknight—sometimes that’s all you need.
8. The Little Tool That Tamed My Rolling Tomatoes
There I was on a Wednesday night, juggling a tired brain, a hungry kid asking for dinner, and a cutting board that had turned into a stage for a slippery tomato circus. Those tiny, glossy cherry tomatoes would ricochet like marbles — a red blur across the counter — and I always felt one near-miss from turning a quick salad into an ER story. The sound of my knife tapping the board while the tomatoes skittered away became the late-evening percussion I never wanted.
Then I found the simple gadget that changed the rhythm of my weeknights. It hugs the tomato like a tiny fence, the teeth cradling the round fruit so it cannot flee. Vertical slots let the knife glide straight down through each slice, so instead of chasing fruit I am slicing with a steady thwack and a satisfying, clean cut. The first time I used it I remember the relief — the quiet confidence when every slice landed where it should, the soft scent of tomato juice and citrus filling the air as I worked. It wasn’t flashy; it was exactly the kind of small, sensible thing that feels like magic in the middle of a busy evening.
Now it lives in my utensil drawer and shows up in all sorts of unexpected ways. I use it for olives when I need even little rounds, for tiny cheese balls that like to roll away, and for lemons when I want wafer-thin slices without gripping slippery rind. It turned meal prep from a minor battle into a calm, efficient habit. Weeknight salads are quicker, bruschetta is prettier, and I slice citrus without worry. If you’re fed up with fruit that has a mind of its own, this little helper will make those small but frequent moments of prep feel, well, almost indulgent.
Recipe: Quick Lemon-Tomato Bruschetta
Ingredients:
- 1 cup cherry tomatoes, halved (use the gadget to hold and slice them)
- 1 small lemon, thinly sliced and zested
- 1 clove garlic, minced
- 1 tablespoon extra-virgin olive oil
- 6 slices whole-grain or sourdough bread, toasted
- A small handful fresh basil leaves, torn
- Salt and freshly ground black pepper to taste
Instructions:
- Toast the bread slices until golden and set aside.
- Use the tool to steady each cherry tomato and halve them, placing the pieces in a mixing bowl.
- Thinly slice the lemon and reserve a little zest; add a few thin lemon slices to the tomatoes for brightness.
- Add the minced garlic, olive oil, basil, lemon zest, salt, and pepper to the tomato bowl and toss gently to combine.
- Spoon the tomato mixture onto each piece of toasted bread, garnish with an extra basil leaf, and serve immediately.
This comes together in about 10 minutes, tastes like late-summer light, and is the sort of weeknight victory that makes the kitchen feel organized and a little bit celebratory.
9. The 12-Blade Tiny Miracle That Turned My Chaotic Dinners into Calm
The first time I used this little chopper I was running late, the sink was full, and dinner felt like a mountain I hadn’t trained for. I snapped a blade into place and heard that small, satisfying click — the kind that promises something will actually work — and suddenly the task felt doable. Carrots became curls, peppers diced themselves, and cherry tomatoes surrendered their juice into a neat, handled container instead of staging a rebellion all over my cutting board.
There’s something deeply calming about watching colors pile up in one place: vivid orange ribbons, emerald zucchini spirals, and ruby diced tomatoes settling into a 1.7‑liter catcher that grips the counter with a non‑slip base. The blades interlock like tiny gears and, yes, they’re sharp enough that I use the finger guard without fail. The body is lightweight and BPA‑free, and when the meal’s over I shove the parts into the dishwasher and feel an almost childish sense of victory — no scrubbing, no stray seeds glued to the counter.
This tool didn’t just save time; it changed the way I think about weeknight cooking. Instead of dreading prep, I cue up music, let the chopper whistle through the veg, and assemble dinner while the pasta boils or the tofu crisps. It’s fast enough for a solo weeknight and forgiving enough to let curious kids help without turning the kitchen into a disaster scene. If you’ve ever wished for a shortcut that still feels homemade, this is the kind of gadget that quietly becomes part of your routine.
Simple Weeknight Rainbow Veggie Noodle Bowl
Ingredients:
- 2 medium carrots
- 1 medium zucchini
- 1 red bell pepper
- 8–10 cherry tomatoes
- 1 cup cooked quinoa or rice (leftover works great)
- 1 small avocado, sliced
- 2 tbsp olive oil
- 1 tbsp soy sauce or tamari
- 1 tsp rice vinegar or lemon juice
- Salt and pepper to taste
- Optional: toasted sesame seeds or chopped herbs for garnish
Instructions:
- Snap the julienne/spiral blade into the chopper with the audible click and spiralize the carrots and zucchini directly into the catch container.
- Swap to the dicing blade and quickly dice the red pepper; then use the slicing setting for the cherry tomatoes so their juices collect neatly in the container.
- Toss the cooked quinoa or rice with the olive oil, soy sauce, and vinegar right in the catch container so everything mixes without dirtying another bowl.
- Plate the spiralized veggies over the grain base, add avocado slices, season with salt and pepper, and sprinkle with sesame seeds or herbs.
- Eat immediately, or wrap for a quick lunch tomorrow — cleanup is as easy as popping the pieces into the dishwasher.
Serve it with a fried egg or a handful of toasted nuts for extra protein. It’s the kind of weeknight recipe that feels like effort but takes almost none — and that container makes the whole thing tidy from start to finish.
10. The Ten-Prong Trick That Saved My Weeknight Dinners
I still remember the exact Tuesday it happened: kids asking for dinner, the clock ticking, and my knife skills feeling suspiciously average. I pulled out that little tool with ten stainless prongs like a secret friend I’d been saving for a rainy day. I pierced a tomato, and instead of it wobbly and theatrical on the cutting board, it sat there perfectly calm. The knife slid between the tines with a soft metallic whisper and the slices came out even, like the kind of thing you only see in glossy food photos. It felt like cheating—in the best possible way.
There’s something almost mischievous about the way those prongs grab an onion or an avocado. Push them in and you get this reassuring, tactile click; the veg becomes an instant model, steady and obedient. No more awkward balancing, no fingers doing a last-minute sprint toward the blade. I learned to halve a boiled egg cleanly with one gentle pass, the yolk staying put instead of splattering, and to make lemon wheels that glittered on salads instead of collapsing into sad crescent moons. The handle has a nice weight in the hand, and after a few washes the stainless steel still looks as cheerful as the first time I used it—no rust, no drama.
What changed my weeknight cooking was less about a gadget and more about the confidence it gave me. Ten minutes became enough to make a plate that felt thought-through. I started inviting conversation at the counter again—”Can you cut the lemon?”—instead of delegating everything to takeout. The tool didn’t do the cooking for me, but it made the prep delightful: the sound of the blade gliding, the smoothness of a tomato slice, the bright pop of a lemon wheel. If you ever need a tiny kitchen miracle for busy nights, this is the one I tell my friends about.
Quick weeknight recipe idea: Avocado & Tomato Toast with Halved Egg
Ingredients:
- 2 slices of your favorite bread, toasted
- 1 ripe avocado
- 1 small vine-ripened tomato
- 1 soft- or hard-boiled egg, peeled
- 1 lemon wedge
- Salt and freshly ground black pepper, to taste
- A drizzle of olive oil (optional)
Instructions:
- Toast the bread until golden and set aside.
- Use the pronged tool to steady the tomato and slice it into even rounds; arrange on the toasted bread.
- Halve the avocado (or slice if you prefer) while holding it steady with the prongs, then fan or mash it onto the toast.
- Place the peeled boiled egg on the prongs and slice it cleanly in half; nestle the halves on the toast.
- Finish with a squeeze of lemon, a drizzle of olive oil if using, and a pinch of salt and pepper. Serve immediately and enjoy the little things that make a weeknight feel special.
11. The Little Magnet That Saved My Weeknights
A few weeks ago I was mid-chaos: laundry in a basket, a toddler asking for more crackers, and a pot of something vaguely overcooked hissing on the stove. I had an electric pressure cooker on the counter and zero patience left for digging through the manual or scrolling my phone to find the right times. That’s when I peeled a tiny, laminated chart off the fridge and stuck it front-and-center. It felt like finding a secret cheat code — suddenly the fog around cooking times, liquid ratios and steam releases cleared. I could see the right setting from across the room without wiping my hands on my jeans.
The card itself is the kind of sensible thing I didn’t know I needed: postcard-sized, printed so you can actually read it at arm’s length, and plastic that shrugged off a stray tomato sauce splatter like it was nothing. It lists common foods, sensible liquid ratios and steaming notes (including little flags for higher altitudes and plant-based swaps) so that I don’t have to guess whether to add an extra half cup of broth or let the pressure come down naturally. It’s magnetic, so it lives on my fridge — the first thing I see when I open the door and the last thing I glance at before closing the cooker’s lid.
Best part: it made me bold again on weeknights. One evening I tossed chicken, quinoa and a handful of veg together without staging a full kitchen production. I glanced at the chart, picked a pressure time, and ten minutes later the whole house smelled like lemon and garlic. The cooker had done the heavy lifting, and I sat down to dinner that felt home-cooked and effortless. If you’re anything like me — juggling to-dos and craving real food that doesn’t require a diary-length prep — this little magnet is the kind of discovery that quietly changes how the week flows.
Recipe idea — Weeknight Lemon-Garlic Chicken & Quinoa
Ingredients:
- 1 lb boneless, skinless chicken thighs (or breasts cut into chunks)
- 1 cup quinoa, rinsed
- 1 1/4 cups low-sodium chicken or vegetable broth
- 1 lemon (zest and juice)
- 3 cloves garlic, minced
- 1 tablespoon olive oil
- 1 cup diced zucchini or bell pepper
- 1 teaspoon dried oregano or thyme
- Salt and pepper to taste
- Fresh parsley for garnish (optional)
Instructions:
- If your cooker has a sauté mode, heat the olive oil and brown the chicken briefly (about 2 minutes per side) for extra flavor; you can skip this if you’re in a hurry.
- Add the rinsed quinoa, broth, minced garlic, lemon zest and juice, oregano, salt and pepper to the pot. Stir to combine and scrape any browned bits off the bottom.
- Nestle the diced zucchini on top (it will steam gently). Close the lid and set the cooker to high pressure for 8 minutes.
- When the cook cycle ends, allow a natural pressure release for 5 minutes, then carefully quick-release any remaining pressure.
- Open the lid, fluff the quinoa, and check the chicken with a thermometer (165°F/74°C) or cut a piece to ensure it’s cooked through. Chop or shred the chicken if desired, toss everything together, garnish with parsley, and serve.
Tip: If you’re using chicken breasts, keep an eye on texture — you can reduce the pressure time slightly or slice the breasts small so they finish tender rather than dry. This is one of those no-fuss recipes that the little fridge cheat sheet helps me trust every single week.
12. The Little Glass Bottle That Saved My Weeknights
I have a confession: for years I treated olive oil like a naughty guest at dinner — generous, slippery, and impossible to control. Then, on a chaotic Tuesday when I was trying to get dinner on the table between calls and homework help, I swapped the old bottle for a glass dispenser with a nozzle that, somehow, changed everything. The first time I clicked it and a whisper-thin mist shimmered over my air-fryer basket, I felt like a cooking magician. No greasy puddles, no wasted oil, just a fine, even sheen that made vegetables sing when they crisped.
The bottle itself feels like it belongs in the hands of someone who cooks with intention: cool, clear glass that stands up to heat, and a nozzle that gives you two moods — a feather-light spray when you want an even coat on salads or baskets, and a steady stream when you need to get a pan hot and ready for searing. Every tiny spray is about 0.15 grams, which is oddly satisfying when you’re trying to be mindful of portions. No guessing, no drips down the counter, just clean, simple control.
Since it arrived, weeknight dinners have gotten quieter and more confident. I mist green beans before they hit the air fryer and they come out glossy and crisp; I switch to the pour when I want a hot sizzle to brown chicken skin. The smell of garlic hitting olive oil is somehow amplified when there’s no excess slick pooling in the pan — you get immediate browning, bright lemon at the end, and a texture that feels like you actually spent more time than you did. It’s small, but it makes cooking feel easier, faster, and a little more joyful.
Recipe: Lemon-Garlic Pan-Seared Chicken Thighs with Misted Green Beans
Ingredients:
- 4 boneless skin-on chicken thighs (or bone-in, if you prefer)
- Salt and freshly ground black pepper
- 2 cloves garlic, thinly sliced
- 1 lemon (zest and juice)
- 12 ounces green beans, trimmed
- 1–2 teaspoons crushed red pepper flakes (optional)
- Olive oil in your glass sprayer (enough to mist and pour)
Instructions:
- Pat the chicken dry and season generously with salt and pepper on both sides. Let sit at room temperature for 10 minutes while you prep the beans.
- Place the trimmed green beans in a bowl and mist them lightly with the sprayer until they have an even sheen. Toss with a pinch of salt. Arrange in a single layer in your air fryer basket or on a sheet pan if roasting.
- Air-fry the green beans at 380°F (or roast at 425°F) for 8–10 minutes, shaking once, until blistered and tender-crisp.
- Meanwhile, heat a skillet over medium-high heat. Use the sprayer’s stream mode to add a thin ribbon of oil to the pan — just enough to coat the surface. When the oil is hot and shimmering, add the garlic and let it sizzle for 20–30 seconds until fragrant.
- Add the chicken thighs, skin-side down, and press gently so the skin makes full contact with the pan. Sear for 5–7 minutes until deeply golden and crisp, then flip and cook another 5–7 minutes until cooked through.
- Remove the pan from heat, squeeze half the lemon over the chicken, and sprinkle on the zest. Toss the finished green beans with a squeeze of the remaining lemon and a few red pepper flakes if using.
- Plate the chicken with the green beans on the side. Drizzle any pan juices over everything and — if you like — give a final, delicate mist of oil over the vegetables for a glossy finish.
That little spritz at the end is the kind of flourish that turns a tired weeknight into something you actually look forward to repeating. Simple, fast, and quietly transformative.
13. The Little Rocker That Turned My 6 PM Scramble into a Cozy Dinner Ritual
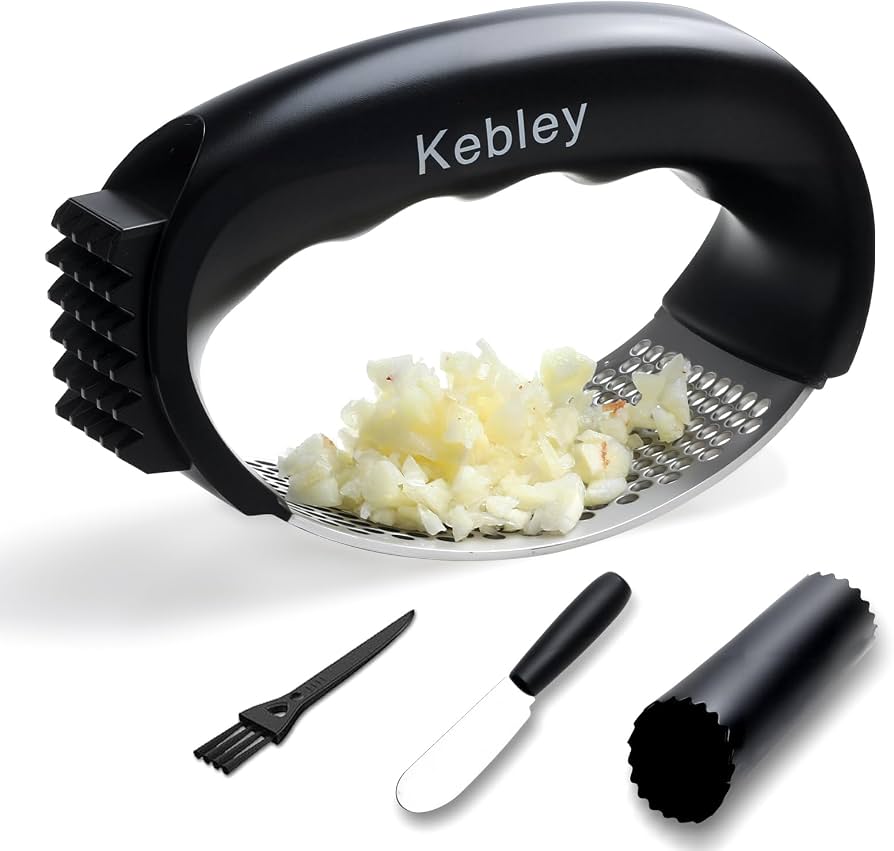
I still remember the first Tuesday I tried it — it was one of those late afternoons when work ran overtime and the only thing between me and a decent dinner was the will to stand at the counter. I pulled a clove of garlic from the jar with no grand plan, and instead of wrestling a stubborn hinge press, I set the clove under a compact rocker and let my forearm do the work. With a simple arc, it crushed the clove open like a tiny mezzaluna, releasing that bright, warm garlic scent that makes the whole kitchen feel hopeful again.
The sound is oddly satisfying: a soft crush, a quick scrape, and then a pan sizzling to life. Because the rocker uses a back-and-forth motion you don’t have to pinch hard at all — you use your weight, not a death grip, so those tired 6 pm hands can still make dinner. I loved that the minced garlic falls right onto the board instead of getting trapped in a hollow chamber, and cleanup is almost blissfully easy. A quick rinse and a flick with the little brush that comes with it, and it’s happily off to the dish rack. The silicone top feels comfortable against your palm, the steel underneath looks like it will survive a few lifetimes, and its small footprint means it tucks into a drawer instead of living on the counter like a kitchen monument.
Since that night it’s been my secret to faster, more flavorful weeknights. I end up adding garlic to everything because it’s no drama — a two-minute mincing ritual that smells like home and turns a rushed meal into something a little more considered. If you ever need a little kitchen confidence boost, this one small tool is worth it. Below is one of my go-to, five-star weeknight ideas that pairs perfectly with a quick, fragrant mince.
Quick Weeknight Garlic-Lemon Shrimp
Ingredients:
- 1 pound large shrimp, peeled and deveined
- 3 tablespoons olive oil or a mix of olive oil and butter
- 3–4 garlic cloves (minced with your rocker)
- 1 lemon (zest and juice)
- 1/4 teaspoon red pepper flakes (optional)
- Salt and black pepper to taste
- A handful of chopped parsley or basil
- Crusty bread or cooked pasta, for serving
Instructions:
- Mince the garlic with the rocker until fragrant and almost paste-like — this takes seconds and fills the kitchen with aroma. Pat the shrimp dry and season lightly with salt and pepper.
- Heat the oil (and butter, if using) in a large skillet over medium-high heat until shimmering. Add the minced garlic and red pepper flakes and cook for about 30 seconds, stirring constantly so the garlic doesn’t burn.
- Add the shrimp in a single layer and cook 2–3 minutes per side, until pink and opaque. Spoon the garlicky oil over the shrimp while they cook so every bite is glossy and bright.
- Remove the pan from heat, stir in the lemon zest and juice, and toss with chopped herbs. Taste and adjust seasoning.
- Serve immediately over pasta or with slices of crusty bread to soak up the garlicky juices.
There — dinner that smells like someone took the time to care, made in minutes, and never a battle with a stubborn tool. Tell me how you use yours; I love hearing new weeknight tricks.
14. The Tiny Tool That Ended My Onion Drama (and Changed Weeknight Dinner)
Last Tuesday felt like the last straw. I was standing at the counter, eyes stinging, having already flicked half an onion onto the cutting board only to realize my slices were uneven and my fingers were perilously close to the knife. A friend had slipped me a curious little gadget the week before, and that evening I decided to give it a try. The first time I pressed the stainless-steel prongs into the onion, there was this satisfying little click — like the kitchen finally agreed with me. No tears, perfectly even slices, and my fingers safely tucked away behind a comfy, ergonomic handle. It felt almost indulgent: the simple pleasure of control over chaos.
What surprised me most was how versatile it was. I used the same prongs to steady a tomato for even rounds that slipped onto avocado with the gentlest tap, and later to hold a hard-boiled egg steady while I made neat segments for topping a salad. The tool’s cover keeps those sharp prongs from doing damage in the drawer, and the handle is shaped so your hand doesn’t cramp after the third or fourth fruit. The slices cook more evenly, too — the onions caramelized into ribbons of amber faster than before, and the tomatoes seared in a single, confident round on the skillet.
Since that night, weeknight cooking has felt less like a battle and more like a little ritual. My kids noticed how pretty the tomato and avocado slices looked and volunteered to help assemble plates. I love how a tiny change can turn the mundane into something a bit ceremonial: pulling that gadget from the drawer, pressing it into an onion, hearing the small metallic whisper as it holds everything steady. If you hate crying over onions or just want your slices to look restaurant-ready without the fuss, this is the kind of thing that quietly makes weeknights better.
Recipe: Quick No-Tears Avocado, Tomato & Egg Toast (a perfect pairing for the onion slicer)
Ingredients:
- 2 ripe avocados
- 2 medium tomatoes
- 1 small red onion (or sweet onion), thinly sliced
- 2 hard-boiled eggs
- 4 slices of whole-grain or sourdough bread
- 1 tablespoon olive oil
- Salt and freshly ground black pepper, to taste
- A squeeze of lemon juice (optional)
- A pinch of chili flakes or chopped fresh herbs (optional)
Instructions:
- Toast the bread until golden and set aside.
- Use the onion slicer to secure and thinly slice the onion into even rings; set aside a few rings for topping and separate the rest into thinner ribbons if you like them softer.
- Slice the tomatoes and avocados using the same tool for neat, even rounds. If you like, toss the tomatoes in a little olive oil, salt, and pepper.
- Peel the hard-boiled eggs and cut them into even slices or wedges with the gadget’s help for tidy pieces.
- Drizzle the toasted bread lightly with olive oil, then layer with avocado slices, tomato rounds, and a few onion rings. Top with egg slices.
- Finish with a squeeze of lemon, a sprinkle of salt and pepper, and a pinch of chili flakes or herbs.
- Serve immediately and enjoy the simple, even slices you achieved without a single tear.
This recipe is forgiving and fast — everything about it loves the precision the tool gives you, from presentation to cooking speed. It’s one of my go-to weeknight wins now: minimal fuss, maximum comfort.
15. The Little Twist That Saved My Weeknights
I used to dread the part of dinner where the timer goes off and I’m faced with two sad forks and an hour’s worth of patience. One frantic Tuesday, with a laundry pile eyeing me and a toddler demanding snacks, I pulled a small clear gadget out of a drawer and decided to give it a shot. It looked almost playful—two clear discs like tiny portholes with handles—and within a few turns it made the most satisfying peeling sound as perfectly cooked chicken turned into fluffy shreds.
What surprised me was the choreography: set the meat between the discs, grip the handles, and twist. The base stays put while the top spins, so nothing slips onto the counter. I loved watching the meat tumble through the see-through shell, like watching confetti fall. The handles feel sturdy in the palm; the motion is quick and oddly calming, a small ritual that instantly takes the edge off a hectic evening.
Since that night I’ve used it on chicken, pulled pork, even leftover brisket. It shortened my prep time and made dinner feel less like a scramble and more like a little kitchen win. Cleanup is simple, the shreds go straight into a pan for reheating or into tortillas for a fast weeknight meal. It turned one of my most annoying chores into something I actually look forward to when the week gets busy.
Easy Weeknight Shredded Chicken Tacos
Ingredients:
- 3 cups cooked chicken (rotisserie or leftover poached chicken), shredded with the twist tool
- 1 tablespoon olive oil
- 1 teaspoon chili powder
- 1/2 teaspoon garlic powder
- Salt and pepper to taste
- 8 small tortillas (corn or flour)
- 1/2 cup shredded cabbage or lettuce
- 1 avocado, sliced
- Lime wedges and chopped cilantro for serving
Instructions:
- Shred the cooked chicken using the twist tool and set it in a bowl.
- Heat the olive oil in a skillet over medium heat. Add the shredded chicken, chili powder, garlic powder, salt, and pepper. Stir and cook for 3–4 minutes until warmed through and slightly crisp at the edges.
- Warm the tortillas in a dry pan or microwave for a few seconds. Divide the chicken among the tortillas.
- Top each taco with shredded cabbage, avocado slices, a squeeze of lime, and a sprinkle of cilantro. Serve immediately and enjoy how quickly a chaotic evening became delicious.
Final Thoughts
If you’re still picturing that frazzled Tuesday, know this: you don’t need to overhaul your whole kitchen in a day. Start with one or two tools that address your biggest pain points—maybe a faster way to chop, a smarter way to keep things warm, or a trusted pot that won’t betray you mid-simmer. Give each new tool a few tries in different recipes and notice how small efficiencies compound into real relief.
Cooking for my family hasn’t become a perfectly smooth movie montage, and there are still moments of spilled sauce and last-minute detours. But the tension has eased, dinners are tastier, and we have more time to actually sit and talk. Try the tools that fit your routine, share your wins (and funny missteps) with us at cleaneatingsmartliving.com, and let the right gear help you reclaim weeknights—one calm, nourishing meal at a time.