Spooky-Chic Nail Ideas to Try This Halloween

Halloween is the season to have fun with your fingertips—whether you prefer subtle nods to the spooky season or full-on statement nails. These approachable designs work for a range of lengths and skill levels and focus on techniques you can do at home or ask your nail tech to adapt. Keep a steady hand, good lighting, and a fine brush nearby.
Before you begin: work on clean, filed nails, use a base coat to protect natural nails, and ventilate the room when using polishes. If you have sensitive skin or nail allergies, test a small amount of any new product on one fingertip before committing to a full set. Below are six fresh ideas with straightforward supplies and step-by-step directions to inspire your Halloween mani.
1. Ghostly Negative-Space French
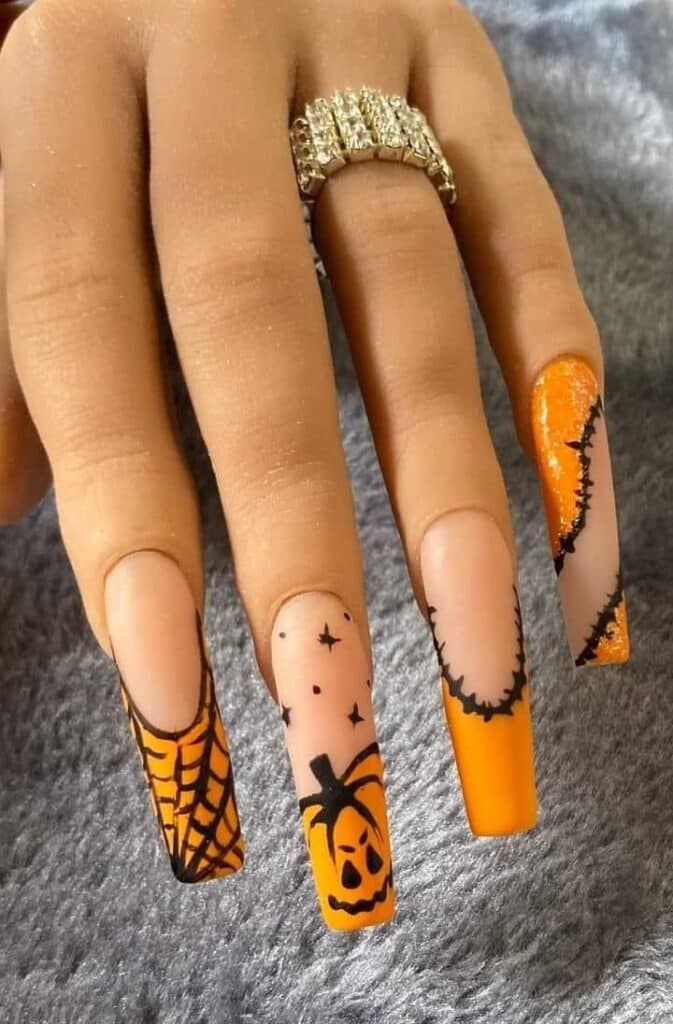
A minimalist, wearable take on ghost motifs, this look pairs a sheer base with tiny floating ghost faces tucked into the half-moon or French tip area. It’s playful without being over-the-top and suits short-to-medium nails.
What You’ll Need
- Base coat and clear top coat
- Sheer nude or pale grey polish
- White polish
- Black polish or a thin black nail art pen
- Fine liner brush or toothpick
How to Put It Together
- Prep nails: file, push back cuticles, and apply a base coat.
- Paint two thin coats of the sheer nude or pale grey and let dry.
- Using the white polish and a small brush, paint soft half-moon shapes at the tip or cuticle area to act as ghost bodies, leaving negative space around them.
- With a dotting tool or toothpick dipped in black polish, add two tiny eyes and a little surprised mouth to each ghost.
- Finish with a glossy top coat to seal the design and smooth any texture.
2. Midnight Marble with Metallic Veins
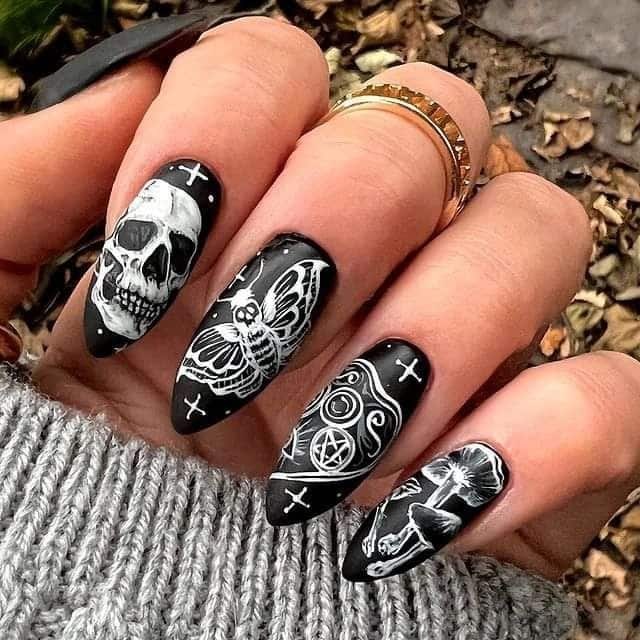
Dark marble nails feel luxe and moody for autumn evenings. The trick is to keep the base deep and add thin metallic veins for a luxe contrast—perfect for pairing with a little black dress or cozy knit.
What You’ll Need
- Base coat and top coat
- Deep charcoal or black polish
- Mid-tone grey polish
- Metallic gold or silver polish (thin brush-friendly)
- Small sponge or stiff brush
- Thin striping brush or toothpick for veins
How to Put It Together
- Apply base coat and then two coats of your deep charcoal or black polish; let dry.
- Dab small amounts of mid-tone grey onto the nail with a sponge or stiff brush and quickly smudge to create soft, cloudy marble shapes.
- Once the grey is set, use a thin brush and metallic polish to paint fine, irregular veins across the nail—less is more.
- If you like, add a tiny matte top coat to the background and a glossy top coat over the metallic veins to make them pop.
- Clean up edges and finish with a full glossy top coat to protect the art.
3. Dramatic Drip Accent with a Hint of Sparkle
For a bold, theatrical accent, a controlled drip motif can read edgy or glamorous depending on the colors. Use a deep red for a classic effect or try jewel tones for a modern twist, and add a dash of sparkle for party-ready shine.
What You’ll Need
- Base coat and high-shine top coat
- Base polish (black, deep plum, or nude)
- Deep red polish (or color of choice for the drip)
- Small angled brush or dotting tool
- Optional: red or clear glitter polish for highlights
How to Put It Together
- Start with a smooth base coat and two coats of your chosen base color; allow to dry.
- Use a dotting tool or small brush to place a rounded blob of the red polish at the nail tip.
- Pull several thin trails downward from the blob with the angled brush to form drips—vary the length for a realistic effect.
- Add a tiny touch of glitter into the center of the drop or along one edge for a wet, dimensional look.
- Seal everything with a generous top coat to smooth the texture and prolong wear.
4. Tiny Pumpkin Accent on a Neutral Canvas
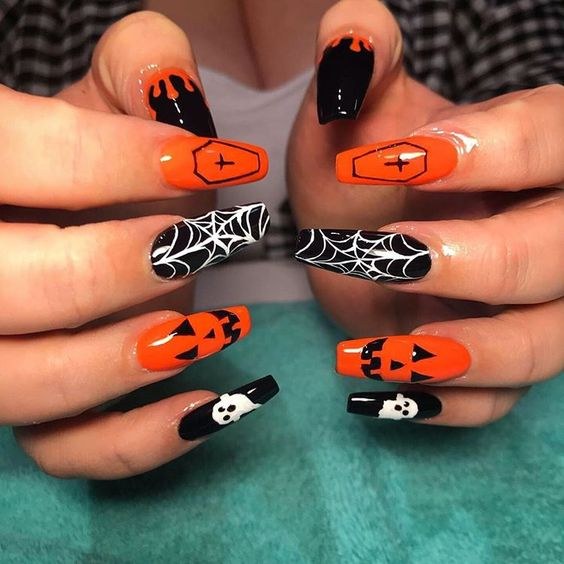
This design lets you wear a subtle nod to fall: neutral nails with a single cheerful pumpkin accent on the ring finger. It’s sweet, seasonal, and easy to customize for any outfit.
What You’ll Need
- Base coat and top coat
- Neutral base polish (cream, beige, or soft pink)
- Bright orange polish
- Olive or forest green polish for the stem
- Thin nail art brush or dotting tool
- Black or dark brown polish for minimal face details (optional)
How to Put It Together
- Apply base coat and two coats of your neutral polish; let dry thoroughly.
- On the accent nail, paint a small rounded orange oval slightly towards the tip to form the pumpkin.
- Use a thin brush and a slightly darker orange or brown to add subtle vertical lines for dimension.
- Paint a short green stem at the top of the oval, and add tiny leaves if you like.
- Optional: add a tiny jack-o’-lantern face with a thin brush or dotting tool, then finish with a top coat.
5. Delicate Webs with Tiny Spider Silhouettes
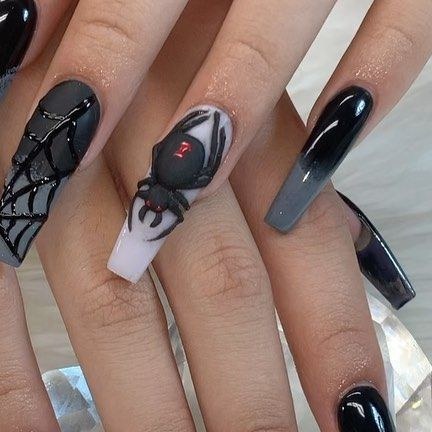
A hand-painted web is feminine and intricate when done in soft contrast—think white on deep plum or silver on matte black. A small spider silhouette adds playful creep factor without feeling heavy-handed.
What You’ll Need
- Base coat and top coat (matte top coat optional)
- Deep base polish (black, navy, or plum)
- White or silver nail art polish/pen
- Fine liner brush or nail art pen
- Optional: a tiny rhinestone for the spider body
How to Put It Together
- Apply base coat, then two coats of the deep base polish; allow to dry.
- Using a fine liner brush, draw three thin radiating lines from one corner of the nail toward the center.
- Connect those lines with a series of small curved arcs to form the web—keep the arcs slightly uneven for a natural look.
- On an accent nail, paint a small oval and add three short legs on each side to suggest a tiny spider; place a rhinestone for the body if desired.
- Finish with a top coat—matte gives a vintage vibe, glossy makes the web pop.
6. Glow-in-the-Dark Night Eyes

These playful nails reveal a second personality after sunset: pairs of glowing eyes that appear once the lights go down. It’s ideal for events where you want a little surprise without committing to full glow polish coverage.
What You’ll Need
- Base coat and clear top coat
- Dark base polish (charcoal, deep teal, or black)
- Glow-in-the-dark nail polish or glow topcoat (non-toxic)
- Dotting tools or small brushes
- A bright light source to charge the glow polish
How to Put It Together
- Prep nails and apply two coats of the dark base polish; let dry fully.
- Use a dotting tool to place paired dots of the glow polish on selected nails—varying sizes make the eyes look more curious.
- For pupils, add a tiny black dot once the glow layer is dry to anchor the look.
- Seal with a clear top coat and charge the glow areas under a bright lamp or sunlight for several minutes before heading out.
- Remember: glow effects are for fun; avoid getting polish into the skin, and follow the product’s safety instructions.
Final Thoughts
These ideas are designed to be adaptable—mix and match elements, swap colors, or simplify details to suit your skill level and nail length. A single accent nail can be just as effective as a full set, so don’t be afraid to scale designs up or down.
Have fun with the process, take your time on fine details, and protect your natural nails with a good base and top coat. If you’re trying something new or using specialty products (like glow polishes), do a quick patch test first and enjoy the little surprises your manicure brings all through the season.