Tiny Coastal Christmas Trees: Nautical Tabletop Ideas for Small Homes
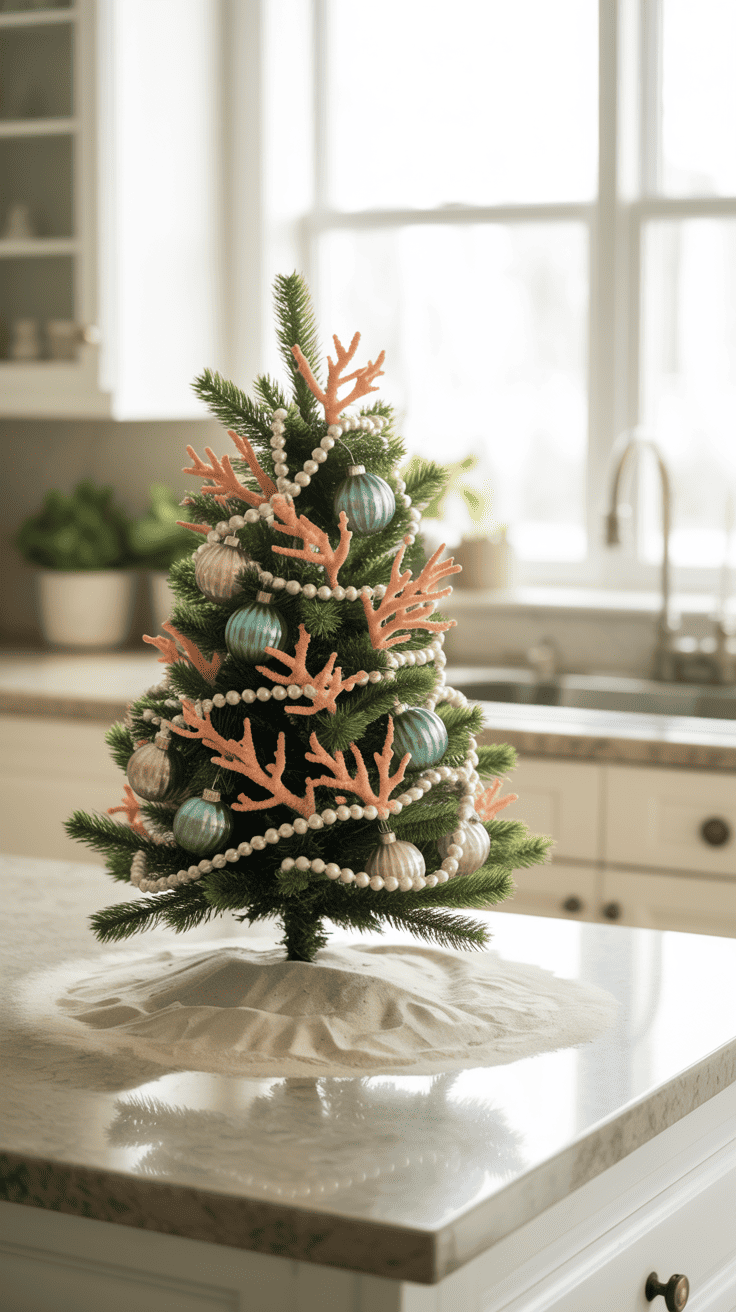
A coastal tabletop tree brings a breezy, low-profile holiday statement to apartments, studios, and other small homes. Its compact footprint creates a focal point without crowding surfaces, while natural textures—driftwood accents, shells, and woven rope—introduce a relaxed seaside vibe that fits year after year. For renters and anyone short on floor space, a miniature coastal tree delivers seasonal charm with minimal storage or maintenance needs.
This article walks through practical, space-smart ideas for creating a seaside mini tree that suits tiny living areas. You’ll find makeover concepts to customize a tabletop tree to your style, simple ways to make decorating a family event, and clear guidance on arranging ornaments, lights, and base accents so everything reads cohesive at a small scale. There’s also a concise list of essential supplies and setup tips to keep the display tidy and stable. Whether you prefer a pared-back driftwood sculpture or a twinkling, shell-adorned centerpiece, these suggestions will help you craft a coastal tabletop tree that feels festive, functional, and true to your space. No special skills required—just a little patience and an eye for scale.
1. Why a Coastal Tabletop Tree Is Ideal for Small Homes
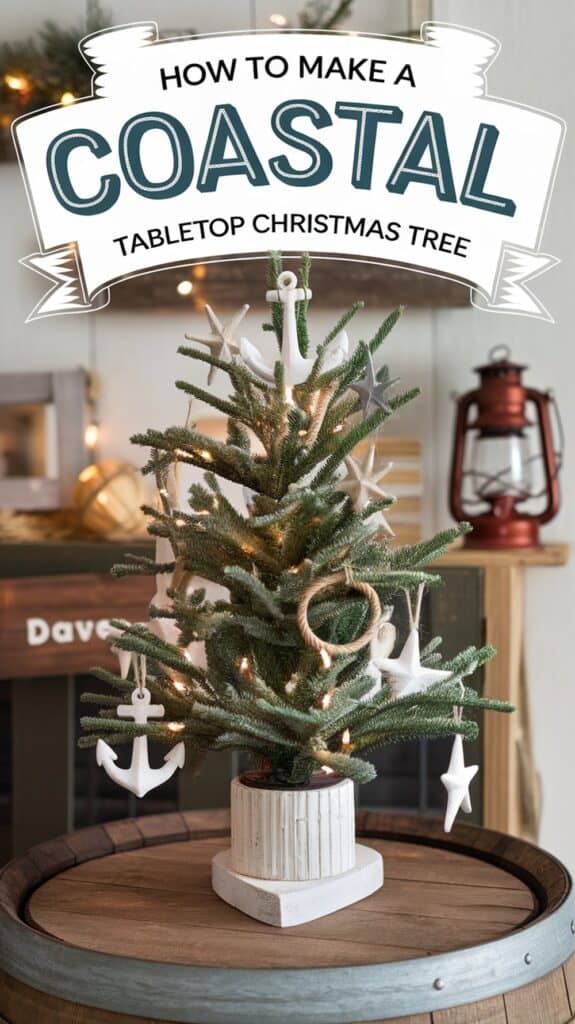
A coastal tabletop Christmas tree brings a fresh, relaxed look to a compact space without overwhelming it. Its small size makes it easy to tuck into corners, on kitchen islands, or on a narrow console, so you get holiday cheer where you want it without rearranging furniture or sacrificing usable surface area.
Beyond saving space, a seaside-themed mini tree creates a calm, uplifting vibe that stands out in winter. Soft blues, sandy neutrals, and natural textures echo beach days and inject a cheerful brightness that complements busy family life—perfect for those who want seasonal spirit with a breezy, lived-in feel.
Materials
- – Small tabletop tree (real branch, faux mini tree, or a driftwood branch assembled upright)
- – Sturdy base (mason jar, terracotta pot, weighted stand, or shallow tray)
- – Sand, pebbles, or rice to anchor the base
- – Battery-operated micro LED string lights
- – Assortment of small sea-themed ornaments: shells, starfish, tiny buoys, wooden anchors
- – Rope, twine, or thin netting for garland
- – Clear fishing line or ribbon for hanging lightweight pieces
- – Hot glue gun or craft glue (optional)
- – Small decorative mat or tray to place under the tree
Steps
- 1. Choose the right spot: pick a surface that’s out of high traffic but still visible—windowsills, kitchen islands, hall consoles, or a bedroom dresser work well. Measure height to ensure the tree won’t block sightlines or doorways.
- 2. Secure the base: place the tree in your chosen container and fill with sand, pebbles, or rice until the trunk is stable and won’t tip easily. If using a jar or pot, press filler around the base for extra support.
- 3. Add lights first: wrap battery micro lights from the base up, tucking the battery pack discreetly at the back or under the base. Battery lights avoid cords running across surfaces.
- 4. Layer textures: drape a short length of rope, twine, or a thin net around the tree for that coastal feel. Keep the garland loose and airy—avoid heavy draping on a small tree.
- 5. Place focal ornaments: choose two or three slightly larger pieces (a couple of starfish or a tiny wooden boat) and place them evenly around the tree to anchor the look.
- 6. Fill with smaller pieces: hang shells, beads, and lightweight keepsakes on clear fishing line. Space ornaments so the tree breathes; less is more on a small canvas.
- 7. Kid- and pet-safe zones: put all fragile or small choking-hazard items out of reach. Reserve the lower branches for soft, nonbreakable decorations or felt ornaments.
- 8. Finish the base: set the tree on a small mat or tray and scatter a few shells or pebbles around the pot for a finished vignette.
- 9. Quick teardown and storage: remove lights and fragile ornaments, store in a shallow box with dividers or wrapped in tissue; keep the tree folded or nested in a closet or under-bed bin.
This approach keeps decorating simple, family-friendly, and distinctly coastal—big charm with a tiny footprint.
2. Seaside Mini Tree Makeovers
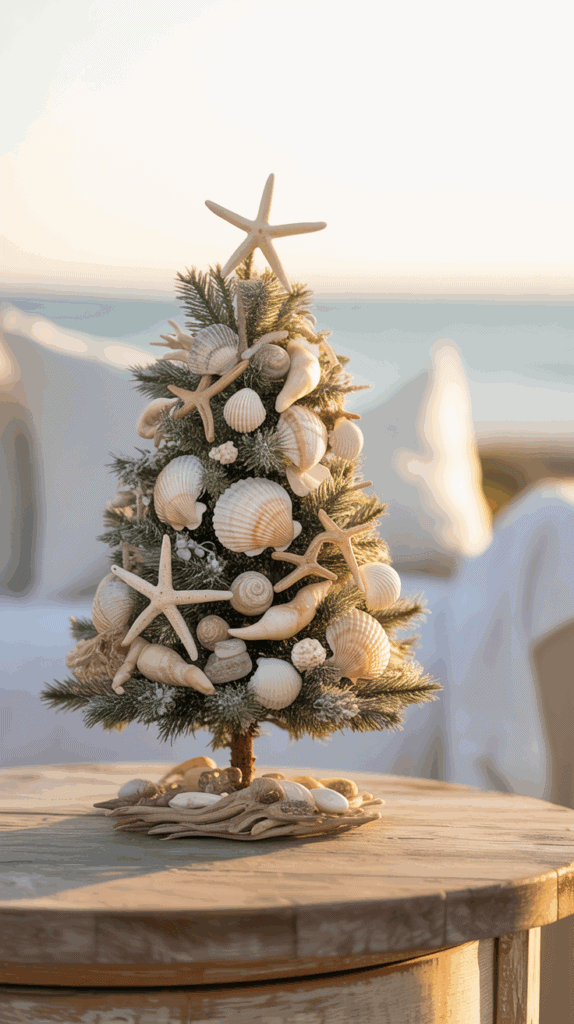
Bring a pocket of the shore into a tiny room with a coastal tabletop tree that feels curated, not cluttered. Small trees—bottle-brush cones, 12–24″ faux pines, or simple foam cones—are the perfect blank slate for beachy textures: sea glass, shells, driftwood, and soft rope. These designs work well in apartments, on console tables, or as a focal point on a narrow mantel, and they’re easy for the whole family to help assemble with a little adult supervision for hot-glue moments.
Before you begin, pick one dominant element (glass, shells, or wood) and limit your palette to two or three colors to keep the look tidy. Use battery-powered micro LEDs and lightweight ornaments so the tree stays balanced and safe on a small surface. If children are joining, pre-thread lights and reserve stronger adhesives for adults—let little hands place the lighter embellishments and test arrangements before anything is permanent.
Materials
- – Small tabletop tree (12–24″ faux pine, bottle-brush, or foam cone)
- – Battery-powered micro LED lights
- – Assorted sea glass, small shells, and tiny sand dollars
- – Driftwood bits or small wooden slices
- – Natural rope or jute twine
- – Low-temp glue gun and glue sticks (adults only)
- – Clear fishing line or ornament hooks
- – Small shallow tray, saucer, or weighted planter as a base
- – Optional: white paint or chalk for “frosted” tips, lightweight star or shell topper
Steps
- 1. Prep the base: choose a shallow tray or weighted planter to prevent tipping. If using a foam cone, anchor it into the base with a dab of hot glue or a wooden dowel for stability.
- 2. Light first: wrap battery-powered micro LEDs evenly, tucking the pack behind the base so it’s hidden but accessible for battery changes.
- 3. Arrange your focal material: decide whether sea glass, shells, or driftwood will dominate. Place larger pieces near the bottom to steady the silhouette.
- 4. Attach lighter items: tie small shells or sea glass pieces to fishing line and hang them close to branch tips for movement and sparkle. Use ornament hooks for pre-drilled items.
- 5. Build texture: weave thin rope or jute loosely as a garland, or wrap once around the midsection for a nautical accent. Keep it snug so it doesn’t overwhelm branches.
- 6. Add driftwood accents: glue small driftwood pieces flat against the base or vertically layered like tiny shelves; adults should handle the hot glue.
- 7. Create a gentle frosted look: dry-brush white paint on tips of driftwood or branch ends for a soft, seaside-snow effect.
- 8. Top it: use a lightweight shell, knot of ribbon, or small starfish as a topper—avoid anything heavy.
- 9. Final balance check: step back and move a few items if one side feels crowded; trim any long hanging lines.
- 10. Store smart: when the season ends, tuck fragile pieces in tissue paper and pack the whole tree in a labeled bin for next year.
These small, sea-inspired trees are quick to assemble, easy to adapt, and bring a calm, beachy note to compact living spaces.
3. Include Everyone: Easy Ways to Make Decorating a Family Event

Get everyone involved without a fuss by turning your coastal tabletop tree into a shared project. Small children can do simple, safe tasks, older kids can take on more detailed decorations, and adults handle the fragile or electrical bits. When each person has a clear role, the activity stays fun and manageable — and the finished tree reflects the whole family’s personality.
Keep expectations relaxed and celebrate the mishaps. Handmade ornaments, unevenly hung garlands, and mismatched seashells are the parts of the tree that tell stories later. Schedule decorating after a calm meal or snack, set out a dedicated crafting station, and let children choose one or two special pieces they made themselves. This keeps energy high and reduces frustration, and it makes those ornaments feel earned.
Materials
- – Small tabletop tree (or potted branch)
- – Battery-operated string lights
- – Lightweight hooks or ornament ribbon
- – Assorted shells, sand dollars, small driftwood pieces
- – Felt, craft foam, paper, and stickers
- – Child-safe scissors and glue sticks; low-temp glue gun for adults
- – Pipe cleaners, beads, twine, and buttons
- – Cookie sheets or trays for project areas
- – Labels or small tags and a permanent marker
- – Storage box for fragile/finished ornaments
Steps
- 1. Pick roles: assign a spot-picker, a lights-placer (adult), ornament hangers (kids), and a photographer. Keep the roles age-appropriate so everyone enjoys their job.
- 2. Prep the workspace: cover the table with a washable cloth or paper, set out trays with materials, and have wipes and a small bin for scraps handy.
- 3. Make simple keepsakes: guide kids to glue shells to flat discs, thread beads on pipe cleaners, or cut felt shapes to hang. Encourage writing a name and year on a tag for each child’s ornament.
- 4. Protect precious pieces: collect fragile or heavy decorations in the storage box and let adults place them last and out of reach.
- 5. Decorate in stages: add lights and a few base ornaments first, then let each family member place one or two creations. Spread this over several evenings as a countdown to add anticipation.
- 6. Start a ritual: take a quick family photo by the tree, read a short holiday book together, or let one child pick the soundtrack for the session.
- 7. Wrap up with cleanup: assign one child to wipe the table, one to gather supplies into the box, and an adult to store sharp tools.
- 8. Store memories: keep a small notebook with each year’s ornament tags and a photo so the story of your coastal tabletop grows every season.
4. How to Style a Coastal Tabletop Tree in a Tiny Space
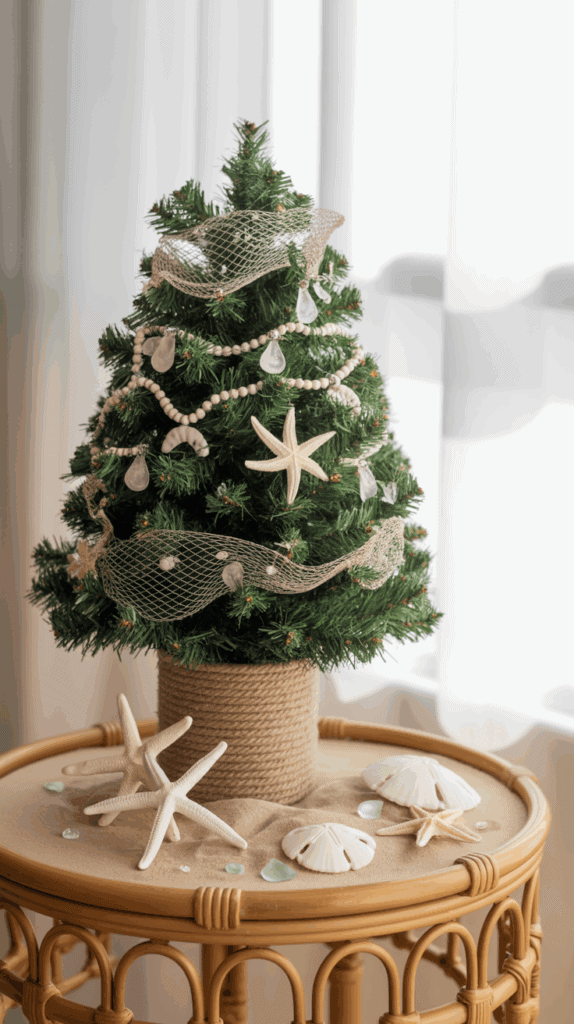
A small coastal tabletop tree can make a big design statement with just a few thoughtful choices. Pick a spot that gets noticed but won’t be in the path of daily chaos — think a hall console, kitchen island corner, or a bedroom windowsill. Keep scale in mind so the tree complements the surface it sits on; a slightly elevated base and a tidy surrounding vignette will help it read like a deliberate décor piece rather than a leftover ornament.
Prioritize stability and simple accents that read as ‘coastal’ without turning the display into clutter. Natural textures, soft blues or sandy neutrals, and a few tide-pool inspired pieces will convey the beachy theme. Use battery-powered or low-heat micro LED lights for safety and ease, and choose a weighted or well-anchored base so the tree endures pets, kids, and the occasional bump without collapsing.
Materials
- – Small tabletop tree (real or faux)
- – Weighted container (basket, ceramic pot, or metal tin)
- – Pebbles, sand, or marbles to weigh down the base
- – Non-slip pad or folded cloth
- – Battery-operated fairy lights or micro LED strand
- – A tree skirt substitute: jute, soft blue cloth, or burlap
- – A few coastal accents: shells, glass pebbles, driftwood piece, lantern, or framed beach photo
- – Ribbon or thin twine (for optional anchoring)
- – Hot glue or craft putty (to secure loose decorations)
Steps
- 1. Choose the placement: pick a surface that’s visible but not a traffic hazard. Corners, mantels, and bedside tables work well.
- 2. Create a stable base: set the tree into your chosen container and fill around the trunk with pebbles, sand, or marbles until solid. Test for wobble and add more weight if needed.
- 3. Add a slip-proof layer: place a silicone mat or folded cloth under the container to keep the display from sliding on smooth surfaces.
- 4. Light it first: wrap a battery-operated light strand into the branches, hiding the battery pack behind the base or inside the container beneath fabric so it’s accessible but out of sight.
- 5. Dress the trunk and base: cover any gaps with a jute mat, burlap, or soft blue cloth to echo coastal colors and hide filler materials.
- 6. Apply simple ornaments: favor few, larger pieces over many tiny ones—think starfish, glass pebbles, or small driftwood ornaments—to keep the look tidy and durable. Use putty or hot glue for pieces that need extra holding power.
- 7. Layer nearby décor: raise the tree slightly on a cake stand or stack of books, then place a lantern, shell bowl, or framed beach photo at varying heights to create visual interest.
- 8. Anchor if needed: tie a discreet ribbon from the tree to a sturdy object behind the surface for extra security in busy households.
- 9. Final check: ensure lights are on a timer if desired, cords are out of reach, and fragile items are placed higher or swapped for child-safe versions.
Follow these steps and you’ll have a coastal tabletop tree that feels intentional, safe, and effortlessly festive — even in the smallest nooks.
5. Essential Supplies and Setup Tips for a Coastal Tabletop Christmas Tree
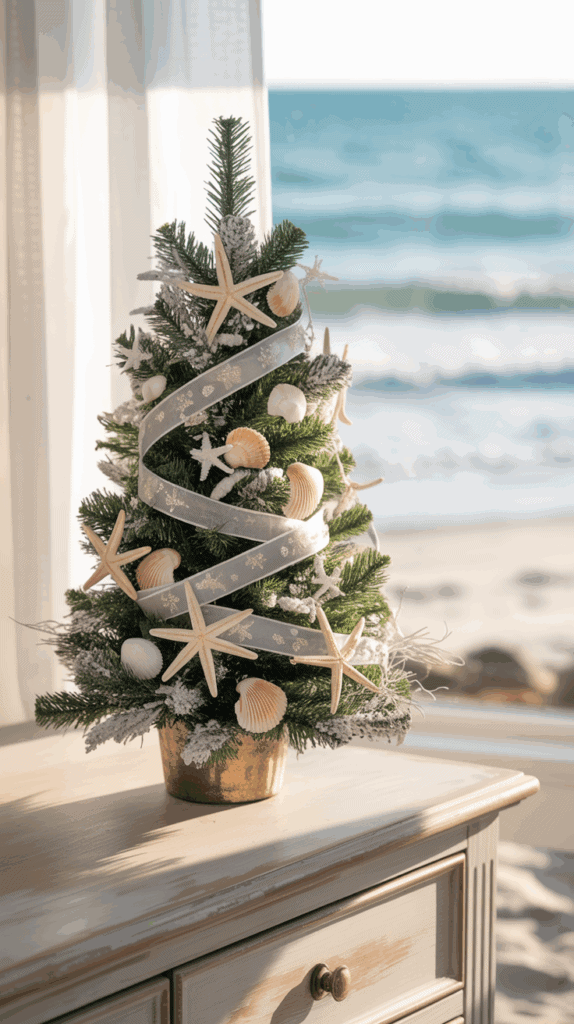
Start by choosing a foundation and a color story that feel relaxed and seaside — think driftwood tones, washed aquas, soft sand, and pearly whites. A lightweight base and low-profile lights let the tree look luminous without crowding small surfaces. Keep textures natural (rope, wood, shells) to evoke the shore, and add one unexpected pop—coral pink or a hint of brass—to keep the arrangement from reading too monochrome.
Safety and balance matter as much as style for small-space displays. Prioritize lightweight ornaments and battery-powered micro-lights, secure any heavier decorations with glue or wire, and anchor the tree in a shallow tray filled with sand or pebbles if it’s freestanding. If kids or pets will be near the display, avoid fragile pieces and tuck electrical components out of reach.
Materials
- – Tabletop tree (mini faux pine, bottle-brush, driftwood stack, or small twig/palm)
- – Assorted coastal ornaments (faux starfish, sand dollars, small shells, seahorse figurines)
- – Faux sea glass, wooden beads, and short lengths of jute or natural rope for garlands
- – Battery-powered micro-lights or fairy lights
- – Lightweight topper (small starfish, shell cluster, or mini sail)
- – Ribbon, tulle, or mesh in sandy neutrals or sea tones
- – Hot glue gun and glue sticks (or strong craft adhesive)
- – Thin craft wire or fishing line for hanging and securing
- – Small shallow tray or pot and filler (sand, pebbles, or aquarium gravel) to stabilize the base
- – Scissors and small pliers
Steps
- 1. Select your base and finalize the palette: pick one dominant tone (sea blue or sandy neutral) plus one accent color.
- 2. Anchor the tree in a shallow tray or pot and add sand or pebbles to weigh it down; this prevents tipping on counters.
- 3. Wrap battery-powered lights around the tree first, hiding the battery pack behind the trunk or under the filler so it’s accessible but discreet.
- 4. Arrange garlands (rope, beads, or faux sea glass) in loose loops, spacing them to create depth rather than tight wraps.
- 5. Group ornaments by size and material; place the largest or heaviest items lower and toward the back to maintain balance.
- 6. Attach delicate shells or starfish with a small dab of hot glue or secure them with thin craft wire; use fishing line for floating or dangling pieces.
- 7. Add the topper last—choose a lightweight option and secure it with wire or a small glue dot so it won’t tip the tree over.
- 8. Tuck ribbon, tulle, or netting into gaps for texture; avoid over-cluttering to keep the coastal calm.
- 9. Do a final safety check: ensure lights aren’t pinched, battery pack is cool and secure, and nothing can be pulled off easily by children or pets.
- 10. When the season ends, store ornaments in labeled compartments with padding so the coastal pieces are ready for next year.
Final Thoughts
Whether you want a subtle nod to coastal living or a bolder seaside centerpiece, a tabletop tree is an ideal seasonal solution for small homes. Keep proportions in mind, stick to a consistent materials palette, and involve family or friends to make decorating both fun and efficient.
Start by choosing the right base, limiting ornaments to prevent clutter, and anchoring the display with a simple base treatment—sand, pebbles, or a woven mat all work well. With a few thoughtful choices and simple setup steps, your coastal tabletop tree will bring holiday warmth and ocean-side calm to even the tiniest space.