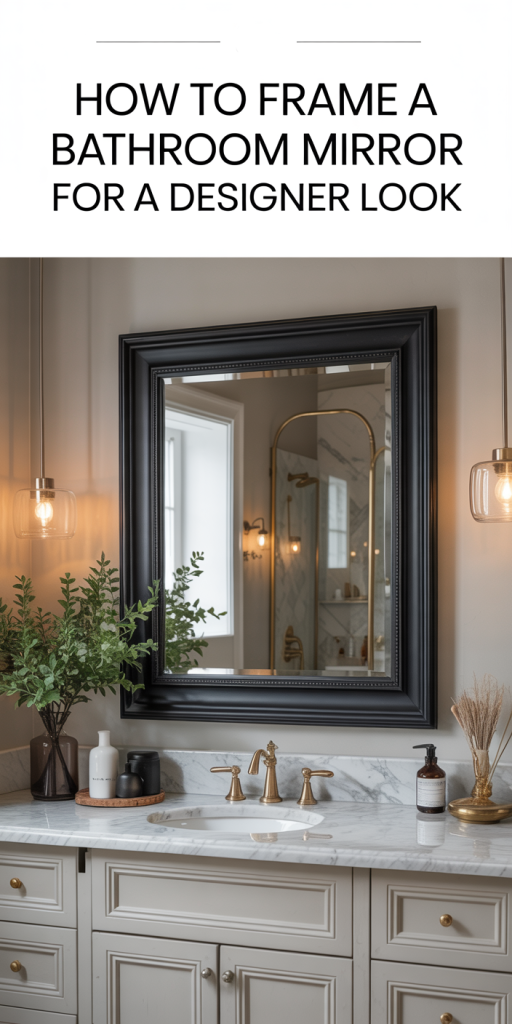
A framed mirror transforms a bathroom from functional to finished, instantly elevating style, adding definition, and making the space feel more intentional. In this guide we walk through everything you need to plan, build, and finish a framed bathroom mirror that reads like a designer touch. Whether you’re wrapping an existing mirror with trim, installing a prebuilt frame, or building a custom mitered surround, we’ll share clear, practical steps, material choices, and stylistic tips so your project looks high-end and lasts.
Why Framing a Bathroom Mirror Matters
A bathroom mirror is one of the most visible design elements in a bath, and framing it is one of the most cost-effective ways to make a big impact. Framing does more than decorate: it creates a visual boundary that anchors the vanity, introduces texture and color, and can harmonize the mirror with other finishes (vanity, lighting, faucets).
From an aesthetic standpoint, a frame provides scale and context. An unframed mirror can feel utilitarian or unfinished: adding a frame gives the eye a deliberate stopping point and helps balance surrounding elements like sconces or shelving. Practically, framing also protects mirror edges from chips and hides any imperfections where the mirror meets the wall.
We should also consider psychological effect: framed mirrors read as furniture-like pieces rather than building materials. That’s why designers often use frames to make a standard bathroom read like a curated room. A well-chosen frame can take a simple remodel to boutique-hotel territory without the hotel-price tag.
Planning Your Framed Mirror Project
Good results start with careful planning. Rushing into materials or methods risks poor fit, mismatched scale, or finishes that don’t hold up to moisture. We’ll break planning into three foundational checks: measurements, location/orientation, and assessment of the wall and mirror condition.
Measurements And Mirror Assessment
Accurate measurements are non-negotiable. Start by measuring the full width and height of the mirror and the visible glass edge on all four sides. If the mirror is recessed into the wall or has a substrate behind it, note that depth as well.
Measure the distance from the mirror’s edge to surrounding elements: vanity top, backsplash, electrical outlets, light fixtures, and medicine cabinet doors. If you plan to mount a built-up trim, account for the added projection from the wall, you don’t want it colliding with towel bars or cabinet doors.
We recommend recording three measurements for width and height (top, middle, bottom: left, center, right) because many mirrors aren’t perfectly true. If the mirror varies by more than 1/8″ over a long run, opt for a floating or gap-tolerant frame method rather than a tight mitered frame.
Choosing The Right Location And Orientation
Orientation matters: horizontal mirrors read wider and work well over double vanities: vertical mirrors add height, which can be a nice counterpoint in rooms with low ceilings. Keep symmetry in mind for paired sinks, or embrace asymmetry over a single sink to accommodate lighting.
Consider where light falls and how reflections will behave. We avoid placing mirrors directly opposite a strong light source that will glare back into the users’ eyes. Instead, aim for balanced illumination from sconces or an overhead light that’s compatible with the frame style and thickness.
Finally, think about sightlines from other parts of the bathroom. A framed mirror will be noticed: choose an orientation that complements how the room reads from the door and the shower.
Assessing Wall And Mirror Condition
Before building anything, inspect both the mirror and the wall. Look for loose or lifting mirror edges, delamination, silvering spots, or backing failure, these are signs the mirror may need replacing rather than framing.
Check the wall for flatness and structural soundness. Moisture-damaged drywall, warped plaster, or uneven tile surfaces require remediation. For tile walls, confirm that tiles are securely adhered: for drywall, test for soft spots which indicate prior water damage.
If the mirror is glued to the wall, determine the adhesive type and how the mirror is mounted. Some older mirrors were glued with adhesives that make removal risky. If removal isn’t necessary, choose a frame method that doesn’t require taking the mirror off the wall, such as a floating frame or built-up trim attached to the wall surrounding the mirror.
Selecting A Frame Style That Suits Your Bathroom
Picking the right frame style is where the project becomes personal. Frames can be minimalist and modern, classic moulding, raw wood, or metal, each choice shifts the bathroom’s overall vibe. We’ll examine matching frame style to design, proportion, and finish choices so the frame reinforces your intent rather than distracting from it.
Matching Frame Style To Bathroom Design
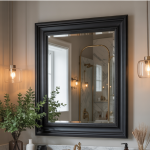
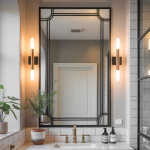
Start with your bathroom’s existing character. For contemporary baths with clean lines and polished chrome, slim metal frames or painted minimal profiles often work best. Traditional bathrooms benefit from ornamental moulding or warm-stained wood. Rustic or farmhouse baths pair well with reclaimed wood or distressed finishes.
Neutral frames, matte black, soft brass, or natural wood, are safe bets when you want longevity and flexibility. If the bathroom has a signature finish (for example, aged brass fixtures), echoing that tone in the frame ties the palette together. But avoid exact matches that feel contrived: instead aim for complementary tones that create cohesion without being literal.
Scale, Proportion, And Visual Weight
Proportion is crucial. A frame that’s too thin can look lost against a large mirror: one that’s too chunky can dominate a small vanity. As a rule of thumb:
- Mirrors under 24″ wide: use frames 1–1.5″ thick.
- Mirrors 24″–48″ wide: use frames 1.5–2.5″ thick.
- Mirrors over 48″: consider 2.5″–4″ or built-up profiles for balance.
Visual weight also depends on color and finish. A dark, matte frame reads heavier than a light-stained wood of the same thickness. When in doubt, mock up the width with cardboard or painter’s tape to preview the visual impact before cutting materials.
Color, Finish, And Texture Considerations
Finish choices influence style and maintenance. High-gloss finishes reflect light and look modern but show water spots more readily. Low-luster or satin finishes hide imperfections and feel more forgiving in bathrooms. For metal frames, finishes like brushed nickel, aged brass, or matte black are durable and coordinate well with typical bathroom hardware.
Texture adds depth: a hand-scraped wood frame or a hammered metal profile lends tactile interest that photographs well in real estate and rental listings. When choosing color, sample pieces in the actual bathroom lighting. Colors shift dramatically between daylight and warm bathroom lamps, and we want the frame to work in the room’s daily light conditions.
Materials, Tools, And Supplies You’ll Need
Material choice affects durability, moisture resistance, and cost. We’ll outline common options, the essential tools for a clean install, and budgeting/sourcing tips so you can plan realistically and avoid run-ins with supply delays.
Common Frame Materials And Pros/Cons
Here are the most commonly used frame materials and what to expect from each:
- Solid Wood (pine, poplar, oak): warm, easy to finish, can be mitered. Pros: great finish options: easy to repair. Cons: susceptible to humidity unless sealed.
- MDF (Medium-Density Fiberboard): stable and inexpensive. Pros: smooth factory finish: less warping. Cons: edges swell if exposed to water: needs sealing.
- PVC or PVC‑trim: water-resistant and low maintenance. Pros: excellent for humid bathrooms: paintable. Cons: can look plastic if not finished carefully.
- Metal (aluminum, brass): sleek and durable. Pros: resistant to moisture, modern look. Cons: requires specialized tools for mitering and joining: higher cost.
- Reclaimed Wood: high character and texture. Pros: unique look, sustainable. Cons: extra prep work (de-nailing, sealing) and variability.
For wet or steam-heavy bathrooms, favor moisture-resistant options (PVC, sealed wood, or metal). Whatever material we choose, a good sealer and finish will extend life significantly.
Essential Tools And Fixings
A typical framing job will require:
- Tape measure and spirit level (or laser level)
- Pencil and painter’s tape for mockups
- Miter saw or a hand miter box for 45° cuts (for mitered frames)
- Circular saw or jigsaw for custom shapes
- Drill/driver and small bit set
- Construction adhesive rated for mirrors and trim (mirror-safe adhesives)
- Mirror mounting clips or French cleat system for heavier frames
- Finishing nails or trim screws and wood glue for joinery
- Sandpaper, primer, and paint or stain and topcoat
- Caulk (paintable silicone or hybrid polymer) and a caulking tool
For metal framing or precise miters, you may also need a metal chop saw or a professional metal shop to pre-fab the frame.
Always use mirror-safe adhesives and avoid strong solvents that can attack mirror backing. For heavy or large mirrors, plan for reinforcement with mechanical fasteners rather than relying solely on adhesive.
Budgeting And Sourcing Materials
Budget can vary widely: a basic MDF trim wrap might run $30–$100 in materials: a custom metal or solid oak mitered frame can exceed $400–$1,000 depending on size and finish. Prebuilt snap frames fall in between.
Source materials from local lumberyards for a wider selection of solid woods, or from big-box stores for convenience and consistent MDF or PVC options. For specialty metal finishes or custom profiles, check local metal fabricators or online frame makers.
We recommend buying 10–15% more material than calculated to account for mistakes and matching grain in wood. If you’re hiring a framer or carpenter for a complex design, get multiple quotes and check photos of previous work to ensure they can deliver the finish you expect.
Step‑By‑Step Framing Methods (With Variations)
There are several reliable methods to frame a mirror, each with trade-offs in skill, finish, and removability. We’ll walk through four common approaches so you can pick the one that fits your mirror condition and skill level.
Using A Prebuilt Framed Mirror Or Snap Frame
This is the simplest route when existing mirrors are thin or removable. Prebuilt frames (or snap frames) clamp onto the mirror’s edges and are often made from metal or plastic with a fastening system.
Steps:
- Measure mirror dimensions and order a prebuilt frame sized to those measurements (many vendors offer custom sizes).
- Clean mirror edges and follow the frame manufacturer’s instructions, usually sliding the profile over the glass and locking it with screws or clips.
- Install any required backer or retainer strips and mount the framed assembly to the wall using the recommended hardware.
Advantages: fast, factory finish, minimal tools. Disadvantages: less custom, may be more costly per size, and some snap frames can look commercial if the profile is too generic.
Building A Built‑Up Trim Frame Directly On The Mirror
A built-up trim frame is an excellent DIY-friendly option. It uses flat mouldings or layered trim pieces glued and nailed directly onto the wall surrounding the mirror, creating the look of a framed inset.
Steps:
- Mock up trim width with painter’s tape.
- Cut trim pieces (straight cuts) to fit around the mirror, coping or using butt joints where precise miters are unnecessary.
- Dry-fit pieces, then adhere with mirror-safe construction adhesive and secure with finish nails into studs or wall anchors.
- Fill nail holes, caulk seams, prime, and paint.
Advantages: forgiving with imperfect mirror edges, inexpensive, and quick. Disadvantages: the look is less refined than a true mitered frame and projects out from the wall, which might interfere with lighting.
Constructing A Floating Frame (Box Frame)
A floating frame (or box frame) surrounds the mirror with a narrow gap, giving the illusion that the mirror is hovering within the frame. This method is ideal when the mirror is glued or set into the wall and can’t be removed.
Steps:
- Build four lengths of mitered trim to form a shallow box frame (typically 1″–1.5″ deep).
- Assemble the frame with glue and brad nails, leaving the back open.
- Attach a French cleat to the frame back and the wall so the frame mounts around the mirror without touching the glass. Maintain a consistent reveal (1/8″–1/4″) between mirror edge and frame.
- Finish and hang.
Advantages: very polished look, hides imperfect edges, good for glued mirrors. Disadvantages: requires accurate miters and some woodworking skill: slightly more time-consuming.
Creating A Custom Wood Or Mitered Frame
A classic mitered frame offers the most bespoke feel and is the preferred method for high-end results.
Steps:
- Precisely measure mirror dimensions and cut four mitered pieces on a miter saw.
- Join corners with wood glue and biscuits or splines for strength: clamp until cured.
- Sand, stain or prime, and apply topcoat.
- Attach the frame to the wall around the mirror with a French cleat or by screwing through the back into wall studs: use silicone pads to keep the frame off the glass.
Advantages: premium appearance, unlimited customization. Disadvantages: highest skill and tool requirement: mistakes are costly on material wastage.
Finishing, Sealing, And Installing The Frame
A professional-looking finish requires careful surface prep, proper adhesives, secure attachment, and final sealing. We’ll cover important finishing touches and practical considerations like lighting and placement adjustments.
Surface Preparation And Adhesives
Prepare all surfaces by removing dust, oils, and soaps scum. For wood, sand edges and apply an appropriate primer or wood conditioner. For MDF or PVC, clean with isopropyl alcohol and ensure edges are sealed.
Select adhesives rated for mirrors: many construction adhesives contain solvents that can attack mirror backing. Look for products labeled “mirror-safe” or “non-staining for mirrors.” Use adhesive beads behind the frame where it contacts the wall, not directly on the glass unless manufacturer guidance allows.
When glue alone won’t provide structural support, particularly for larger frames, combine adhesive with mechanical fasteners (screws into studs, anchors for heavier assemblies).
Mounting Hardware And Secure Attachment Methods
We prefer a French cleat system for medium-to-large frames because it distributes weight evenly and allows easy removal for paint touch-ups. For heavier frames, use multiple cleats or a cleat paired with screws into studs.
Alternative methods:
- Mirror clips for prebuilt frames (ensure clip placement doesn’t stress mirror corners).
- Keyhole brackets or D-rings screwed into the back of the frame and screwed into studs.
- Long toggle bolts or heavy-duty anchors for hollow walls, though these complicate future removal.
Always verify weight ratings for hardware and, when in doubt, add mechanical redundancy so the frame remains secure over decades of humidity cycles.
Caulking, Sealing, And Paint/Finish Techniques
Caulking makes the difference between a DIY look and a pro finish. Use a paintable, mold-resistant caulk at seams between the frame and wall, especially in wet zones. Smooth the bead with a wet finger or a caulk tool for a seamless joint.
For painted frames, use a high-quality primer followed by 2 coats of semi-gloss or satin enamel for durability and cleanability. For stained wood, apply a penetrating oil or polyurethane topcoat with marine-grade properties for humidity resistance.
If the frame sits close to the mirror edge, leave a small expansion gap (1/16″–1/8″) and caulk to allow movement without cracking paint. Wipe off any adhesive squeeze-out immediately to avoid staining or difficult cleanup.
Lighting, Mirror Placement, And Practical Considerations
The frame interacts with lighting both functionally and stylistically. Sconces mounted to the mirror frame are possible if the frame is securely anchored to studs and the wiring is accessible, but we recommend mounting lighting independently to the wall or junction boxes and aligning it with the framed composition for safety and flexibility.
Leave enough clearance at the bottom of the mirror for faucet splash: at the top, avoid placing the frame so close to ceiling-mounted fixtures that it throws odd reflections. For bathrooms with steam, plan extra ventilation or choose materials that won’t delaminate with prolonged moisture exposure.
Styling And Design Tips For A Designer Look
A frame is part of a larger design ensemble. We’ll share styling strategies that help the framed mirror read like a deliberate, designer-level feature rather than an afterthought.
Layering Mirrors, Lighting, And Wall Treatments
Layering creates depth. Consider a tiled backsplash that extends behind the mirror or a textured wallpaper strip framed by the mirror. Backlit mirrors or LED perimeter lighting behind a floating frame deliver a luxe, hotel-like glow.
Combine sconces with a framed mirror for balanced, flattering light. Place sconces at eye level, typically 60″–66″ from the floor, and about 28″–36″ apart for even illumination. Avoid placing overhead downlights that cast harsh shadows unless you supplement with task lighting.
Choosing Shapes, Proportions, And Multiple Mirrors
Don’t feel obliged to stick with rectangles. Rounded and arched frames soften a modern bathroom or add contrast to linear tile patterns. For double vanities, either use a single large framed mirror for continuity or two matching frames for symmetry: mismatched frames can work if united by a common finish.
When using multiple mirrors, make sure spacing between frames is consistent and that the frames’ visual weights feel balanced with the vanity width. A general spacing rule is 2″–6″ between frames, adjusted for the overall composition.
Hardware, Shelving, And Accessory Coordination
A frame’s finish should converse with other hardware, faucet, towel bars, drawer pulls. We prefer repeating one metal finish in small doses and introducing a secondary finish through accessories to keep the look curated.
Shelving or small ledges under framed mirrors can be practical for toiletries, but keep profiles slim to avoid clutter. Consider integrated towel hooks that align with the frame’s vertical edges for a tailored appearance.
Maintenance, Cleaning, And Long‑Term Care
A framed mirror should deliver durable style with reasonable care. How we clean and maintain the frame will determine how long it continues to look designer-fresh.
Cleaning Tips To Protect Finishes And Mirror Edges
Use mild cleaners and soft microfiber cloths to clean glass. Avoid ammonia-heavy cleaners on mirrors with painted or delicate frames: ammonia can dull finishes over time. For wood frames, use a damp cloth followed by a dry one: for metal, wipe with a damp cloth and immediately dry to prevent water spots on some finishes.
Don’t spray cleaner directly onto the mirror near the frame: spray onto the cloth and wipe to prevent saturated liquid from seeping under the frame and attacking backing or adhesives. Inspect mirror edges periodically for signs of silvering or moisture ingress and address early to prevent larger failures.
Repairing Dings, Replacing Trim, And Refinish Options
Small dings in painted trim can be filled with wood filler or caulk and repainted. For stained wood, light sanding and spot-staining followed by a topcoat can blend repairs nicely. If a trim piece is damaged beyond repair, many built-up trim systems allow replacement of individual pieces without removing the entire frame.
For heavy damage or water intrusion, you may need to remove and replace the whole frame. Keep spare material from the original batch (or note its finish and paint codes) to ensure a perfect match if replacement becomes necessary later.
When To Call A Professional
Call a pro when:
- The mirror is large and heavy, installers with proper hardware and insurance should handle it.
- The mirror needs removal and the adhesive seems strong or unknown.
- You plan to integrate lighting or wiring through the frame, which requires an electrician.
- You want a custom metal frame with precise miters, metal framing often needs a fabricator.
Professionals save time and risk in complex situations. Ask for references and photos of past framed mirror installations to confirm quality.
Conclusion
Framing a bathroom mirror is a high-impact, relatively low-cost upgrade with outsized returns in style and function. By taking time to plan, choosing materials appropriate for a humid environment, and selecting the framing method that matches your skill level and mirror condition, we can create a tailored result that elevates the entire bathroom.
Remember: mock up the frame width with tape before committing, protect mirror edges with mirror-safe adhesives, and focus on finishing details, caulking, paint selection, and coordinated hardware, to achieve a designer look. When in doubt, consult a professional for heavy mirrors or integrated electrical work. With careful choices and an eye for proportion, a framed mirror can be the signature piece that makes your bathroom feel thoughtfully designed.