Chocolate Piñata Dessert Bars are a delightful fusion of flavors and textures that bring the fun of classic piñatas right to your table. Not only do they look impressive, but they also offer a scrumptious treat hiding within a chocolate shell. Whether it’s a birthday party, family gathering, or just a sweet craving we want to satisfy, these dessert bars are sure to be a crowd-pleaser. Let’s jump into the world of flavors and learn how to create our very own Chocolate Piñata Dessert Bars.
What Are Chocolate Piñata Dessert Bars?
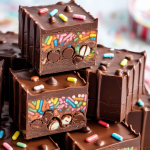
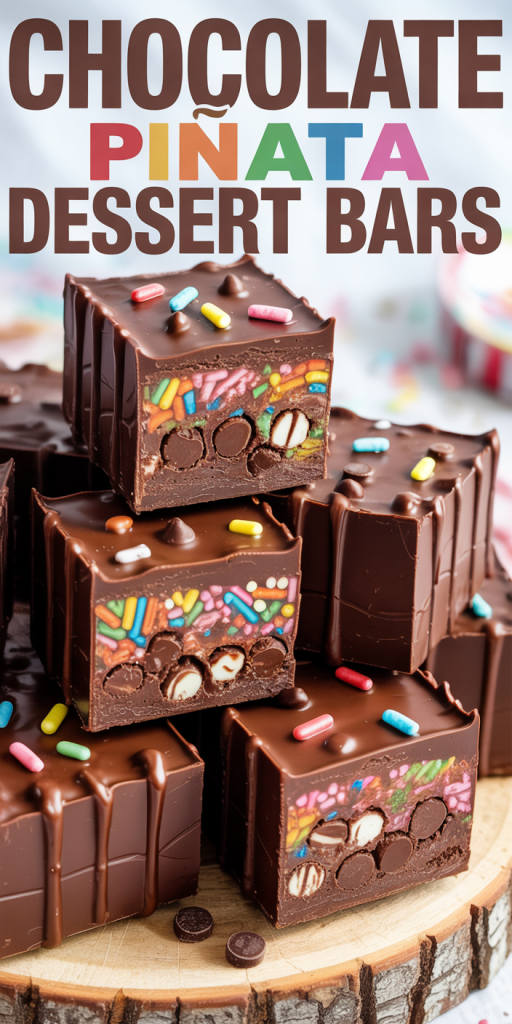
Chocolate Piñata Dessert Bars are a playful and indulgent treat made from a rich, chocolatey shell filled with a mix of sweet ingredients that can include candies, fruits, or even cake. The concept combines the excitement of breaking open a piñata filled with goodies, but in a more accessible format. Imagine slicing into a bar only to discover a surprise-filled center that spills out into a colorful, sugary delight. This dessert bar is not just about taste, it’s about the experience, making it perfect for celebrations or just an extravagant dessert for us to enjoy.
Ingredients for Chocolate Piñata Dessert Bars
To make these delicious bars, we’ll need the following ingredients:
For the Chocolate Shell:
- 12 ounces of semi-sweet chocolate chips or chopped chocolate
- 1 tablespoon of coconut oil (optional, for a smoother finish)
For the Filling:
- 1 cup of assorted candies (think M&Ms, gummy bears, or chocolate-covered nuts)
- 1 cup of mini marshmallows (for a light chewy texture)
- 1 cup of chopped fruit (dried cherries or strawberries work great)
For the Base:
- 1 cup of graham cracker crumbs
- 1/2 cup of unsweetened cocoa powder
- 1/2 cup of powdered sugar
- 1/2 cup of unsalted butter, melted
- 1 teaspoon of vanilla extract
Optional Toppings:
- Whipped cream
- Chocolate drizzle
- Fresh fruit for garnish
These ingredients will come together to create a decadent treat that not only tastes amazing but looks fantastic too.
Step-by-Step Guide to Making Chocolate Piñata Dessert Bars
Let’s get started on making our Chocolate Piñata Dessert Bars. Follow these steps:
Step 1: Prepare the Chocolate Shell
- Melt the Chocolate: In a microwave-safe bowl, combine the chocolate chips and coconut oil (if using). Heat in the microwave in 30-second intervals, stirring in between until melted and smooth.
- Mold the Shell: Take a muffin tin or silicone mold and use a brush or spoon to coat the inside with the melted chocolate, ensuring a thick enough layer to hold its shape once set. Let it chill in the refrigerator for about 15-20 minutes until hardened.
Step 2: Make the Base
- Combine Ingredients: In a mixing bowl, combine the graham cracker crumbs, cocoa powder, powdered sugar, melted butter, and vanilla extract. Stir until well combined.
- Press into Base: Take the mixture and press it firmly into the bottom of the hardened chocolate shell, creating an even layer. Return to the fridge for another 15-20 minutes to set.
Step 3: Add the Filling
- Layer the Filling: Once the base is set, carefully add a mixture of the assorted candies, mini marshmallows, and chopped fruit on top of the base layer.
- Final Chocolate Layer: Melt any remaining chocolate and pour over the top to seal in the filling. Make sure everything is well-coated for a good seal.
- Chill Again: Return to the refrigerator and let it chill for at least an hour or until everything has set nicely.
Step 4: Release from Mold
- Remove the Bars: To release the dessert bars, gently push from the bottom of the mold or tin. If using a muffin tin, you may need to use a knife to carefully loosen the edges before popping them out.
- Break Open the Shell: Once removed, we can place the Chocolate Piñata Dessert Bars on a serving platter. To enjoy, simply tap the top with a mallet or spoon to break open the chocolate shell and let the candies spill out.
Tips for Perfect Chocolate Piñata Dessert Bars
To ensure our Chocolate Piñata Dessert Bars turn out perfectly every time, we’ve gathered some helpful tips:
Use Quality Chocolate
- Choosing high-quality chocolate can make a significant difference in taste and texture. Dark, milk, or even white chocolate can be used based on our preference.
Don’t Rush the Melting Process
- Melting chocolate too quickly can cause it to become grainy. Continuous stirring and using low heat will help us achieve a smooth consistency.
Distribution of Filling
- Be creative with the filling. We can mix our favorites, but distributing them evenly will ensure that every bite is delicious.
Chill Times
- Adequate chilling time is crucial. If the chocolate or base isn’t sufficiently set, bars might not hold their shape when served.
Experiment with Flavors
- We can try variations like adding flavored extracts (like almond or peppermint) or using different types of nuts and fruits for filling.
Serving Suggestions and Variations
There are so many ways to serve and customize our Chocolate Piñata Dessert Bars. Here are some fun ideas:
Serving Suggestions
- Whipped Cream: A dollop of freshly whipped cream on the side adds an extra touch of sweetness.
- Chocolate Drizzle: A drizzle of melted chocolate over the top enhances the visual appeal and flavor.
- Fruits: Fresh fruits such as strawberries or raspberries can be served alongside for a refreshing contrast.
Variations
- Nutty Version: Incorporate different nuts like almonds or pistachios into the filling for a crunchy texture.
- Cookie Crust: Instead of a graham cracker crust, we can use crushed cookies for a different flavor profile.
- Seasonal Themes: Adjust the filling to fit seasonal themes, like using candy corn for Halloween or red and green candies for Christmas.
Storage and Shelf Life
To keep our Chocolate Piñata Dessert Bars fresh:
- Storage: Place them in an airtight container, separated by parchment paper, to prevent them from sticking together.
- Refrigeration: These bars can last up to one week in the fridge, but they’re best enjoyed fresh within the first few days.
- Freezing: If we want to make them ahead of time, they can be frozen for up to three months. Just make sure to wrap them tightly to avoid freezer burn.
- Thawing: To enjoy, simply transfer the bars to the fridge and let them thaw for a few hours before serving.
Conclusion
Our journey to create Chocolate Piñata Dessert Bars has been both fun and delicious. This treat brings joy not just through its flavors, but also through the experience of breaking into it to reveal a treasure trove of delights inside. With simple ingredients and a straightforward method, we can whip up these bars for any occasion or just when the mood strikes for something sweet. The possibilities are endless, and we encourage you to get creative with the fillings and themes. So, gather your ingredients, and let’s start making some wonderful memories, one Chocolate Piñata Dessert Bar at a time.