Haunted Harbor: Nautical Halloween Ideas to Transform Your Coastal Porch
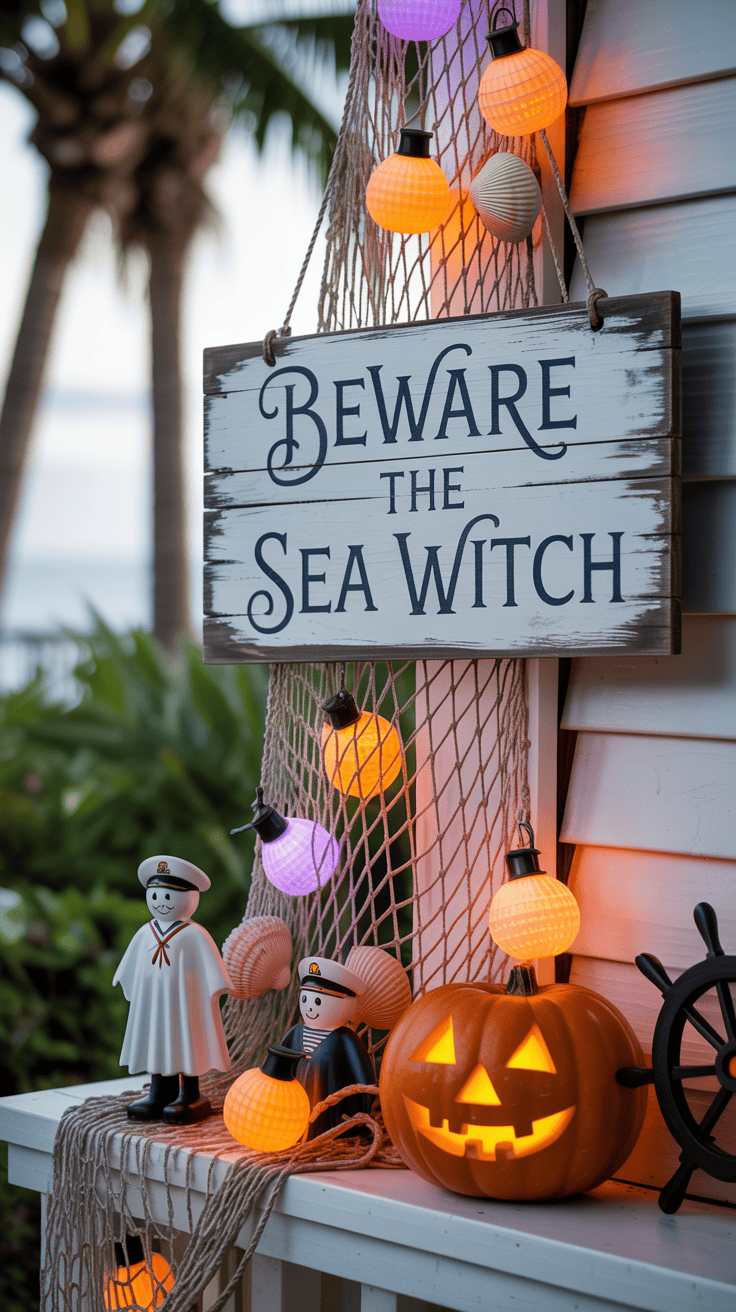
Merging salty sea style with spooky season charm creates a porch that feels both whimsical and atmospheric. Whether you live in a beachfront bungalow or a harbor-front condo, nautical accents—think weathered ropes, lanterns, ship’s wheels, and driftwood—make natural stand-ins for traditional Halloween decor. This guide walks through key elements to anchor a seaside-themed Halloween setup, from statement pieces to kid-friendly crafts, so your entryway feels cohesive, coastal, and just a little eerie.
You’ll get practical ideas in five focused areas: must-have nautical pieces to set the tone; why a maritime approach works especially well on a porch; smart places to scout decorations and inspiration; layout and safety tips for staging your spooky scene; and easy ocean-themed crafts kids can help make. The goal is to mix texture and lighting with a thoughtful balance of fright and finesse—options range from subtle, elegant nods to the sea to full-on haunted harbor theatrics. Read on to build a porch that welcomes trick-or-treaters and wows neighbors with clever seaside spirit.
1. Set Sail for Spooky: Key Nautical Pieces to Anchor Your Porch
Bring a coastal twist to Halloween by leaning into texture, weathered finishes and a few well-placed sea-themed props. Think like a shipwright: use layers and levels rather than crowding every surface. Start with larger silhouette items — a faux mast, oversized buoy, or a draped sail — then add smaller accents (shell clusters, netting, lanterns) to create depth and guide visitors’ eyes across the porch. The aim is a haunted harbor that feels intentional, not cluttered: salty, a little eerie, and entirely welcoming for trick-or-treaters.
When planning, focus on contrast and safety. Pair dark, matte pieces (black flags, tattered fabric) with warm, flickering lights to keep the vibe spooky but kid-friendly. Use battery-operated candles and secure heavier items against wind or curious hands. Repurpose beach finds — driftwood becomes signposts, glass floats become lanterns — and keep paint colors limited to two or three tones (deep navy, weathered white, and a pop of orange) to maintain a cohesive look that reads clearly from the street.
Materials
- – Fishing net or decorative netting
- – One or two weathered buoys or painted beach balls
- – Thick rope or twine (various lengths)
- – Old sheet or canvas for sails/flags
- – Battery-operated lanterns, tea lights, or string lights (warm white or orange)
- – Assorted shells, driftwood pieces, and sea glass
- – Small pumpkins (real or faux) and acrylic paints
- – Mason jars or clear bottles for candle housings
- – Zip ties, heavy-duty outdoor tape, and command hooks
- – Wooden crate or crate-like box for a treasure chest
- – Scissors, hot glue gun, outdoor-grade sealant spray
Steps
- 1. Plan your focal point: decide whether a ghost ship mast, stacked buoys, or a treasure chest will be the main draw and position it so it’s visible from the sidewalk.
- 2. Prepare large pieces: paint buoys or beach balls in your chosen palette and wrap with rope for a nautical look. Seal painted surfaces with an outdoor spray for durability.
- 3. Make a sail or flag: cut and distress an old sheet, attach to a broom handle or driftwood mast, and secure with twine. Add a skull stencil or simple sea creature silhouette for theme.
- 4. Light safely: place battery lanterns inside mason jars filled with a little sand and shells; tuck flameless tea lights inside to avoid open flames.
- 5. Pumpkin styling: paint designs (anchors, tentacles, mermaids) before carving to reduce mess. Glue small shells or driftwood accents for texture.
- 6. Drape netting along railings and over rail spindles; weave string lights through the net for subtle illumination.
- 7. Create small vignettes: stack crates with a bottle “message,” coins, and a stuffed octopus or skeleton sailor to invite closer inspection.
- 8. Secure everything: anchor tall items with weights or ties, use zip ties for nets, and test stability in wind.
- 9. Add finishing touches: scatter sea glass, tuck in a few faux seaweed sprigs, and adjust lighting levels for the right glow.
- 10. Run a safety check each evening: ensure pathways are clear, lights are functioning, and nothing is loose.
With a few sturdy anchors and layered accents, your coastal porch will feel like a spooky shipwreck come to life — playful for kids, atmospheric for grown-ups, and built to last through the season.
2. Bring Coastal Charm to Halloween: Why a Nautical Porch Wins
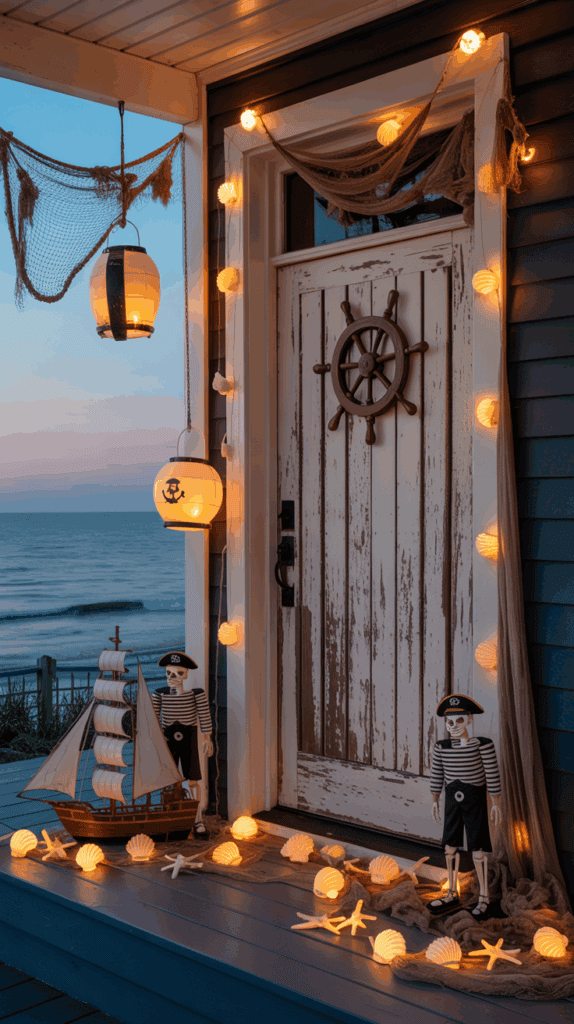
Nautical Halloween decor blends the laid-back warmth of beach life with the playful spookiness of October. Salt‑worn textures, rope accents, and sea‑inspired silhouettes give you a fresh alternative to the usual witches-and-ghosts setup—one that feels welcoming to neighbors and irresistible to kids. The mix of natural materials and clever lighting creates atmosphere without leaning too hard into fright, so your porch feels festive from dusk until the last trick-or-treater leaves.
Choosing a coastal approach also makes decorating easier and more sustainable. Many elements you already own for summer—lanterns, nets, shells, driftwood—can be repurposed with a few seasonal tweaks. Painting a pumpkin with an anchor, turning a paper lantern into a jellyfish, or draping a fishing net with tiny LED lights gives classic Halloween touches a seaside spin while keeping setup and storage simple year after year.
Materials
- – Assorted pumpkins (real or faux)
- – Paper lanterns or round craft lanterns
- – Fishing net or decorative netting
- – Driftwood pieces or reclaimed wood planks
- – Assorted shells and faux seaweed (or green crepe paper)
- – Rope and twine
- – Battery-operated LED lights or fairy lights
- – Acrylic paint and brushes (white, navy, teal, coral, black)
- – Scissors, hot glue gun, clear craft glue
- – Sand and clear glass vases or jars
- – Battery tea lights or flameless candles
- – Optional: small skeletons, faux crab/sea creatures, pirate hat or flag
Steps
- 1. Pick a palette and focal point: choose 2–3 main colors (e.g., navy, sea‑glass green, and coral). Decide whether your focal point is the door, a bench display, or a porch corner.
- 2. Prepare your anchor piece: turn a plank of driftwood into a sign (“Harbor of Haunts” or similar) with stenciled letters, or lean a ship’s wheel against a wall and surround it with lights.
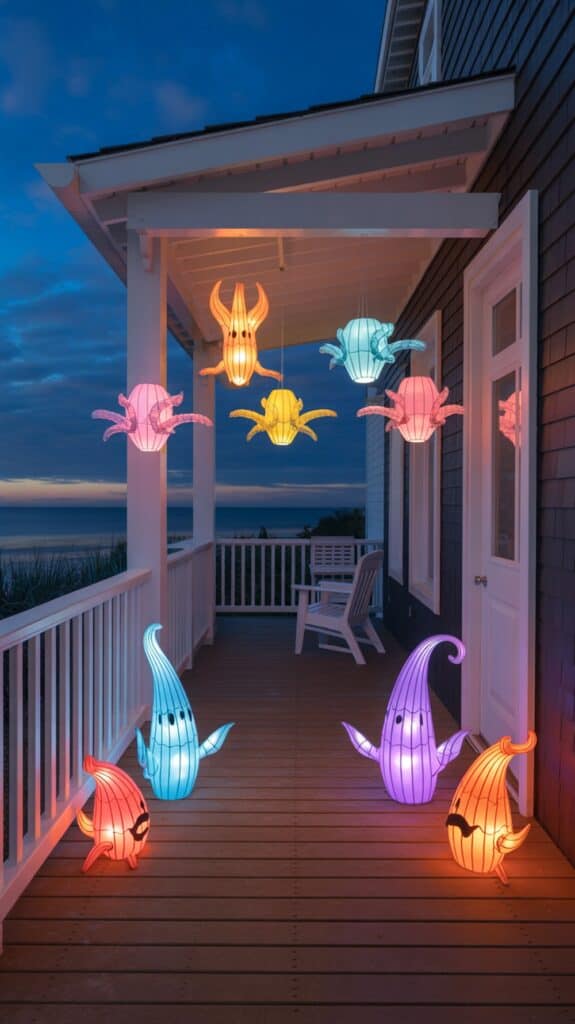
- 3. Make jellyfish lanterns: attach strips of crepe paper, ribbon, or thin fabric to the inside rim of a paper lantern with hot glue; add a battery LED at the top and hang at varying heights for a floating effect.
- 4. Nautical pumpkins: paint anchors, octopus arms, or crab motifs on pumpkins using simple stencils or freehand with contrasting colors. Add rope collars or glued shells for texture.
- 5. Layer textures: drape the fishing net across railings or over a porch box, weave in fairy lights, and tuck shells and faux seaweed into the knots for spooky seaside depth.
- 6. Create lantern vases: fill clear jars with sand, a few shells, and a battery tea light for instant coastal glow—place in clusters on steps.
- 7. Weatherproof & safety check: secure all hanging items from wind, use battery lights instead of open flames, and elevate fragile decor out of puddles.
- 8. Store smart: keep a tub with shells, rope, and paint for quick refreshes next year; most pieces repurpose easily for other seasons.
With a few adaptable pieces and simple crafts, your porch can capture the magic of the coast while staying friendly and fun for every Halloween visitor.
3. Where to Scout Nautical Finds and Spark Porch Ideas
There’s a special thrill in tracking down pieces that make a coastal porch feel like a spooky seaside scene. Start by thinking like a treasure hunter: browse seasonal aisles, stroll through local boutiques and artisan markets, and keep an eye on thrift stores for lanterns, rope, and weathered containers you can repurpose. Social media and idea boards are great for quick inspiration—collect images, save seller names, and build a short wish list before you buy so each new find has a purpose.
Practicality matters on a porch exposed to wind, salt, and rain. Prioritize durable materials (metal lanterns, treated wood, marine rope) and plan simple ways to weatherproof delicate pieces. Involve family members—kids love beachcombing for shells and driftwood—and treat shopping as part of the decorating story: half the fun is the hunt, and mixing found objects with one or two purchased accents keeps the display fresh without a big spend.
Materials
- – Sturdy tote or basket for hauled finds
- – Notepad or phone notes app for inspiration and a wish list
- – Camera or phone to photograph displays you like
- – Gloves and sand-appropriate footwear for beachcombing
- – Zip ties, clear outdoor tape, and weatherproof adhesive
- – Small can of clear spray sealant (for shells, painted items)
- – Fishing net or decorative netting
- – Marine-style rope or thick twine
- – A few lanterns or hurricane jars with LED candles
- – Assorted driftwood pieces and smooth shells or sea glass
- – Lightweight signs or wooden blanks for painted messages
- – Storage bins with lids for seasonal organization
Steps
- 1. Make a short plan: decide on a theme (e.g., haunted harbor, pirate ship, ghostly lighthouse) and list three must-have elements—anchor, lanterns, and a focal prop.
- 2. Scout locally: visit coastal boutiques, artisan markets, and thrift stores early in the season to find unique, weathered pieces that fit your theme.
- 3. Search smart online: save sellers and pin images to a single board or folder. Use specific keywords like “driftwood decor,” “nautical lantern,” or “sea shell garland” to narrow results.
- 4. Schedule a beachcombing trip: bring your tote, gloves, and a small brush. Collect interesting driftwood, shells, and rope—only take what’s abundant and allowed by local rules.
- 5. Photograph and catalog finds and inspiration: label items in your notes so you remember sources and where you’ll use them on the porch.
- 6. Prepare and protect: clean and seal fragile pieces, secure decorations with zip ties or adhesive, and store extras in labeled bins for next year.
- 7. Add one new statement piece each season to evolve the display without starting over.
With a compact kit and a simple plan, hunting for coastal Halloween decor becomes a fun, sustainable tradition rather than a last-minute scramble.
4. Stage Your Seaside Spook: Porch Layout and Safety Tips
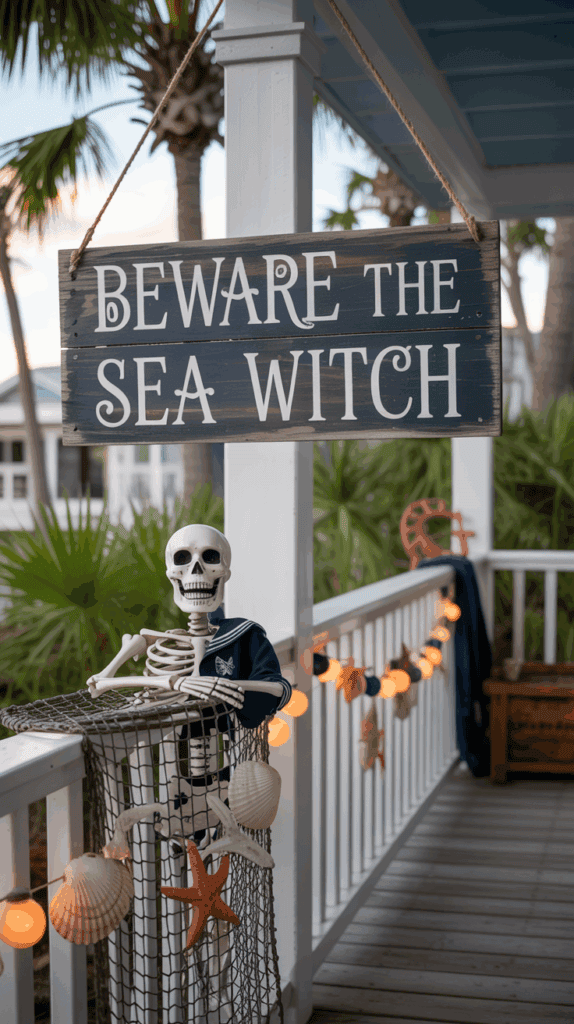
A successful nautical Halloween porch feels like a tiny haunted harbor: playful, layered, and easy to move through. Start by imagining the path people will take from the sidewalk to your door. Keep that main lane free of anything that could trip small hands or swirl away in a gust of ocean wind. Anchor large pieces—crates, faux treasure chests, and lantern stands—along the sides so they frame the approach without blocking it. Choose battery-powered lights and secure hanging items with clear fishing line or heavy-duty hooks so rattling décor won’t startle little ones or become a hazard.
Think about sightlines at dusk and after dark. Place light sources near steps and uneven surfaces, and avoid bright glare that hides shadows where kids step. Hang nets and ropes up high or flat against a wall; if you want that shipwreck look, drape nets over railings rather than across the walkway. For candy distribution, set a stable table or wide bucket within easy reach of children and parents so there’s no leaning or stretching that could topple props. A quick evening walk-through with the porch lit will reveal any trouble spots before guests arrive.
Materials
- – Battery-powered lanterns and flameless candles
- – Waterproof LED string lights
- – Decorative crates or wooden boxes (lightweight)
- – Faux treasure chest or sturdy basket for candy
- – Thick fishing line, zip ties, and adhesive hooks
- – Heavy-duty outdoor rope or nautical netting
- – Sandbags or weighted anchors for lightweight props
- – Non-slip welcome mat and outdoor-safe rug
- – Plush sea creatures or weatherproof décor accents
- – Outdoor-rated extension cords and cord covers (if needed)
Steps
- 1. Clear the path: remove shoes, planters, and loose rugs from the main walk.
- 2. Map your layout: place large props along the sides, leaving a 3-foot clear walkway.
- 3. Anchor big pieces: secure crates and chests to railings or walls with zip ties or brackets.
- 4. Hang high, not across: suspend nets and decorative ropes above head height or attach flat to walls.
- 5. Light intentionally: position lanterns near steps and darker corners; use flameless candles for safety.
- 6. Tuck and protect cords: cover cords with outdoor-rated covers and tape to avoid trip risks.
- 7. Weight light décor: add sandbags or hidden weights to lightweight props in breezy spots.
- 8. Test in low light: walk the porch at night to spot shadows or hazards and adjust as needed.
- 9. Set a stable candy station: use a wide, low table or heavy basket within easy reach of children.
- 10. Final check: secure everything, ensure signage is visible, and keep an eye on weather changes.
5. Coastal Kids' Crafts: Spooky Sea Projects for the Porch
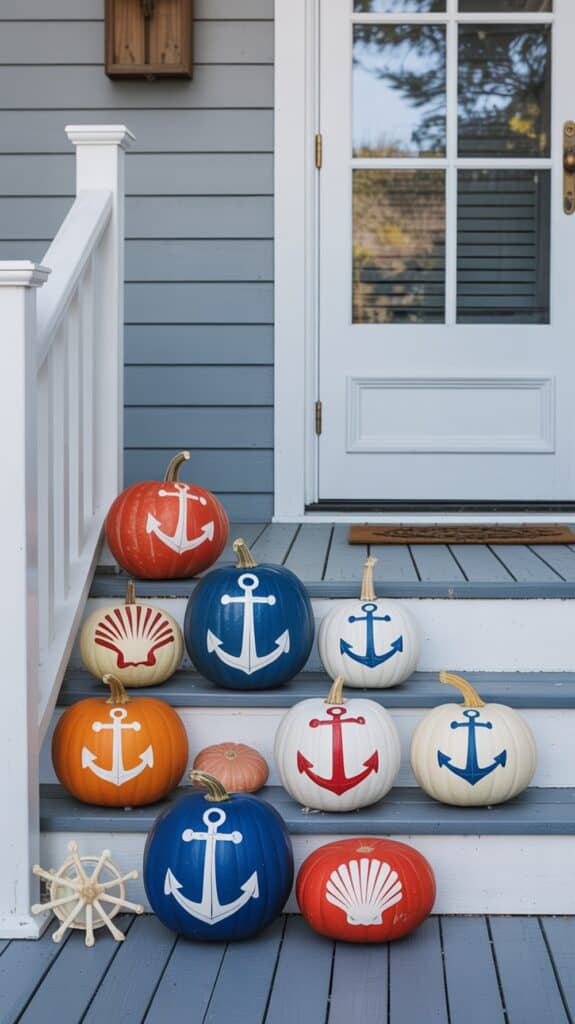
Kids love to help when the decorations come out — and turning summer beach finds into Halloween accents is a great way to get them invested. Simple, tactile projects let children use their imaginations while contributing real pieces to your porch display. These two crafts are forgiving, portable, and easy to adapt to whatever shells, driftwood, or bottles you already have on hand.
Before you begin, set up clearly labeled workstations and gather everything within reach so the little ones can focus on creative choices rather than hunting for supplies. Keep sharp tools and hot glue under adult supervision, offer aprons or old shirts for messy bits, and encourage kids to tell a short story about each finished piece — that adds personality and makes the finished vignette feel like a shared creation.
Driftwood & Shell Spookmobile
Materials
- – Lightweight driftwood pieces or small branches
- – A variety of shells, small starfish, pieces of sea glass
- – Twine, fishing line, or thin ribbon
- – Scraps of cheesecloth or lightweight white fabric
- – Googly eyes, black marker, or small stickers
- – Scissors and a craft awl or thick needle (adults only)
- – Optional: small bells, beads, or orange/black craft ribbon
Steps
- 1. Have kids sort and choose shells and small beach finds; let them arrange combinations on a flat surface so they can visualize the mobile.
- 2. Adults use an awl or drill to make tiny holes in shells where needed; threading thicker shells with twine works, while lighter pieces can be tied with ribbon.
- 3. Make tiny ghosts by wrapping small bits of cheesecloth over a pellet of tissue or a bead, tying the neck with twine, and adding eyes with a marker or stickers.
- 4. Tie each chosen element to lengths of twine or fishing line at varying intervals so they hang at staggered heights.
- 5. Attach the strings to the driftwood, balancing the weight as you go so it hangs level. Add bells or beads if you want soft sound.
- 6. Hang the mobile from a porch beam or hook and adjust the spacing so pieces move freely in the breeze.
Message-in-a-Spooky-Bottle
Materials
- – Clean glass bottles or jars with lids
- – Coarse sand, tiny shells, or pebbles
- – Small strips of paper or parchment
- – Jute twine or ribbon, optional faux seaweed or raffia
- – Small plastic critters (spiders) or glitter for fun
Steps
- 1. Let kids pour a shallow layer of sand into the bottle and add tiny shells or pebbles.
- 2. Have each child write a short spooky note, map, or drawing on a strip of paper and roll it up.
- 3. Tuck the message inside, add a curl of raffia or faux seaweed, and seal the bottle.
- 4. Wrap the neck with twine or ribbon and tuck in a tiny plastic spider or a scrap of cheesecloth for a ghostly cap.
- 5. Group several bottles on steps or a windowsill so light can shine through the glass and reveal the hidden messages.
Both crafts are simple to personalize — encourage kids to name their pieces and display them proudly as part of your porch’s seaside Halloween scene.
Final Thoughts
A nautical take on Halloween is an invitation to get creative with natural materials, weathered finishes, and moody lighting. By focusing on a handful of anchor pieces, safe and functional staging, and a few DIY touches, you can craft a porch that reads as coastal and seasonal without feeling cluttered. Involving kids with simple sea-themed projects adds personality and makes decorating a shared family tradition.
Use these ideas as a starting point—adapt colors, textures, and intensity to suit your home and neighborhood. With a little planning and a few well-placed accents, your porch can become the perfect haunted harbor: welcoming, memorable, and unmistakably seaside.
