We want our homes to look deliberate, layered, and comfortable, like a designer spent thoughtful hours on every corner, without draining our bank accounts. The good news: design principles are more about choices and restraint than about price tags. In this guide we’ll walk through a practical, room-by-room approach that designers use, demystify which pieces are worth investing in, and give actionable, budget-friendly techniques that make a real visual difference. Bring measured curiosity and a tape measure: we’ll handle the rest.
Set a Clear Vision and Budget
A coherent home starts with clarity. Before we buy anything, we need a clear vision and a realistic budget. These two anchors keep impulse purchases and stylistic confusion at bay.
Define Your Style With Simple Exercises
Start with three quick exercises to define what we truly like, beyond trendy Pinterest boards:
- The ‘Favorites’ Test: Collect five images that consistently draw us in (magazines, Instagram saves, photos). Identify repeating themes: warm vs. cool tones, minimal vs. layered, modern vs. vintage. Those repeating themes are our style DNA.
- Closet Analogy: Look at the clothes we wear most often. Do we favor tailored neutrals or bold prints? Our wardrobe often echoes our interior preferences and narrows design choices quickly.
- A One-Sentence Mission: Write a short mission statement for the space. For example: “A calm, layered living room that’s inviting for evenings with friends.” That sentence will guide furniture, color, and accessory decisions.
We avoid the common mistake of declaring a style label immediately (e.g., “mid-century modern”). Instead, we describe feelings and functional needs, cozy, bright, airy, family-friendly, then let specific pieces express that.
Create a Realistic Budget and Priorities List
A budget isn’t about limiting creativity: it’s about prioritizing impact. We recommend the following steps:
- Total Spend: Decide how much we’ll allocate to the whole project or per room. Being realistic prevents compromise later.
- Prioritize: List three priorities (e.g., sofa comfort, durable flooring, statement lighting). Allocate larger percentages to those priorities and trim elsewhere.
- Categorize Costs: Break down the budget into categories, furniture (40%), lighting (15%), paint + walls (10%), textiles (10%), accessories/art (10%), contingency (15%). Adjust based on our priorities.
- Timeline vs. Cost: If we spread purchases over months, we can wait for sales and find better pieces. If we need a quick refresh, accept that costs might be higher.
With vision and budget aligned, our project becomes manageable and strategic rather than expensive and chaotic.
Plan Smart: Layout, Flow, and Focal Points
Designers think of space before stuff. When we plan layout and focal points first, every furniture purchase serves a purpose.
Optimize Furniture Placement for Flow and Function
Measure, then measure again. We always start by mapping the room dimensions and the scale of major openings (doors, windows). From there:
- Anchor with a Rug: A rug sets the conversation area. Size matters, ideally all front legs of seating sit on the rug in living rooms. Smaller rugs make rooms feel chopped.
- Sightlines: Arrange seating to allow visual flow across the room. Avoid blocking pathways. If traffic naturally cuts through a seating area, reposition furniture to create clear walkways.
- Conversation Zones: In multi-purpose rooms, create smaller zones, a reading nook, a media area, by using rugs, lighting, or shelving as subtle dividers.
- Proportions Over Trends: Resist tiny, trendy furniture if the space demands presence. A too-small sofa in a large room feels cheap: oversized pieces in small rooms overwhelm.
We test layouts with masking tape on the floor or a free room-planning app. Mocking up the arrangement prevents costly returns.
Design Strong Focal Points Without Big Spending
Focal points anchor perception. They don’t need to be expensive: they need intent.
- Paint an Accent Wall: A bold or deep color on one wall instantly creates a built-in focal point.
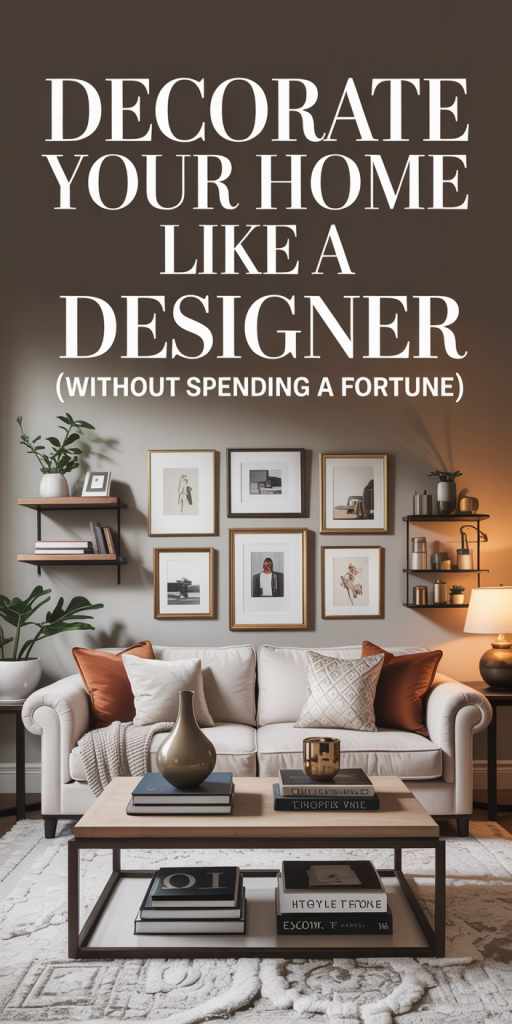
- Art or Gallery Wall: Large-scale art feels designerly. We don’t need to buy original paintings, high-quality prints or thoughtfully framed photographs work just as well.
- Fireplace Styling: If we have a fireplace, style the mantel with layered objects, books, a sculptural object, and a plant, for an immediate focal area.
- Statement Mirror: Mirrors provide both focus and light. A large mirror above a console or sofa multiplies perceived space and reads as a curated choice.
Focal points should be simple, singular, and intentional. Too many competing centers dilute the design.
Mix High Impact, Low Cost Pieces
One designer trick we rely on: mix a few quality, timeless purchases with several affordable, high-impact items. The combo reads curated and expensive without the price tag.
Where to Spend vs. Where to Save
Knowing where to allocate funds is everything. Spend more on items that are both seen often and used daily: save on the ephemeral or decorative.
Spend on:
- Sofa or Bed: These are used constantly and set the room’s tone. Choose neutral upholstery that can handle wear.
- Rug (if it’s anchoring the space): A well-chosen rug defines scale and can be a long-term investment.
- Key Lighting: A central chandelier or quality floor lamp changes ambiance immediately.
Save on:
- Accent Chairs and Side Tables: Trendy or colorful pieces are easy to replace.
- Artwork and Accessories: We can rotate or swap these affordably.
- Curtains when made from simple, budget-friendly fabrics like linen blends that look good when hung well.
A simple rule: spend where function and longevity intersect with visibility.
Affordable Sources for Designer-Look Finds
We don’t have to rely on one place. Here are proven sources and strategies:
- Thrift and Vintage: Hunt at estate sales, thrift shops, and vintage furniture dealers. A simple reupholster or new knobs can transform a find.
- Online Marketplaces: Sites like local marketplaces and curated secondhand platforms often have high-quality pieces at a fraction of retail.
- Discounted Outlets and Floor Models: Closeout stores and showroom floor models are great for slightly imperfect but well-made items.
- Sales and Seasonal Discounts: Sign up for emails from our favorite retailers and buy during major sale periods.
- DIY Customization: A new coat of paint, fresh hardware, or reupholstery customizes a budget piece to look more expensive.
With patience and a shortlist of target items, we can hunt for steals that read designer-made.
Use Color, Texture, and Lighting Like a Pro
Color, texture, and lighting are the trinity of evocative spaces. They’re affordable tools that dramatically change perception.
Simple Color Schemes That Elevate a Room
We recommend starting with a 60-30-10 rule: 60% dominant color (walls), 30% secondary (furniture), 10% accent (pillows, art). Keep these principles in mind:
- Favor Neutrals with a Twist: Instead of plain beige, choose warmed greige or a soft gray-green. It’s subtle but more refined.
- One Bold Accent: Introduce a single saturated color, mustard, teal, or deep terracotta, in pillows, a throw, or a chair to add life.
- Test Paint in Context: Paint looks different at various times of day. Test large swatches on multiple walls before committing.
We avoid matching paint to online images. Instead, let natural light and existing textiles guide our palette.
Layering Texture for Depth and Warmth
Texture is what keeps neutrals from feeling flat. Layers create visual interest without buying new furniture.
- Mix Hard and Soft: Pair smooth woods or metals with boucle, wool, or linen textiles.
- Vary Scale: Combine large-pattern rugs with small-scale textures like knit throws and woven baskets.
- Add Organic Elements: Wood, stone, and greenery introduce tactile warmth.
Texture is cumulative, small additions (a seagrass basket, a plush throw) add up to a rich, lived-in look.
Lighting Strategies That Transform Space
Good lighting is non-negotiable. We design lighting in layers:
- Ambient: Overhead fixtures or recessed lights set the overall glow.
- Task: Reading lamps, pendant lights over kitchen islands, these provide function.
- Accent: Wall sconces, picture lights, and uplighting create drama and focus.
A few practical tips:
- Use warm bulbs (2700K–3000K) to make spaces feel inviting.
- Dimmer switches instantly shift mood and are relatively inexpensive upgrades.
- Aim for multiple light sources per room rather than relying on a single central fixture.
Great lighting disguises imperfections and makes colors harmonize more naturally.
Edit, Edit, Edit: Declutter and Curate
Editing is where rooms stop feeling like showrooms and start feeling intentional. We trim possessions and curate surfaces with a designer’s restraint.
Decluttering Techniques That Reveal Design Opportunities
Decluttering is less about minimalism and more about purpose. Try these exercises:
- The 90/90 Rule: If we haven’t used or loved an item in 90 days and won’t in the next 90, remove it.
- Box It for 30 Days: Store doubtful items in a box out of sight. If we don’t need them, donate or sell them.
- One Surface, One Purpose: Designate surfaces for specific functions. Clear the rest to emphasize the object that belongs there.
Decluttering also reveals architectural details or furniture placement possibilities that were previously hidden.
Styling Surfaces With Purpose and Restraint
We style with intentional clusters rather than scattering many small items:
- Rule of Three: Group objects in odd numbers, three or five pieces form a visually pleasing cluster.
- Scale Matters: Mix low and tall items to create a mini landscape on a console or shelf, stacked books, a vase, and a sculpture work well.
- Negative Space: Leave breathing room. An intentionally empty area signals confidence in our choices.
When we style with restraint, each object reads as a chosen piece rather than clutter.
DIY and Easy Upgrades That Look Custom
Small, targeted DIYs can make a rental or inexpensive piece feel bespoke. We prioritize projects that add significant visual impact with modest effort.
High-Impact DIYs: Paint, Trim, Hardware, and Fabric
- Refinish or Paint Furniture: Chalk paint or a quality satin finish can give an old dresser a modern life. Distress lightly for a layered look.
- Add Trim and Molding: Installing simple picture-frame molding or baseboard upgrades transforms flat walls into architectural features without huge cost.
- Swap Hardware: New knobs and pulls instantly modernize kitchens and dressers. Choose finishes that complement lighting and metal accents across the room.
- Re-cover Cushions or Throw Pillows: Recovering cushions in a better fabric (linen, wool blends) elevates a sofa’s appearance affordably.
- DIY Headboards: A painted plywood or upholstered headboard adds a custom feel for a fraction of a bespoke piece’s price.
We always test techniques on inconspicuous spots first and take our time to get clean lines and finishes.
When to Hire a Pro for Small Jobs
Some tasks are worth professional help:
- Electrical Work: Any rewiring or fixture installation that touches wiring should be done by a licensed electrician.
- Structural Changes: Moving walls or altering load-bearing elements needs a contractor and permit.
- Complex Upholstery: Full reupholstery of a sentimental or high-value piece may be better left to an expert.
We balance cost vs. risk: if a job will cost more in corrections than in initial professional help, we hire the pro.
Sustainable and Long-Term Choices
Design that lasts is both beautiful and sustainable. We make choices today that reduce waste and create enduring spaces.
Selecting Durable, Timeless Pieces Over Trends
Commit to adaptability. When we buy classic shapes and neutral colors for primary pieces, the room can shift with accents rather than full replacements.
- Focus on Construction: Joints, frame materials, and cushion quality determine longevity.
- Classic Silhouettes: A well-proportioned sofa or a solid wood dining table will stay relevant for years.
- Refinishability: Solid wood pieces can be refinished: composite materials usually can’t.
This approach often costs a bit more up front but lowers lifetime spend and environmental impact.
Smart Repurposing and Upcycling Ideas
- Refinish Instead of Replace: Sanding and staining a tired table can give it a new life.
- Secondhand with Purpose: Hunt for pieces that only need minor repairs or reupholstery.
- Repurpose Elements: Old doors become headboards: crates become shelving: vintage frames become mirrors.
Sustainability is also about giving things time to age gracefully. Patina and wear can be beautiful when integrated intentionally.
Pulling It All Together: A Room-By-Room Checklist
We follow a checklist to ensure each room receives tailored attention without overthinking small decisions.
Key Steps for Living Rooms, Bedrooms, Kitchens, and Entryways
Living Room:
- Measure and choose a rug that anchors the seating area (all front legs on rug if possible).
- Invest in a comfortable sofa: layer with two throws and three pillows mixing textures.
- Choose three levels of lighting: overhead, task (floor/table lamps), and accent (sconces or picture lights).
Bedroom:
- Prioritize the bed: neutral base, quality mattress, layered bedding (fitted sheet, duvet, textured throw).
- Create symmetry with bedside tables and lamps where possible: asymmetry can work if intentional.
- Add a seating nook or bench if space allows for function and style.
Kitchen:
- Clear countertops, store small appliances to make surfaces feel organized.
- Update hardware and lighting: pendants over islands create a designer focal point.
- Add textiles (tea towels, runner) in an accent color to tie the room to the rest of the home.
Entryway:
- Keep it functional: a dedicated landing surface, hooks or a small bench, and a mirror to open the space.
- Use a tray or bowl for keys to keep clutter contained.
- A statement light fixture and a rug make the entrance feel intentional.
Final Touches to Make Design Feel Intentional
- Edit Accessories: Reassess each vignette, does every object have a reason to be there? If not, tuck it away.
- Cohesive Metal Finishes: While mixing metals is trendy, keep it intentional, choose a dominant metal and introduce a second as an accent.
- Plants and Life: Add at least one living plant to every main room. Plants provide color, scale, and a lived-in warmth.
These practical steps help us move from concept to a finished space that reads thoughtfully designed.
Conclusion
Design is less about expensive purchases and more about curated choices, thoughtful editing, and a few smart investments. By clarifying our vision, planning layouts, mixing high-impact with low-cost finds, leveraging color, texture, and layered lighting, and applying selective DIY work, we can make any home look intentionally designed. The result is a space that feels both personal and polished, without a designer price tag. Let’s start with one room, apply these steps, and watch the rest fall into place.