Big Living Room, Cozy Life: A Practical Guide to Zoning, Scale, and Warmth
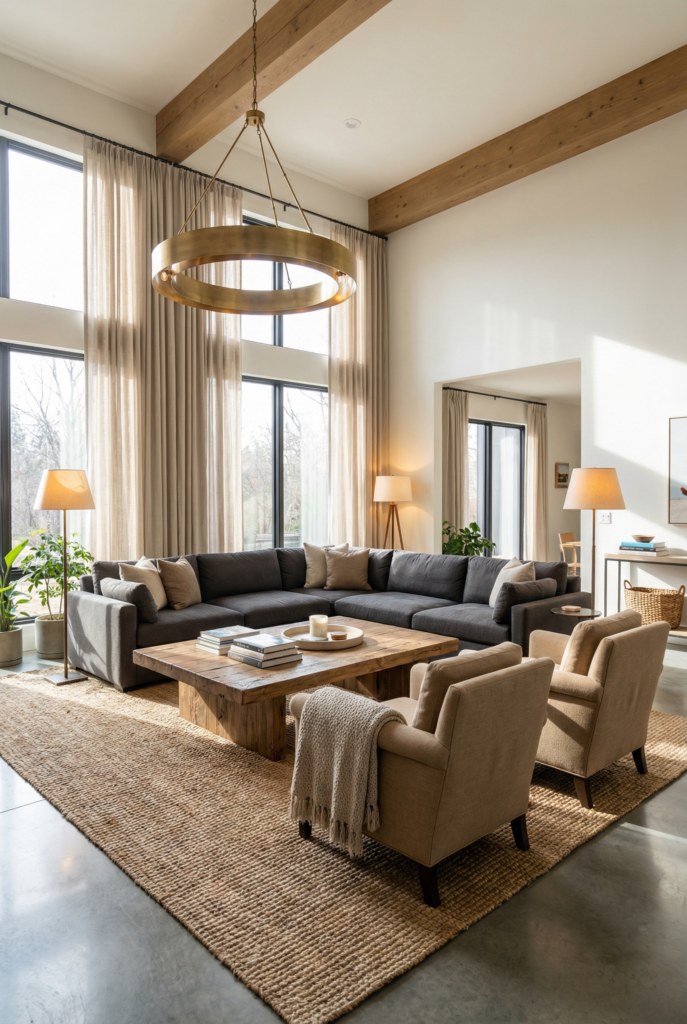
Large living rooms are a gift and a design puzzle: you have space to breathe, but that same openness can read as empty, echo-y, or undecided. The trick is to treat the room like a collection of smaller, purposeful spaces rather than one giant empty box. Start by deciding what the room must do for your household, then design paths, seating, storage, and lighting that support those activities.
This guide walks you through that process in a friendly, real-world way—plan first, then beautify. You’ll get clear, doable steps for layout, proportion, illumination, storage, and the finishing touches that turn a big room into a place you actually want to live in every day.
1. Map Movement: Create Clear Paths and Purpose
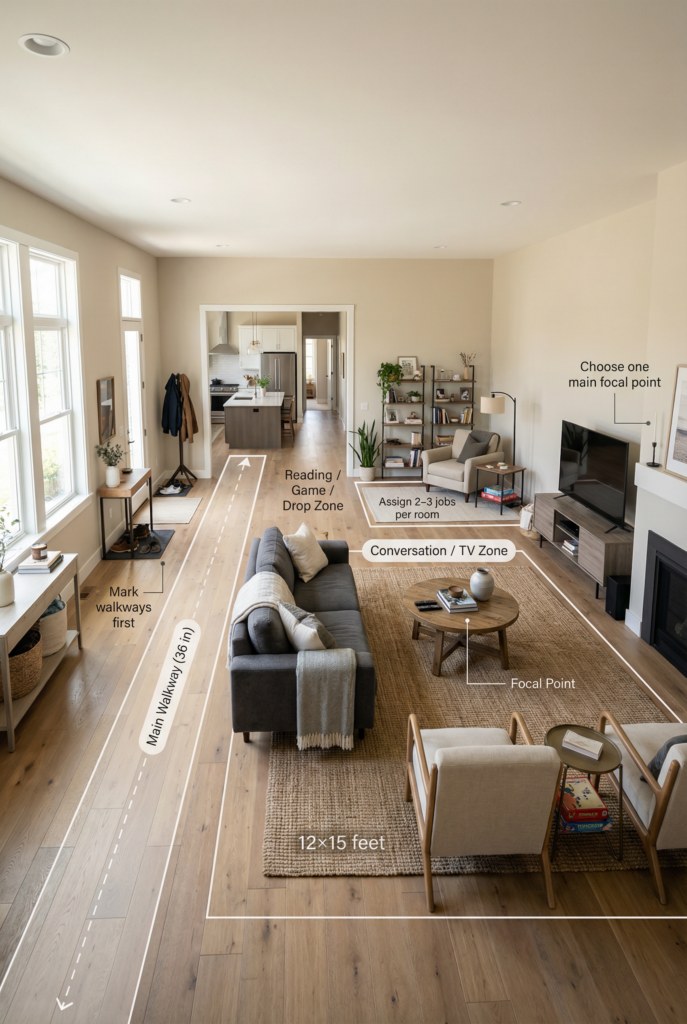
A large room becomes usable when you stop it from being a sea of furniture and instead draw invisible streets through it. Think of the main circulation routes first—how people enter, where they go to get to the kitchen, stairs, or outdoors—and preserve comfortable clearances. Doing this first prevents awkward furniture placement and creates the framework for believable zones.
What You’ll Need
- Tape measure and notepad
- Painter’s tape or masking tape to mark walkways
- Simple floor plan sketch (paper or phone photo of the floor taped with measurements)
- Comfortable shoes—you’ll be walking these routes a lot when testing
How to Put It Together
- Measure the room and mark permanent obstacles (doors, radiators, outlets); sketch a quick plan.
- Use painter’s tape on the floor to outline your main routes; aim for at least a generous single-person clearance so traffic doesn’t interrupt seating.
- Identify two or three primary activities the room must support (conversation, TV, reading, play, workspace) and note where each activity naturally belongs relative to the routes.
- Adjust tape lines until the paths feel intuitive; the seating group should sit beside, not across, the main flow to avoid interruptions.
- Take photos of the taped layout from a corner—this helps you spot cramped spots and confirms sightlines before moving heavy furniture.
2. Group for Comfort: Furniture Scale and Arrangement
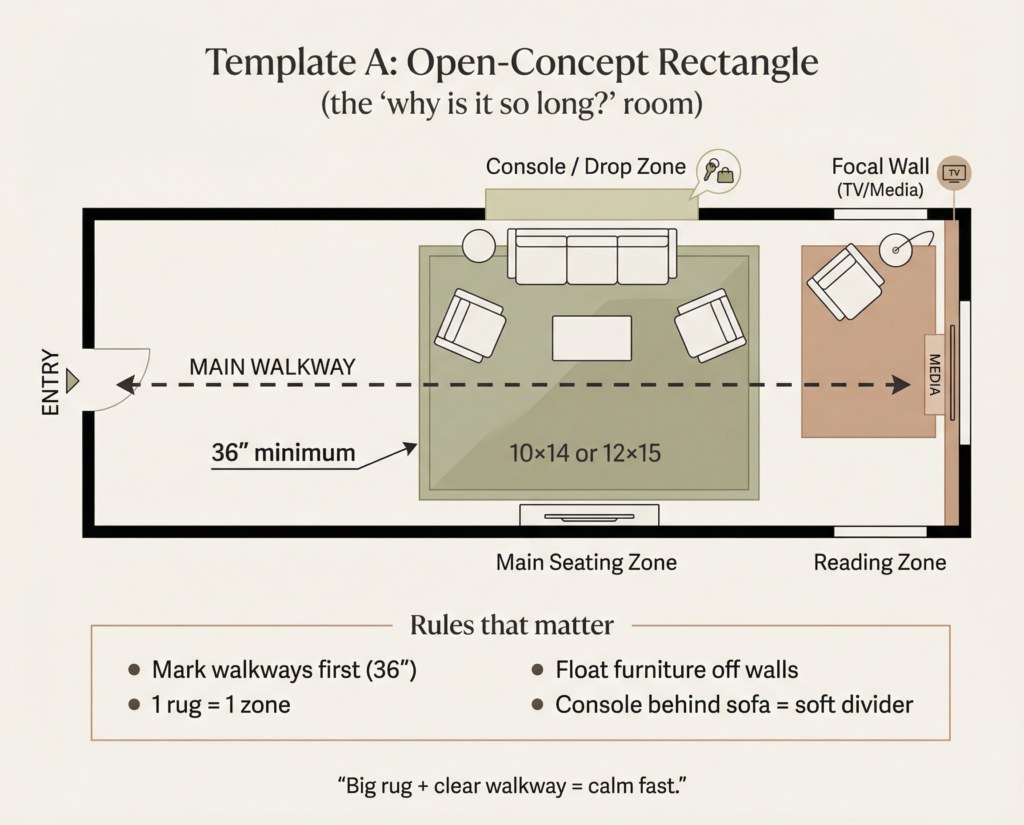
In a big room, small furniture looks like it belongs in a model home. Instead, work with one large anchor piece plus supporting items so the eye reads each cluster as a coherent mini-room. Pull furniture away from walls to create inviting conversation areas and use proportional distances so pieces feel connected without crowding.
What You’ll Need
- Measuring tape
- Painter’s tape (to outline rug and seating footprints)
- A sturdy chair or ottoman you can move around as a test piece
- Ruler for approximating distances (or quick measuring app)
How to Put It Together
- Choose a primary seating anchor (a sofa or sectional sized for the room) and tape its footprint on the floor, including space behind for a console if needed.
- Apply the big–medium–small rule: one substantial piece, one or two mid-sized supports (chairs, side tables), and a few small/mobile pieces (stools, poufs) to add flexibility.
- Place the front legs of seating on the taped rug area so the group reads as intentional; keep coffee table distance comfortable—reach without stretching.
- Resist wall-hugging: pull seating inward to create an intimate perimeter and leave at least one clear walking lane around the group.
- Live with the arrangement for a day or two before committing to nail holes—if it’s awkward, tweak scale or swap one piece for a larger or smaller option.
3. Layer Light: How to Make a Big Room Feel Intimate at Any Hour
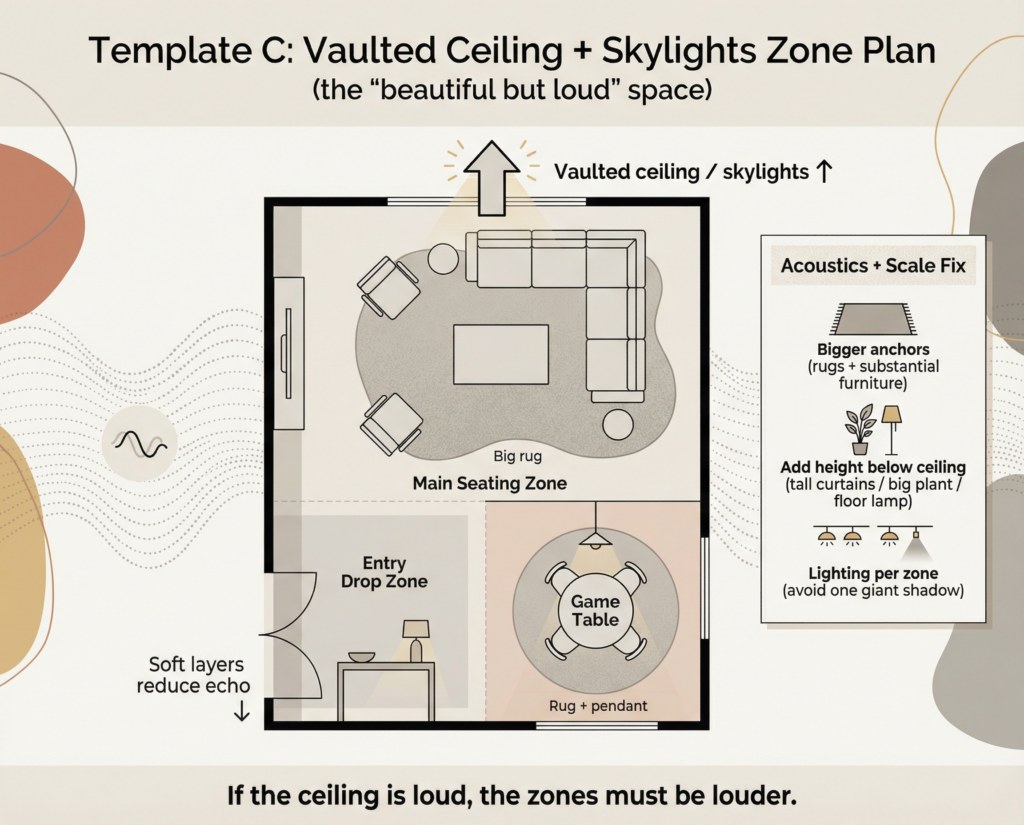
Light controls mood. In large spaces, a single overhead fixture won’t produce the cozy, flexible environment most households need. Use a mix of ambient, task, and accent lighting that’s tied to each zone. Dimmer switches and lamps on separate circuits let you fine-tune the atmosphere for different activities and times of day.
What You’ll Need
- At least two plug-in lamps you can place temporarily
- Warm-toned bulbs (around 2700K–3000K)
- Extension cords and cord covers for safe routing
- Step ladder and appropriate hardware for fixtures (if installing permanently)
How to Put It Together
- Start by adding one lamp to each zone: a floor lamp near a reading chair, table lamps for side tables, and an overhead light for general illumination.
- Aim for three light sources in the main seating area (ambient + two task/side lamps) so you can layer light depending on use.
- Install dimmers on major circuits and use plug-in dimmable lamps where hardwiring isn’t practical; test different brightness levels in the evening.
- Use accent lighting (wall sconces, picture lights) to highlight art or architectural elements—this breaks up large wall planes and adds depth.
- Practice safe lighting: secure tall lamps to walls in households with children/pets, route cords under rugs carefully or use cord covers, and avoid overloading outlets.
4. Choose Anchors: Rugs, Curtains, and Vertical Elements
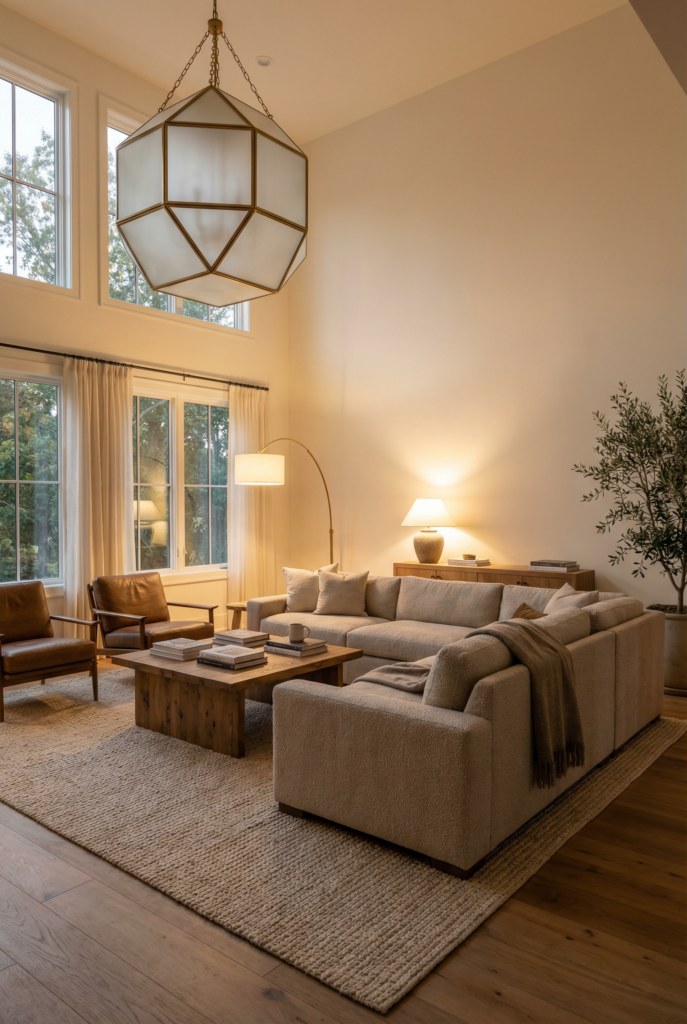
Anchors are the visual reference points that stop a room from feeling like a floating set. A correctly sized rug, generous curtains, and at least one tall vertical element (art, bookcase, plant) help the eye navigate a large space. These elements also add texture and tone, which are essential for warmth and cohesion.
What You’ll Need
- Rug tape or paper to map rug dimensions on the floor
- Curtain rod and samples or long fabric panels to test length
- A tall item to test scale (plant, ladder shelf, or large framed print)
How to Put It Together
- Tape out your ideal rug size first; a main seating rug should allow the front legs of major seating to rest on it so the group feels anchored.
- Hang curtains high (near the ceiling) and wide (beyond the window trim) to visually raise ceilings and balance wall height; ensure panels reach the floor for a tailored look.
- Add a vertical anchor opposite wide horizontal furniture—an upright bookcase, mounted large-format art, or a tall green plant—to balance the room’s lines.
- Repeat one material or finish across anchors (a wood tone, metal, or woven texture) so disparate zones feel related without matching exactly.
- If ceilings are especially tall, consider two stacked curtain panels or layered window treatments to maintain scale and improve insulation.
5. Hide the Chaos: Thoughtful Storage and Functional Furniture
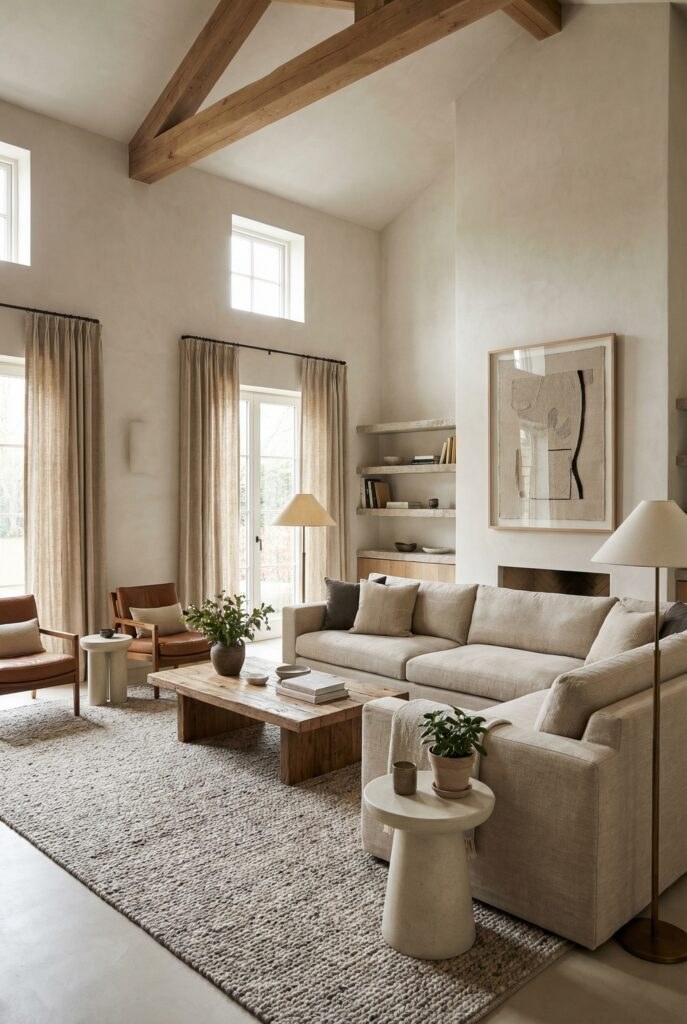
Open space magnifies clutter. In a big living room, provide generous closed storage so everyday things have a home and the surfaces stay calm. Choose multifunctional furniture that doubles as storage and prioritize easy-to-reach spots for items you use most often to keep daily life smooth and tidy.
What You’ll Need
- Closed storage options (cabinet, console, media unit with doors)
- Baskets and trays for visible-but-contained storage
- Cable management supplies (clips, raceways)
- Labels or a simple system for what goes where
How to Put It Together
- Audit what accumulates in the room for a week and assign each type of item a logical storage place (e.g., remotes in a console drawer, blankets in an ottoman, toys in baskets).
- Place closed storage near the zones that generate the most clutter—media storage by the TV, a console near the entry point for keys and mail, a cabinet by the sofa for board games.
- Use aesthetically pleasing baskets or boxes on open shelves to corral smaller items while keeping the look tidy.
- Tame electronics by routing cords along baseboards or behind furniture and add labeling for remotes/chargers so family members know where things belong.
- Review storage after a month and adjust—if something ends up on the coffee table repeatedly, it needs a dedicated nearby home.
6. Finish with Intention: Colour, Texture, and Everyday Styling
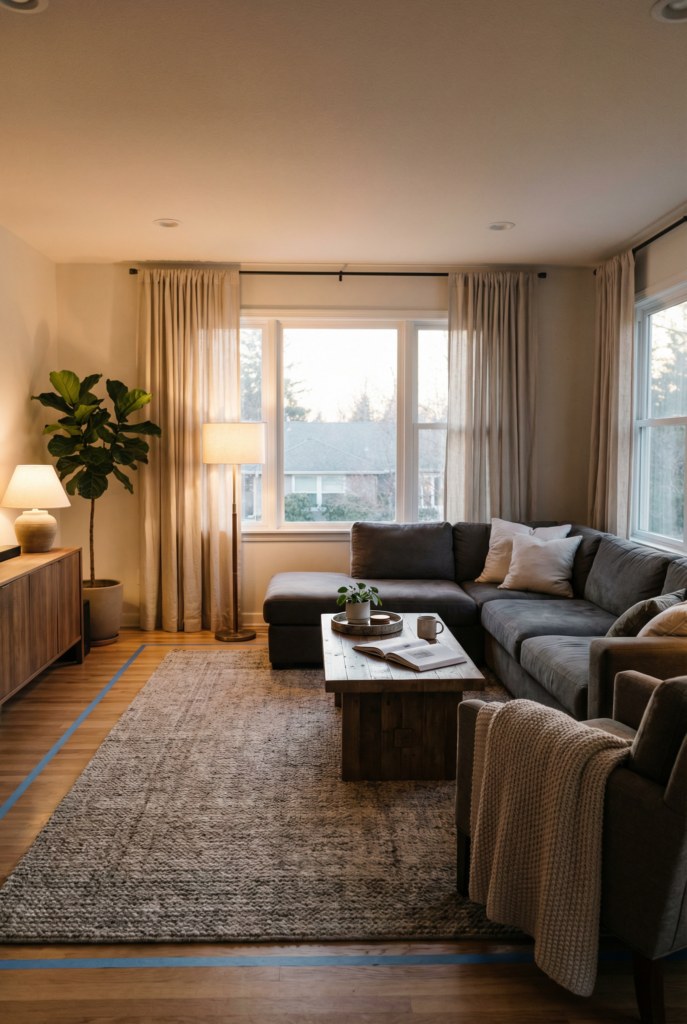
The final layer of decorating is about repetition, restraint, and human-scaled details. A restrained palette with one or two deeper accents repeated around the room creates cohesion. Texture—rugs, throws, woven baskets, and mixed metals—adds warmth without clutter. Style vignettes with three to five items and include one living element to keep displays approachable and not precious.
What You’ll Need
- Swatches or photos of your chosen paint/fabric palette
- A few larger-texture pieces (throws, woven basket, textured cushion)
- Small tray or shallow bowl for rotating vignette items
- A plant or vase with seasonal greenery
How to Put It Together
- Choose a neutral base and select one or two deeper accent colors; repeat those accents in three different spots (pillows, art, accessory) to carry the eye through the room.
- Build vignettes using an odd number of objects arranged on a tray or shelf; anchor each group with one piece that has scale or texture and add a natural element (branch, flower, plant).
- Layer textiles—mix smooth, nubby, and soft surfaces—to create tactile contrast that reads as warmth from across the room.
- Keep large walls simple: one oversized art piece or a balanced pair of sconces reads better than many small frames on an expansive wall.
- Live with the styling for a few weeks and rotate small items seasonally; this keeps the room feeling fresh without constant shopping.
Final Thoughts
Big living rooms work best when you break them down into human-sized decisions: map the routes, anchor seating, add layered light, and give clutter a proper home. These are structural moves that change how you use the space, not just how it looks in a photo.
Take one step—tape a rug outline, hang a lamp, or add a console behind the sofa—and build from there. With a clear plan and a few well-chosen anchors, your large living room will finally feel like a place you live, laugh, and relax in every day.
