Halloween Pebble Art for Kids: Coastal-Inspired Crafts, Community Events, and Sharing Tips
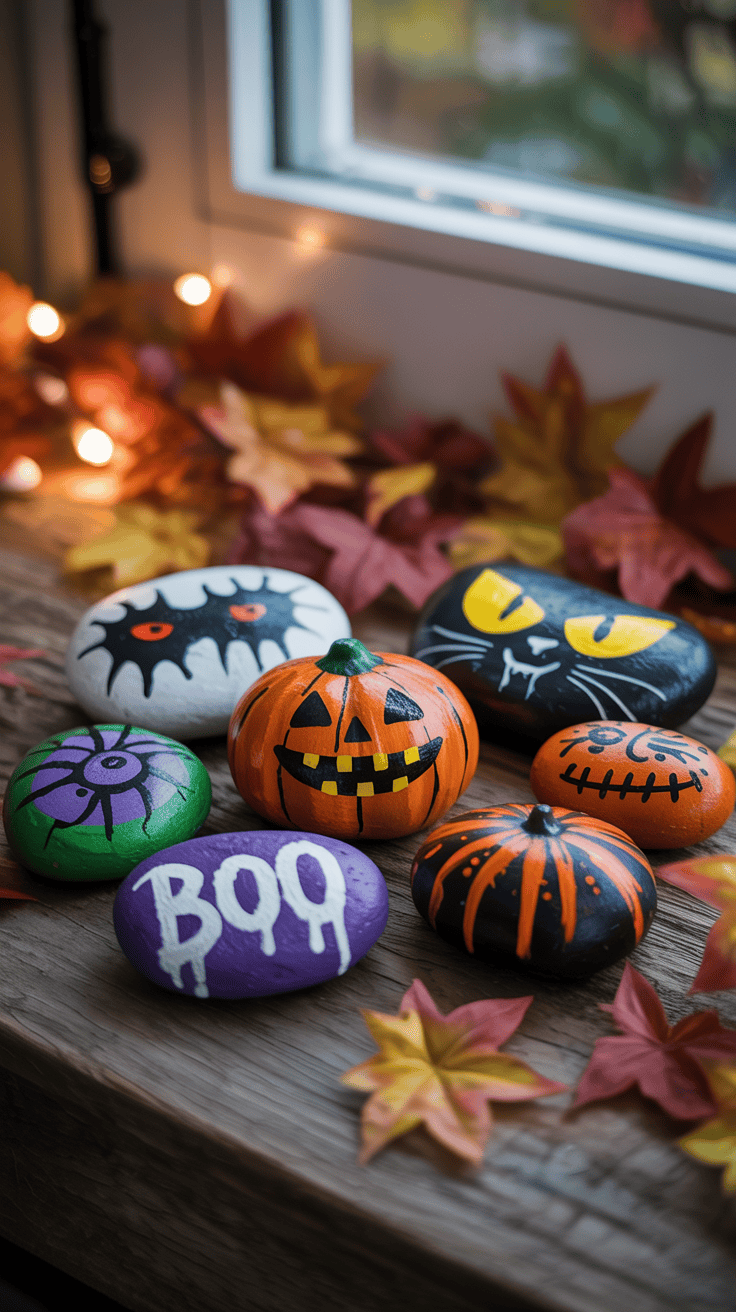
Painting rocks is one of the easiest ways to turn a rainy afternoon into a hands-on Halloween celebration that’s gentle on little hands and big on imagination. With a few inexpensive supplies—smooth stones, washable paints, and a clear sealer—you can set up a simple, kid-friendly station that encourages creative play, fine motor skills, and seasonal storytelling. Whether kids want to paint tiny pumpkins, friendly ghosts, spooky sea creatures, or glow-in-the-dark accents, rock art scales for solo play, playdates, or classroom activities.
This article walks through practical, family-friendly ideas: a compact setup with safety tips and kid-tested techniques, ways to display or share finished pieces, classic paint choices that are forgiving for beginners, how to host a neighborhood or community rock-painting event, and a seaside twist for coastal crafting days. You’ll get straightforward guidance for materials, layout, and timing so projects stay fun and stress-free. From simple templates for toddlers to more detailed designs for older kids, these approachable ideas help you create seasonal keepsakes while encouraging kindness and community connection through shared art.
1. Halloween Rock Painting: Simple Setup and Kid-Friendly Tips

Getting kids excited about Halloween crafts is half the fun — the rest is the messy creativity that follows. Start by choosing a flat, smooth rock and giving it a good scrub; dirt and grit make paint flake off later. A quick base coat of white or a bold color helps designs pop and makes painting faster for little hands. Keep the atmosphere light and playful: short, upbeat sessions work better than marathon painting that leaves everyone tired and frustrated.
Set up a small, organized station with paints, brushes, water cups, and paper towels so kids can focus on imagination instead of hunting for supplies. Encourage simple shapes and big features at first—pumpkins, ghosts, bats, goofy faces—and let children add details with markers once the paint dries. Always choose non-toxic acrylics and supervise younger children around small items and sharp tools.
Materials
- – Smooth, clean rocks (various sizes)
- – Acrylic paints (orange, black, white, purple, green recommended)
- – A few paintbrushes (one wide, one fine)
- – Permanent markers or paint pens for details
- – Paper towels and small water cups
- – Disposable table cover or newspaper
- – Old shirts or aprons to protect clothing
- – Clear sealer spray (matte or glossy) for finishing
Steps
- 1. Wash and dry: Rinse rocks in warm, soapy water, scrub any grime, then let them dry completely—this can take 20–30 minutes depending on thickness.
- 2. Prime (optional): Paint a thin base coat of white or a bright color to make subsequent layers more vivid; allow 10–15 minutes to dry.
- 3. Block in shapes: Use a broad brush to paint large areas first (pumpkin bodies, ghost outlines, background colors). Let each color dry a few minutes before adding adjacent colors.
- 4. Add features: With a thinner brush or paint pen, draw faces, eyes, mouths, and defining lines. Emphasize big, friendly expressions for younger kids and spookier details for older ones.
- 5. Outline and detail: Use a black marker or thin brush to outline shapes and add highlights with white for a polished, cartoonish look.
- 6. Let everything cure: Allow painted rocks to dry in a dust-free spot for at least an hour; overnight is best before sealing.
- 7. Seal and protect: Spray a clear sealer in a well-ventilated area to protect colors from handling and weather—apply 1–2 light coats, letting each dry between applications.
- 8. Display or hide: Arrange finished rocks as festive décor, give them as tiny gifts, or join a community rock-hiding game for a cheerful surprise.
These small, simple steps keep the project fun and achievable while teaching kids pride in a finished creation.
2. Ways to Show and Share Your Halloween Rock Art
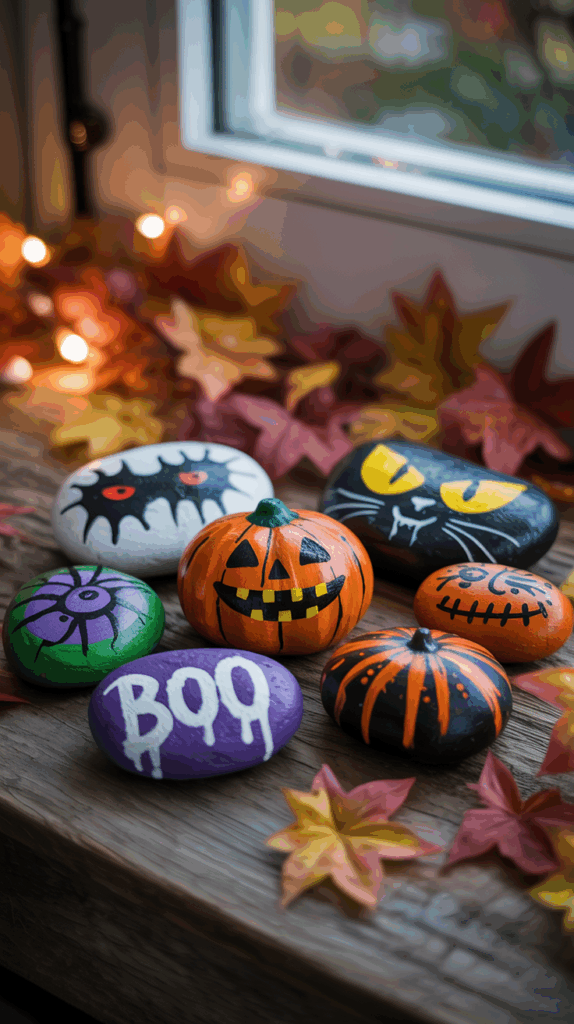
Whether you’ve painted a handful of tiny ghosts or a whole cauldron of creepy pumpkins, the joy really grows when your family’s creations leave the paint tray and find a place to shine. A few thoughtfully placed rocks can transform everyday spots into playful Halloween nooks, and sharing them with neighbors or friends stretches the fun beyond your doorstep.
Make displaying and sharing part of the tradition: pick a few rocks to feature each week, let kids decide which ones to gift, and use simple presentation tricks to make each piece feel special. Small rituals — like a mailbox rock rotation or a neighborhood mini-hunt — make the season more memorable and teach kids that handmade things are meant to be enjoyed by others.
Materials
- – Clear sealer (spray or brush-on) to protect designs
- – Small bowls, trays, or glass vases for grouped displays
- – Strong magnets or adhesive tape for fridge rocks
- – Ribbon, twine, or small gift bags for giving
- – Labels or cardstock and a marker for names/messages
- – Baskets or shallow trays for swaps and hunts
- – Sticky tack or museum putty for securing rocks on shelves
Steps
- 1. Protect first: spray or brush a clear sealer over finished rocks so designs hold up outdoors and in children’s hands. Let them dry fully before moving to display.
- 2. Create a rotating windowsill or mantle vignette: choose a tray or line up rocks by height, alternating colors for contrast. Swap a couple each week to keep the display fresh.
- 3. Porch welcome cluster: group a few rocks near pumpkins or mums on the front steps. Nestle spooky faces among natural elements like pinecones or small gourds for a cozy, seasonal feel.
- 4. Make magnetic decorations: attach small, flat magnets to the back of lightweight rocks with strong adhesive for instant fridge art or mailbox flair.
- 5. Mini gallery at kid height: install a narrow shelf or use a shallow picture ledge to display labeled rocks with names and the year. Take a yearly photograph to document progress.
- 6. Host a rock swap: set out baskets on a low table, let kids spread their pieces, and allow each child to pick one or two to take home. Provide small paper bags for carrying finds.
- 7. Organize a simple neighborhood hunt: choose safe, visible hiding spots, set a start time, and remind kids to take only one rock each. Consider including a printed clue sheet for extra excitement.
- 8. Gift and mail: tuck a painted rock into a tissue-lined bag, add a handwritten note, or stick a tag with a kind message on the back before mailing to friends or relatives.
- 9. Share kindness messages: write short, positive notes on the back of a few rocks and leave them on park benches or in public little libraries — an easy way to surprise and uplift someone’s day.
These small steps help your family’s work be seen, swapped, and celebrated — turning painted pebbles into lasting memories.
3. Kid-Friendly Classic Halloween Rock Paints
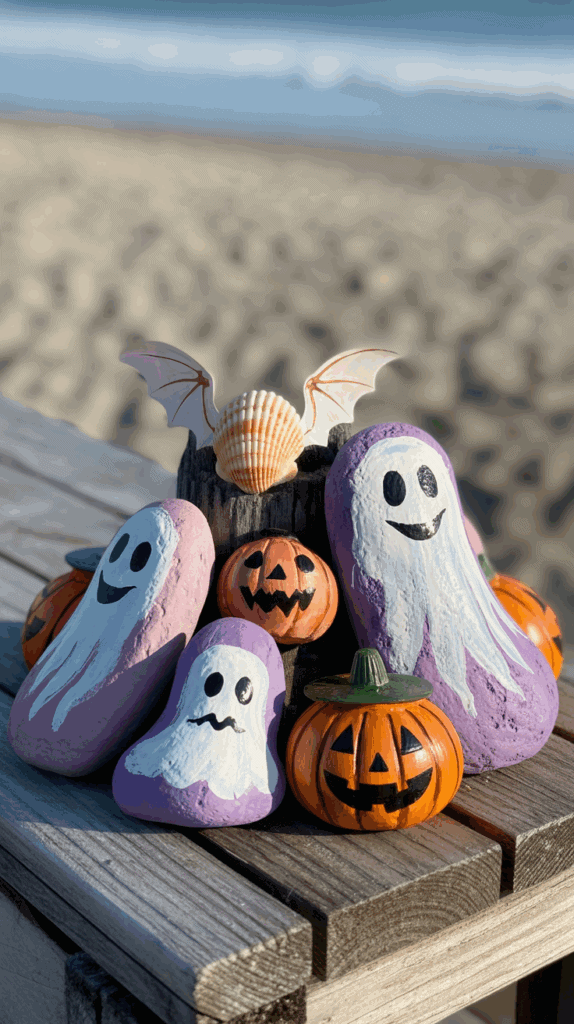
Halloween rock painting is a low-stress way to welcome spooky season and let kids practice shapes, colors, and storytelling. Simple, recognizable designs—pumpkins, ghosts, black cats, playful monsters, and candy corn—give children quick wins and lots of room to personalize. Because these motifs rely on bold shapes and high-contrast colors, even very young painters can make rocks that look intentional and festive.
Keep the session relaxed: set up a washable table cover, offer aprons or old shirts, and work in short bursts so attention stays happy. Encourage experimentation—a pumpkin with freckles, a ghost wearing sunglasses, or a monster with stripes are all great outcomes. For safety and durability, wash and dry stones before painting, use kid-safe acrylics, and finish with a clear sealer once the paint is fully dry. Remind kids to let each painted layer dry before adding details to avoid smudges.
Materials
- – Smooth river rocks or flat stones (washed and fully dry)
- – Acrylic paints (basic colors: white, black, orange, yellow, green, purple)
- – Fine and medium paintbrushes
- – Black permanent marker or paint pen for details
- – Clear spray sealer or brush-on varnish (matte or glossy)
- – Cup of water, paper towels, palette or paper plate
- – Optional: googly eyes, glitter, stickers, small sponge, toothpicks
Steps
- 1. Prep the stones: Rinse rocks, scrub off dirt, and let them dry completely. Choose flatter stones for easier painting.
- 2. Base coat: Apply a thin, even coat of acrylic as the background (orange for pumpkins, white for ghosts, black for cats, bright solid for monsters, white/orange/yellow for candy corn). Let dry and add a second coat if needed.
- 3. Pumpkin basics: Paint a rounded orange shape (or cover the whole rock). Once dry, use black marker or thin brush to add triangle eyes and a smile. Add a short green stem at the top and optional yellow highlights for a glow.
- 4. Ghosts: Paint the rock white, then add two oval eyes and a round or oval mouth with black. For movement, paint soft swirls at the bottom or tiny arms on the sides; add a touch of glitter while paint is tacky for sparkle.
- 5. Black cat: Start with a black base. Use a small brush to create pointy ears and a curved tail silhouette. Add two yellow or green ovals for eyes and a tiny pink nose; finish with whiskers in white or light gray.
- 6. Monsters and variations: Let kids pick bright base colors. Add big mismatched eyes (googly eyes work great), zigzag mouths, horns, spots, and stripes. Encourage layering fun textures with sponges or toothpicks.
- 7. Candy corn: Paint three horizontal bands—white tip, orange center, yellow base—letting each dry before the next.
- 8. Seal and display: After all paint dries, spray or brush on sealant outside or in a well-ventilated area. Let cure, then arrange rocks indoors, on porches, or hide for a neighborhood rock hunt.
These classic designs offer clarity for beginners and plenty of room for imagination—perfect for family craft time or a chilly afternoon project.
4. Host a Community Halloween Rock-Painting Event
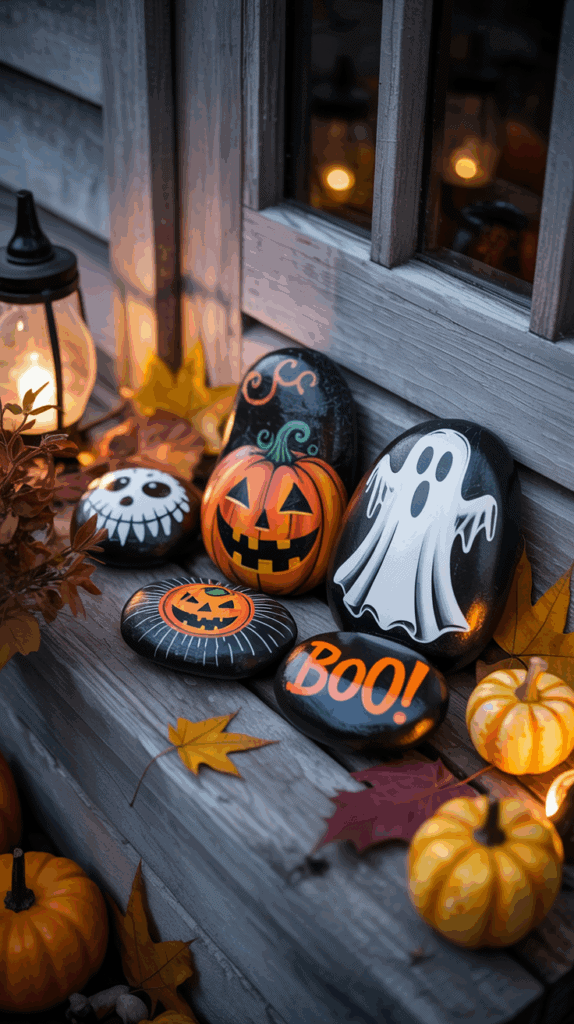
Rock painting is a wonderfully inclusive activity for Halloween gatherings — it’s low-cost, easy to scale, and appeals to every age. Whether you’re planning a neighborhood get-together, a classroom craft, or a party corner at a fall festival, a few simple rules keep the fun flowing: organize supplies into stations, set clear timeframes for younger makers, and offer a few themed prompts to spark creativity.
If you plan to spread the joy beyond your event, think about how the rocks will travel. A community rock hunt creates a little seasonal treasure trail; a “take one, leave one” basket encourages swapping; and a display area gives kids a moment of pride when their work is admired. Keep safety and accessibility in mind — choose public, easy-to-reach hiding spots and provide non-toxic paints and wipes so everyone can participate comfortably.
Materials
- – Assorted smooth stones (washed and fully dry)
- – Acrylic paints or paint pens (limited palette for younger kids)
- – Variety of brushes and a few sponges
- – Permanent markers or paint pens for fine details
- – Paper plates or palettes, water jars, and paper towels
- – Disposable table cover, baby wipes, and aprons or smocks
- – Small boxes, baskets, or paper bags for finished rocks
- – Labels or a waterproof marker to sign the back of each rock
Steps
- 1. Prepare stones in advance: collect, rinse, and let rocks dry completely. Sort them by size so each child can choose easily.
- 2. Set up distinct stations: painting, detailing, drying, and packaging. This keeps traffic moving and prevents wet paint from smudging.
- 3. Limit the color choices at each station (3–5 colors) for younger groups to reduce overwhelm and muddy results. Offer a separate area with extras for older kids.
- 4. Demonstrate a few quick techniques — base coat, dot eyes, simple faces, and glow-in-the-dark accents — so participants have ideas to start with.
- 5. Use permanent markers or paint pens for small features once the base paint is dry; these are easier for fine lines than tiny brushes.
- 6. Create a drying station using egg cartons or muffin tins to keep rocks stable and separated.
- 7. If you’re hosting a rock hunt, have kids write a short message or signature on the back and seal lightly with clear acrylic spray once dry. Share general hiding locations with participants so finds are safe and respectful of public spaces.
- 8. For displays or contests, group rocks by age or theme, set simple categories (funniest, spookiest, most creative), and use sticker voting to include everyone.
- 9. Send painted rocks home in labeled bags or offer a swap table so guests can exchange creations. Encourage participants to photograph their favorites and share in your community page to extend the celebration.
5. Seaside Halloween Rocks: Coastal Crafting for Kids
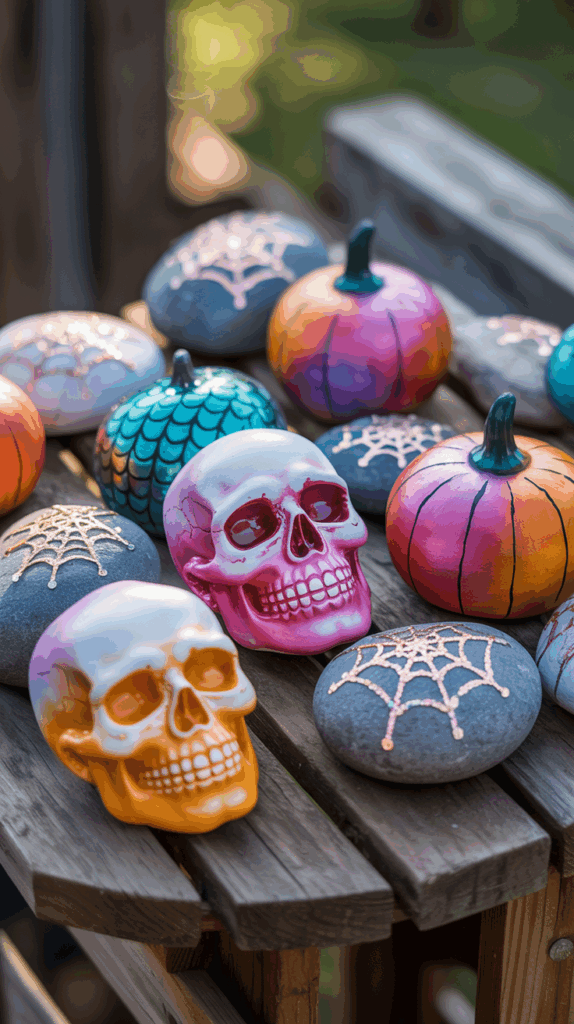
Bring the calm of the coast to your Halloween crafts with painted rocks that blend spooky themes and seaside textures. This twist transforms familiar pumpkins, ghosts, and monsters into beachy treasures using shells, sand, driftwood and ocean tones. It’s an easy way to refresh a holiday favorite and give kids a chance to combine sensory play with creativity.
Start by setting up a bright, covered workspace and letting children choose which sea-inspired twist they want — a sand-sprinkled ghost, a mermaid pumpkin with a scalloped tail, or a crabby jack-o’-lantern. Prep rocks by washing and drying them so paint and glue adhere better, and keep embellishments small and lightweight so they stay attached. For best results, work in stages: base coat, dry, detail work, and then seal.
Materials
- – Smooth, flat rocks (cleaned and dried)
- – Acrylic paints (ocean blues, seafoam greens, orange, white, black)
- – Assorted paintbrushes (flat and fine-tip)
- – Clear acrylic sealer (spray or brush-on)
- – Strong craft glue (for small pieces) and parent-safe hot glue for heavier accents
- – Small shells, sand, tiny driftwood pieces, sea glass or smooth beads
- – Glitter or metallic paints for shimmer
- – Fine-point permanent marker or paint pen for facial details
- – Paper towels, disposable palette or plate, and a cup of water
- – Optional: googly eyes, toothpicks for texture, painter’s tape for patterns
Steps
- 1. Prep the rocks: Wash with warm soapy water, rinse, and let dry completely. Lightly sand any rough spots if needed. Apply a white or neutral base coat to make colors pop.
- 2. Plan the design: Sketch a simple layout with pencil or imagine the coastal twist — ghost with sand base, pumpkin topped with shell “stem,” or a crab-faced jack-o’-lantern.
- 3. Paint base colors: Use flat brushes to block in main shapes and background ocean washes (thin turquoise or seafoam over gray looks great). Let each layer dry before continuing.
- 4. Add texture: While some paint is tacky, press a few small shell fragments into the top of a pumpkin for a natural stem, or use a dab of craft glue to add a sprinkle of sand at the rock’s base for a shoreline effect.
- 5. Detail work: Use fine brushes or markers to paint faces, scales, tentacles, or spider legs. Add metallic highlights or glitter for a pearly sea-glow.
- 6. Attach larger accents: Secure driftwood brooms, sea glass eyes or beads with stronger glue; adult help recommended for hot glue.
- 7. Seal and protect: Once fully dry, apply one or two coats of clear sealer to lock in paint and embellishments.
- 8. Display and store: Place rocks in a dry spot indoors or under a covered porch; supervise outdoor display so small pieces aren’t lost.
Safety tip: Always supervise small parts and glue use with children. Encourage experimentation — there are no rules, just waves of Halloween fun.
Final Thoughts
Rock painting is a low-cost, inclusive craft that easily adapts to home, school, or beach settings. With thoughtful preparation—age-appropriate supplies, clear workspaces, and simple design ideas—you can keep kids engaged and proud of their creations. Sharing painted rocks through neighborhood hiding games, community displays, or classroom swaps adds a lovely social dimension that extends the fun beyond one afternoon.
Whether you’re decorating pebbles as tiny jack-o’-lanterns, painting playful coastal monsters, or organizing a group event, these projects invite creativity and connection. Keep the focus on exploration, celebrate small successes, and enjoy a season of hands-on making that’s memorable for kids and grown-ups alike.