Build a Showstopper Backyard Pirate Ship: Design, Decorate, and Delight
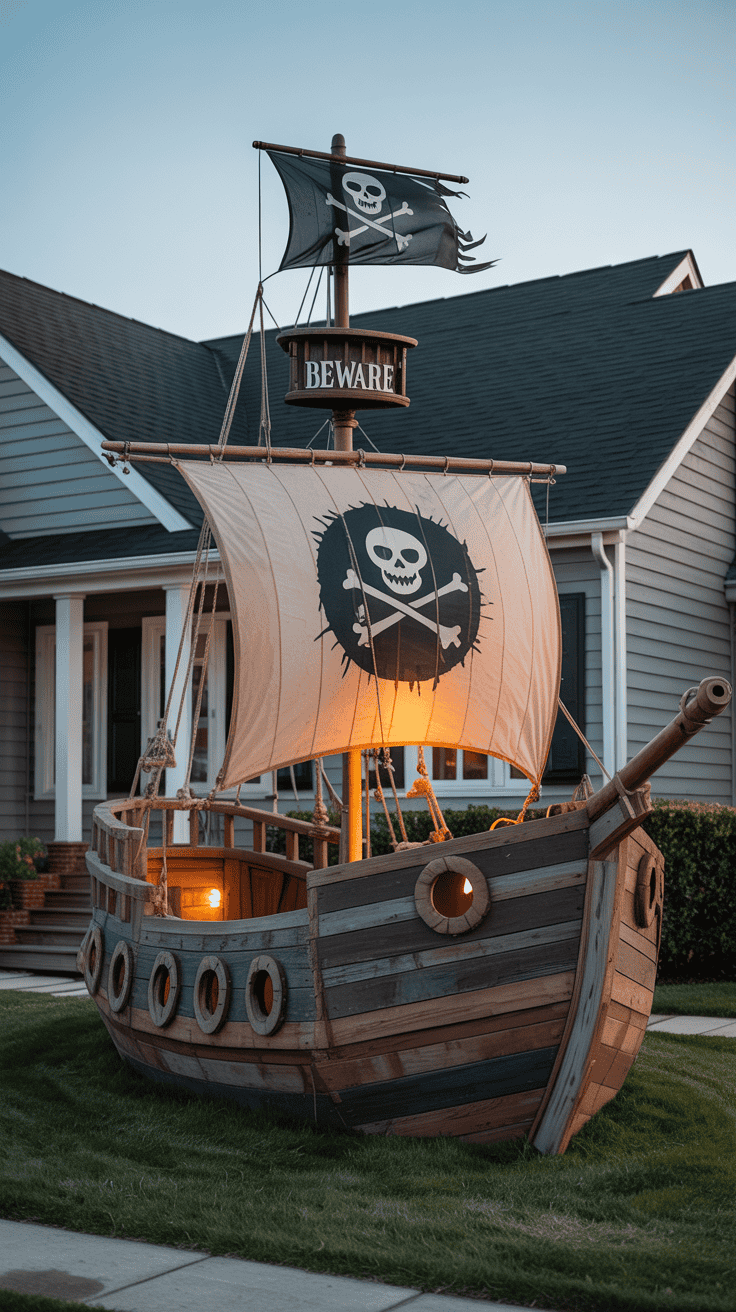
Turn an ordinary yard into a memorable pirate-themed centerpiece that draws smiles, photo ops, and neighborhood chatter. Whether you’re creating a seasonal Halloween spectacle, a weekend party focal point, or a playful set piece for kids’ adventures, a well-planned pirate ship brings drama without requiring pro-level carpentry. With thoughtful design, smart materials, and a few crowd-pleasing details, you can achieve a convincing look that’s sturdy, safe, and surprisingly simple to assemble.
This guide breaks the project into approachable sections so you can plan confidently: how to design a showstopping ship, a step-by-step assembly plan with recommended layouts and materials, weatherproofing and safe storage tips, finishing touches that make the display unforgettable, and interactive activities to bring the scene to life. Follow practical, budget-conscious strategies for scale, balance, and visual impact, then add playful touches—flags, lanterns, and sound effects—that encourage neighbors and guests to linger. By combining creativity with common-sense construction, you’ll create a pirate ship that delights people of all ages and stands up to outdoor use.
1. Designing Your Showstopper Pirate Ship: Plan, Build, Delight
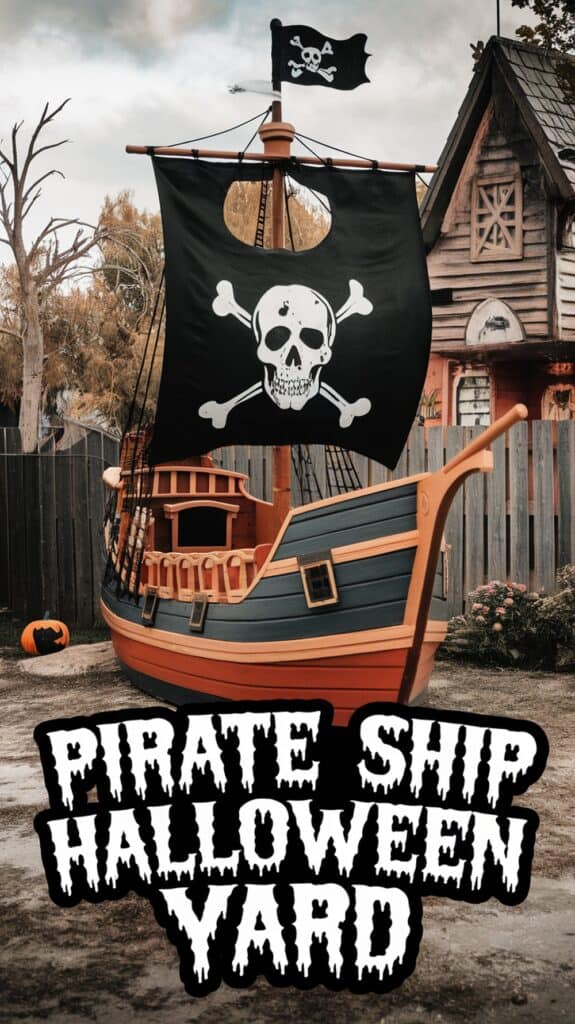
A great yard pirate ship begins with an idea and a simple plan. Invite family members to imagine the scene—who’s at the helm, where the treasure chest sits, and whether you want spooky, silly, or cinematic vibes. Letting kids pick a feature makes the project feel like a shared adventure and keeps enthusiasm high. Keep design choices realistic for your time and tools so the build stays fun instead of stressful.
Before you cut cardboard or paint sails, walk the yard and think like a trick-or-treater. Measure the space you’ll use, note sightlines from the street, and identify hiding spots for supports and cords. Prioritize safety: leave clear paths, secure tall pieces against wind, and choose low-voltage lighting or LED battery lights for outdoor use. Deciding on a single strong theme (rustic, playful, or movie-inspired) helps guide material choices and keeps the final display cohesive.
Materials
- – Large sheets of cardboard or plywood (for hull and deck)
- – Tall poles or dowels for masts (broom handles or PVC work)
- – Black or colored fabric for sails
- – Rope, zip ties, and strong tape (gaffer or duct)
- – Paints and brushes or spray paint (weatherproof if possible)
- – Battery-operated LED string lights or spotlights
- – Decorative accents: fake skull, treasure chest, lanterns, netting, pool noodles, plastic parrots
- – Stakes or sandbags for anchoring
- – Basic tools: box cutter, hammer, drill, staple gun, measuring tape
Steps
- 1. Sketch a simple layout: draw the hull shape to scale, mark mast locations, and map where lighting and walkways go.
- 2. Mark the yard: use stakes and string to outline the ship’s footprint so you can visualize size.
- 3. Build the hull base: attach cardboard or plywood panels to a low frame; reinforce corners with scrap wood or extra tape to withstand wind.
- 4. Add the deck and features: cut an opening for a ship’s wheel, mount a faux cannon or treasure chest, and create railing with pool noodles wrapped in brown tape or painted PVC.
- 5. Erect masts and sails: secure poles to the hull base and fasten fabric sails with grommets or staples; angle sails for a dynamic look.
- 6. Detail and weather: paint wood grain, add fake barnacles or distressing with darker washes, and hang nets or flagged bunting.
- 7. Light and anchor: position LED lights to highlight the helm and treasure; anchor the structure with stakes or sandbags and test stability in a breeze.
- 8. Final safety check: clear trip hazards, secure loose pieces, and run a test evening to adjust lighting and sightlines.
With a clear plan and practical steps, your pirate ship will be an eye-catching, safe centerpiece that delights neighbors and creates lasting Halloween memories.
2. Final Flourishes: Make Your Pirate Ship Unforgettable
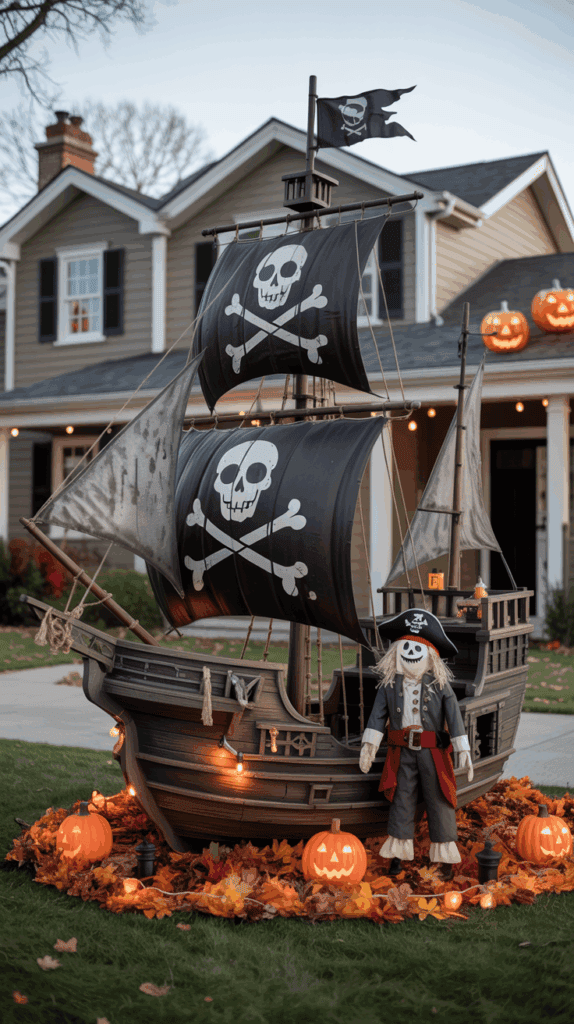
When your yard pirate ship is built, the difference between a neat prop and a showstopper is all in the finishing touches. Focus on layers: ambient light to set mood, a few bold focal pieces to draw eyes, and lots of tactile details that invite people to look closer. Small, low-cost items—weathered ropes, a rum-stained barrel (or lookalike), a handful of gold-painted rocks—add the authenticity that makes passersby pause. Play with height and movement: fluttering pennants, a crow’s-nest silhouette, or a waving flag will read well from the street and give your scene life even on calm evenings.
Think about how people will experience the display from dusk through the night. Start with safe, battery or low-voltage lighting to highlight your key elements (mast, treasure chest, plank) and add a few playful props for kids: a stuffed parrot, a skeletal “look-out,” or a painted pumpkin with an eye patch. Balance spooky with silly so the scene is welcoming to trick-or-treaters but still dramatic for photos. Finally, protect everything: anchor lightweight pieces against wind, stash batteries and cords out of reach, and do a quick safety sweep before dark to avoid trip hazards.
Materials
- – Warm white string lights (battery or low-voltage)
- – Battery-operated lanterns or LED spotlights
- – Black fabric or tarp for sails; white sheets for painting
- – Thick rope or nautical cord
- – Plastic skeleton(s), pirate hat(s), stuffed parrot or monkey
- – Storage bin or wooden crate for treasure; plastic gold coins/painted rocks
- – Blue tarp or large fabric for “sea” and green streamers for seaweed
- – Cardboard or foam board for sharks, signs, and plank
- – Cloth strips, old scarves, or pennant materials
- – Sandbags or weights to secure props; zip ties or bungee cords
- – Optional: small fog machine or battery fog lamp; glow sticks in bottles
Steps
- 1. Light first: mount string lights along railings and wrap the mast; place lanterns near the bow and a spotlight for the treasure chest so focal points glow at dusk.
- 2. Install sails and flags: attach painted sails to the mast using grommets or zip ties; tie fabric strips to rails for motion and texture.
- 3. Stage the deck: position the wheel, anchor, barrels, and treasure chest; fill the chest with coins and reflective items so it catches light.
- 4. Add the crew: dress skeletons with hats/scarves, perch a parrot on a railing, and set one figure at the helm to create a story.
- 5. Create the sea: lay blue tarp under the ship, scatter cardboard fish, and tuck green streamers as seaweed; add glow-stick bottles for eerie floating light.
- 6. Secure and weatherproof: weigh down props, bundle loose cords, and tuck batteries and controls out of reach; test lights and fog effects before dusk.
- 7. Final check: walk the path as a guest would—adjust sightlines, remove hazards, and take a quick photo to confirm the scene reads well from the street.
These finishing moves turn a built frame into a memorable, family-friendly pirate scene that delights neighbors and keeps trick-or-treaters talking.
3. Playful Pirate Activities to Bring Your Ship to Life
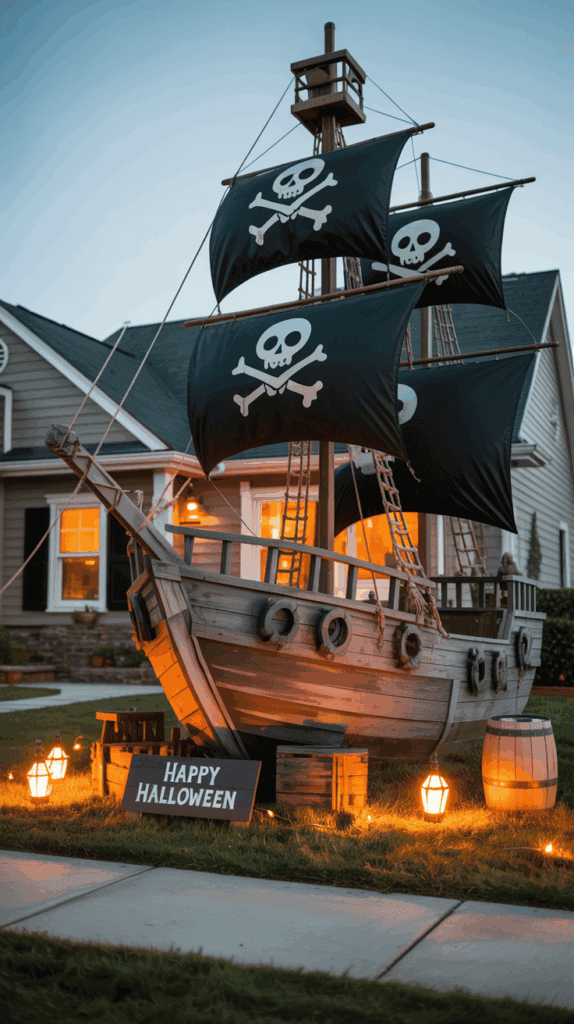
Turn your yard into a stage for imaginative play, not just a display. Kids remember what they do more than what they see, so plan a few simple stations that invite running, crafting and storytelling. Choose activities that let children take on pirate roles—captain, lookout, deckhand—so everyone feels important and included.
Keep safety and pacing in mind: rotate stations every 10–15 minutes for younger children to prevent meltdowns, and group older kids for more competitive games. Use soft props, clear boundaries, and an adult or teen volunteer at each station to guide rules and keep the fun flowing.
Materials
- – Long, sturdy board or balance beam and two low supports (for the plank)
- – Blue tarp or sheet (optional “water” effect)
- – Cardboard box or foam board and beanbags or rolled socks (target toss)
- – Black balloons and wooden spoons or plastic ladles (cannonball relay)
- – Small plastic coins, trinkets, and simple paper maps (treasure hunt)
- – Craft table, paper, markers, stickers, elastic cord, felt (hats and eye patches)
- – Paper towel tubes, tape, crayons (spyglasses)
- – Fabric bandanas, foam swords, costume accessories for a photo corner
- – Blankets and a flashlight (evening story circle)
- – Chalk or cones to mark activity boundaries
Steps
- 1. Set up clear zones: place the ship centerpiece at the focal point and arrange activity stations in a loose circle so kids circulate easily.
- 2. Balance challenge: lay the board across supports a few inches off the ground. Add a sheet beneath for theatricality. Let each child try the walk once per rotation; award silly titles like “Steady Sailor.”
- 3. Target toss: decorate a box as an enemy ship with cutout holes. Place lines at different distances for varying difficulty. Use beanbags for safe, wipeable play.
- 4. Relay race: inflate black balloons and divide kids into teams. Each player carries a balloon on a spoon to a marker and back; if it drops or pops, that player restarts their leg.
- 5. Treasure hunt: hide coins and trinkets and give each team a simple map or a list of clues. Encourage teamwork by assigning roles: map reader, digger, chest guard.
- 6. Craft break: offer quick projects like paper pirate hats, felt eye patches, and decorated spyglasses. Keep supplies pre-cut and options simple so kids leave with wearable items.
- 7. Photo corner: prop up a few costume pieces and a small sign. Let families take turns snapping quick portraits against the ship backdrop.
- 8. Storytime: wind down with a blanket circle and a flashlight. Invite kids to contribute one line each to a communal pirate tale—silliness encouraged.
- 9. Rotate stations every 10–15 minutes for young children and 15–25 for older kids to maintain energy and interest.
- 10. End with a brief parade: march once around the yard, shout a collective “Arrr!” and hand out small ribbons or stickers as keepsakes.
With these simple setups, your pirate ship becomes an interactive playground—memories made, not just admired.
4. Keeping Your Pirate Ship Safe, Weather-Ready, and Easy to Pack Away
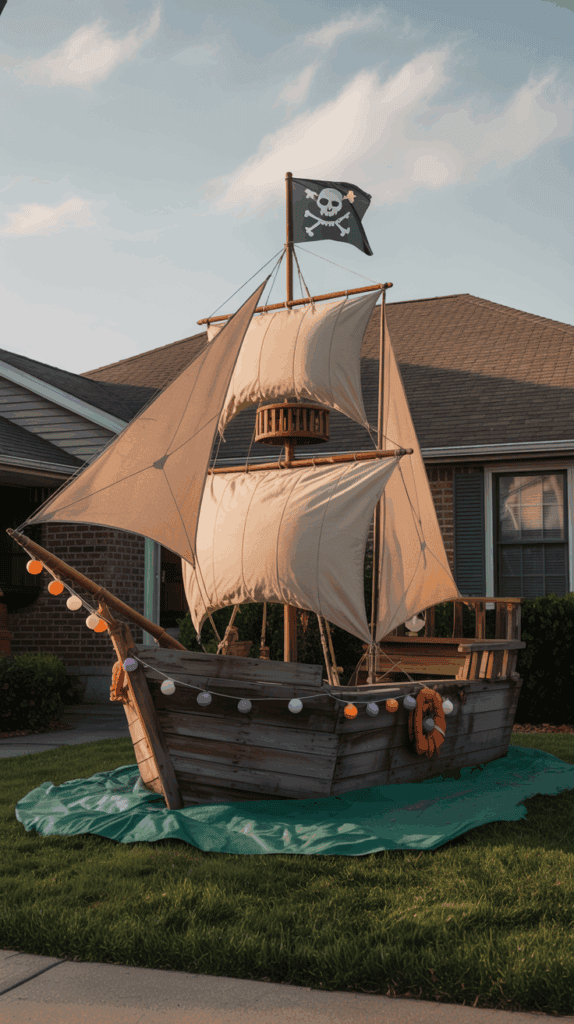
Create a show-stopping pirate ship without turning your yard into a hazard or a soggy mess. Start by thinking like a guest: where will people walk, where might children climb, and which parts could blow away in a gust? Prioritize low-risk materials on any surface people can touch, secure tall elements to solid anchors, and make sure pathways and steps are well-lit. Simple measures — padding sharp corners, tying down masts, and removing trip hazards — remove most of the danger while preserving the playful look.
Weather can change fast in autumn, so plan for wind and rain from the moment you build. Use water-resistant coatings on paper assets, reinforce masts with rigid cores like PVC, and add extra attachment points to sails so they don’t shred in a single gust. Keep a small repair kit on hand for quick fixes during the evening, and have a plan to bring vulnerable pieces inside if heavy rain or high winds are forecast. After the party, recruit helpers and turn teardown into a short, organized routine: sort what’s worth saving, stow reusable parts neatly, and recycle or compost what’s beyond repair.
Materials
- – Duct tape (heavy-duty)
- – Clear outdoor spray sealer or waterproofing spray
- – Zip ties and extra rope
- – Sandbags, bricks, or heavy weights
- – PVC pipe or broom handles for masts
- – Pool noodles or foam padding for rails and edges
- – Battery-powered lanterns and pathway lights
- – Heavy-duty tarp and clamps
- – Scissors/utility knife and work gloves
- – Large storage bins and labeled bags
- – Garbage bags and a small toolbox (screwdriver, pliers, hammer)
Steps
- 1. Walk the site before you build: map out a clear, well-lit path from sidewalk to porch and mark any low branches or trip hazards to remove.
- 2. Anchor major pieces: bury posts, tie masts to fence posts or trees, and add sandbags or bricks to bases so wind won’t flip them.
- 3. Soften impact points: wrap railings and exposed edges with pool noodles or foam and secure with duct tape.
- 4. Secure fastenings: add extra grommets or zip ties to sails and banners; double up attachment points for heavy winds.
- 5. Protect paper elements: spray signs and maps with a clear sealer or laminate; cover fragile props with a tarp if rain is expected.
- 6. Light the way: place battery lanterns along walkways and the ship deck to prevent trips after dark.
- 7. Run a safety walkthrough: test every step and handhold; if a child can push something over, reinforce it.
- 8. Keep a repair kit handy: tape, rope, zip ties, and a tarp allow fast fixes during the night.
- 9. Teardown routine: separate keepers from trash immediately; fold fabric sails, coil ropes, and label bins for next year.
- 10. Final yard sweep: collect small debris and recyclables to avoid mower hazards and neighborhood litter.
Follow these steps to enjoy the spectacle without the stress — your crew will have fun and you’ll keep cleanup and repairs manageable.
5. Assembling the Pirate Ship: Smart Materials, Simple Layout, and Step-by-Step Build
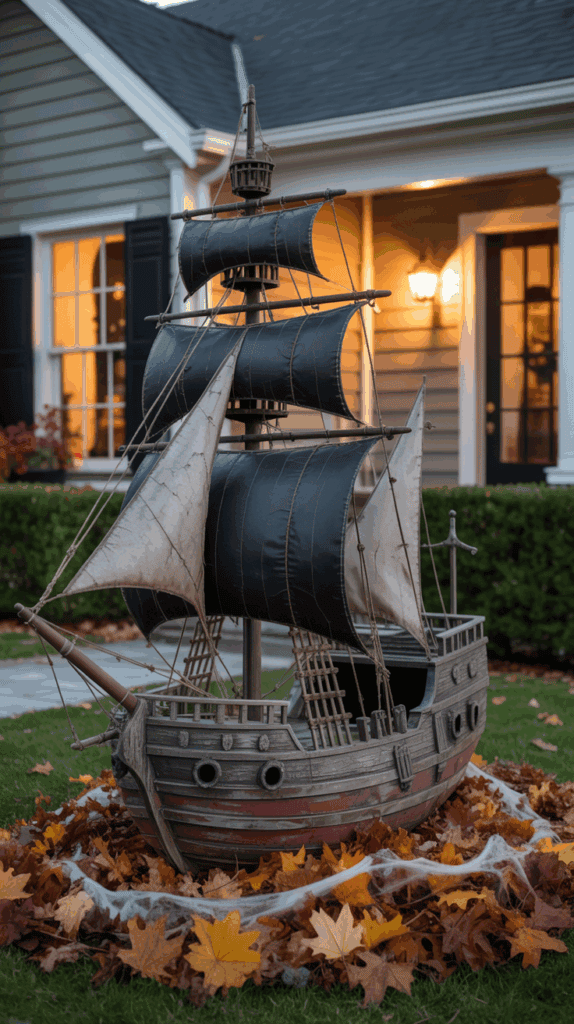
Creating a yard pirate ship that looks impressive but stays family-friendly starts with practical choices and a clear plan. Choose sturdy, low-cost pieces you can cut, tie, and layer — things that won’t blow away at the first gust and that kids can safely climb up to pose on. Think in terms of a lightweight but stable base, a central mast, and dramatic sails rather than heavy construction: the goal is visual impact more than structural perfection.
Before you begin fastening anything, sketch and stake out the footprint on the lawn. Mark where the bow and stern will sit, decide how wide the hull needs to be for photos (a 4–6 foot width works well for family shots), and set a reasonable mast height (around 6–8 feet if you want tall sails but still accessible). That quick layout saves time, helps you estimate how much material to collect, and lets you spot potential hazards — slope in the yard, sprinkler heads, or overhead wires — so you can adapt the design safely.
Materials
- – Cardboard boxes (large appliance boxes) or corrugated plastic sheets
- – Wooden pallets or scrap lumber for a deck base
- – PVC pipe, broomstick, or dowel for the mast
- – Old sheets, tarps, or plastic sheeting for sails
- – Exterior acrylic paint and wide brushes
- – Zip ties, duct tape, rope, and a staple gun (if available)
- – Sand, gravel, or a bucket with concrete mix for mast anchoring
- – Bricks, heavy pavers, or sandbags to weight down the base
- – Optional: pool noodles, toy steering wheel, plastic tubs for details
- – Utility gloves and safety goggles (for cutting and fastening)
Steps
- 1. Clear and mark: Use chalk or string and stakes to outline the hull, bow, and stern. Confirm the area is flat and away from hazards.
- 2. Build the base: Lay pallets or stacked cardboard where the hull will sit. Secure layers with zip ties or tape and add pavers at corners for weight.
- 3. Form the sides: Attach large cardboard panels or corrugated plastic upright along the base edges. Reinforce with scrap wood braces or additional tape on the inside.
- 4. Install the mast: Place the PVC/dowel into a weighted bucket filled with sand or gravel and set it in the center of the hull. For extra steadiness, anchor the bucket to the base with rope or screws through a wooden platform.
- 5. Hang sails: Drape sheets or tarps over the mast and secure at corners with zip ties or rope. Add simple pirate motifs with paint or fabric markers.
- 6. Add details and safety features: Attach pool noodles or rope as railings, mount a toy wheel, and round off any sharp edges with tape.
- 7. Weatherproof and secure: Spray exposed cardboard with a clear sealer or cover with plastic; bring light pieces inside in high winds and check anchors after storms.
Small repairs and storage: Keep spare tape, rope, and a tarp nearby for quick fixes, and store reusable parts in a dry spot so next year’s setup is faster.
Final Thoughts
A backyard pirate ship is more than a decoration—it’s a stage for memories, neighborhood interactions, and seasonal fun. Start with a clear plan and simple sketches, choose durable, weather-appropriate materials, and build in safety and pack-away features from the outset so the display stays usable year after year. Final flourishes like lighting, movable props, and a few interactive activities will turn a structure into an experience.
With attention to proportion, stability, and maintenance, even modest DIY skills can produce a dramatic result. Gather a few helpers, set realistic time and budget limits, and focus on the details that deliver character. The result will be a showpiece that impresses neighbors, invites play, and makes your outdoor space truly unforgettable.