Chic Coastal Halloween Costumes for Women — Cute, Comfortable, and Easy to DIY
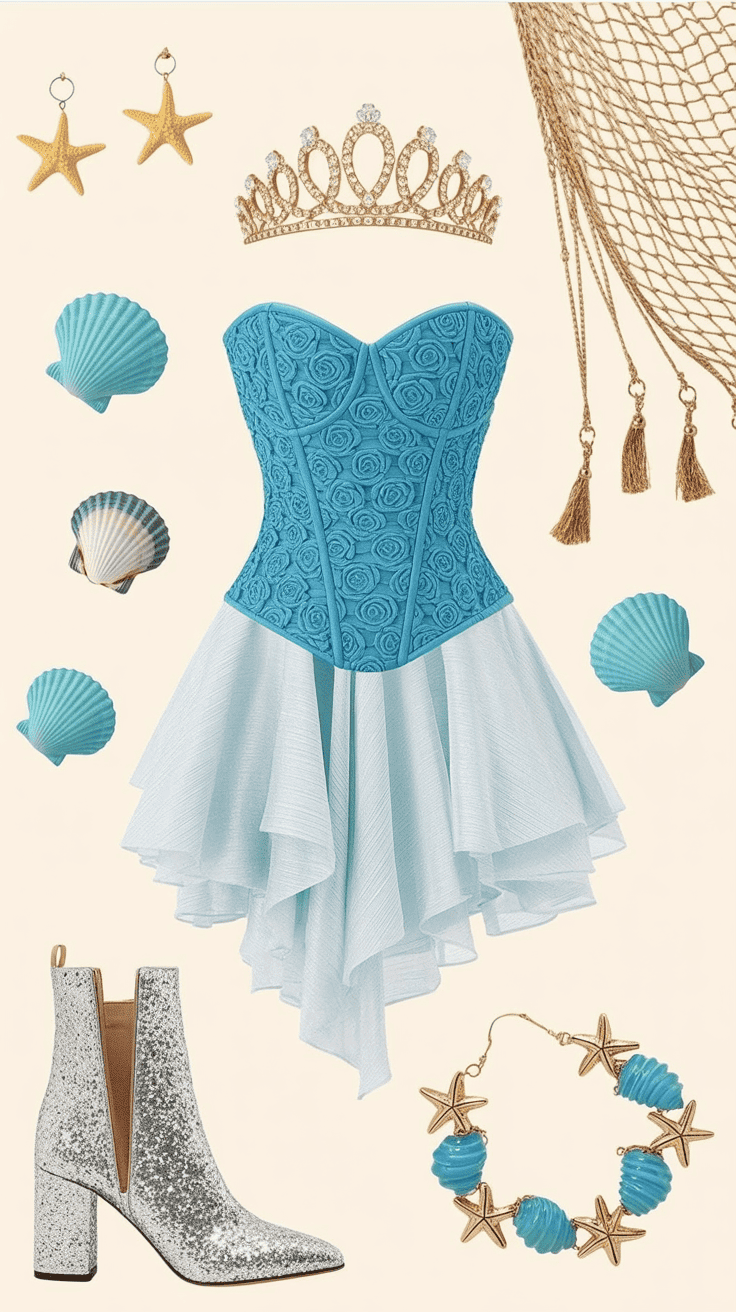
Turn Halloween into a seaside celebration with coastal costume ideas that feel fresh, fun, and surprisingly easy to pull together. Whether you’re headed to a bonfire, a neighborhood party, or an evening stroll along the shore, beach-inspired looks can be lightweight, breathable, and instantly festive. This guide shares playful themes, quick DIY projects (like a seashell tiara and sarong), practical tips for choosing pieces that travel well on sand or pavement, and smart ways to source accessories without breaking the bank.
These ideas emphasize approachable styling and materials you likely already own or can find at a craft store. From simple outfits built around a cover-up and statement jewelry to fuller costumes that still allow for movement, focus on breathable fabrics, secure footwear, and accessories that won’t fly away in a sea breeze. Use the sections that follow to spark inspiration, gather supplies, and try a few easy DIYs so you can enjoy the Halloween fun comfortably and camera-ready.
1. Clever Coastal Halloween Costume Ideas

Bring Halloween to the shoreline with costumes that balance playful spookiness and beach-ready comfort. Focus on lightweight fabrics, quick-dry layers, and accessories that won’t blow away in the sea breeze. Think in terms of a practical base—swimsuit, sarong, light dress, or boardshorts—then add themed elements like shells, sea-themed jewelry, or glow-in-the-dark paint. Waterproof makeup, secure fastenings, and comfortable sandals keep the look polished and wearable from midday sun to bonfire after-dark.
Choose effects that work with the environment: sparkle and iridescence read beautifully in daylight, while UV- or glow-in-the-dark accents take over at dusk. Avoid heavy wigs or cumbersome props; instead use headbands, clipped accessories, and fabric fasteners so you can move freely on sand and step into the water if you want. Safety tips: tie long scarves or sashes low and snug, keep small decor away from open flames, and test face and body products for water-resistance to avoid unexpected smudging.
Materials
- – Lightweight base pieces (swimsuit, sarong, linen shirt, or maxi dress)
- – Assorted shells, faux starfish, and small beads
- – Fishnet or mesh fabric (scrap or shawl)
- – Waterproof face and body paint or cream makeup
- – Fabric glue or waterproof hot glue
- – Elastic headbands, ribbon, and safety pins
- – Small umbrella or translucent parasol (for jellyfish look)
- – Streamers, organza, or thin ribbon for tentacles
- – Battery-powered LED string lights or glow paint (optional)
- – Crochet or sequin trim (optional) and scissors
- – Sandals or barefoot-beading supplies
Steps
- 1. Pick your base: choose a breathable, quick-dry piece that suits movement—boardshorts or a one-piece for sporty looks, a sarong or maxi dress for whimsical vibes.
- 2. Prep accessories: arrange shells and beads into clusters you can glue onto a headband, belt, or the neckline of your top. Use fabric glue for breathable fabrics and waterproof hot glue for sturdier items.
- 3. Build the theme: for mermaid—drape fishnet over a skirt or sarong and attach shells; for tropical pirate—pair an off-shoulder linen blouse with a colorful sash and a sea-star eyepatch; for jellyfish—attach streamers to the rim of a translucent umbrella and carry it upside down.
- 4. Secure everything: reinforce attachments with ribbon ties or safety pins so parts don’t fall off while walking on sand. Keep heavier items low on the body.
- 5. Finish with makeup: apply waterproof shimmer, bold eyeliner, or glow highlights along cheekbones and shoulders. Use glow paint for skeleton bones or to outline tentacles that will pop as light fades.
- 6. Footwear and final checks: choose sandals with secure straps or barefoot sandals. Do a movement test—walk, sit, bend—to ensure nothing restricts you before you head out.
These simple swaps and coastal-friendly tweaks make classic Halloween ideas feel fresh and totally beach-appropriate.
2. Seashell Tiara and Sarong: Easy DIY Beach Halloween Costume
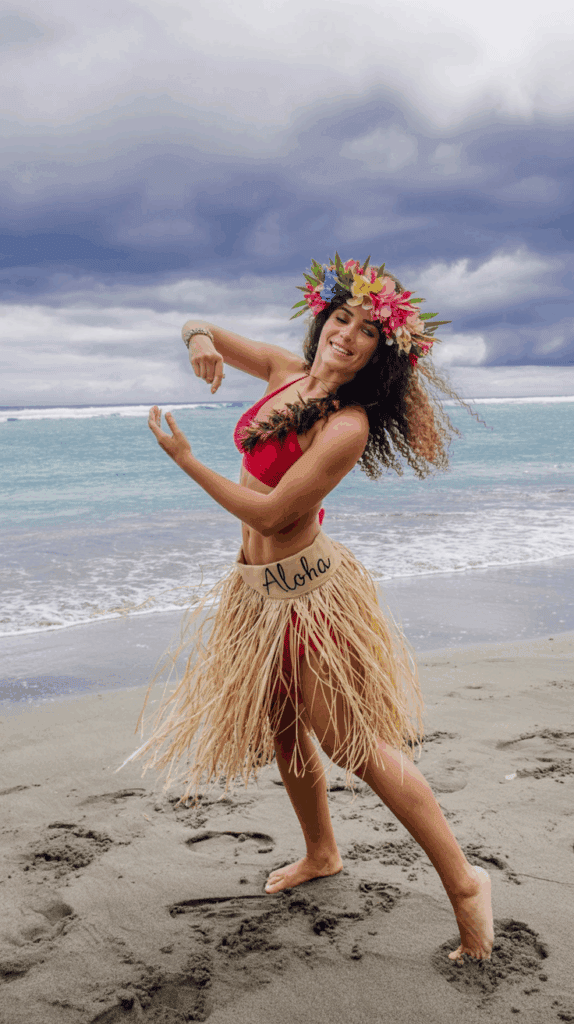
Create a breezy, eye-catching beach Halloween look that’s lightweight, affordable, and easy to wear all evening. A simple seashell tiara paired with a versatile sarong transforms basic beachwear into a costume that feels whimsical without being heavy. This combination works whether you want a subtle nod to the sea or a more embellished, mermaid-adjacent vibe — and it packs down small for travel.
Plan for comfort and practicality: choose materials that tolerate sand, wind, and a little moisture, and keep embellishments light so the crown stays secure. Protect your hair and skin from hot glue and sharp shell edges, and pick breathable fabrics for the sarong so you stay cool. With a few basic supplies and 30–45 minutes of assembly, you’ll have a look that’s unmistakably coastal and completely your own.
Materials
- – Thin metal or plastic headband, or flexible jewelry wire
- – A selection of seashells (cleaned) or lightweight faux shells
- – Hot glue gun or waterproof craft glue
- – Small faux pearls, sea glass chips, or flat-backed rhinestones (optional)
- – Ribbon or elastic cord for ties
- – Large sarong, oversized scarf, or lightweight beach wrap
- – Sandpaper or a nail file (to smooth shell edges)
- – Clear acrylic sealer spray or waterproof clear nail polish (optional)
- – Safety pins or small elastic bands (for securing the sarong)
Steps
- 1. Prepare shells: Rinse and fully dry natural shells. Use sandpaper or a nail file to dull any sharp points. If using natural shells, seal them with a light coat of acrylic sealer or clear nail polish to reduce flaking and make cleanup easier.
- 2. Build the base: If using wire, bend it into a comfortable circular shape and wrap with a bit of ribbon or fabric to prevent snagging. For a headband, simply make sure it fits comfortably behind your ears.
- 3. Arrange your design: Lay shells, pearls, and glass chips on the band to map out the look before gluing. Place larger shells in the center and smaller pieces toward the edges for balance.
- 4. Attach shells: Working in small sections, apply glue to the shell backs and press onto the band or wire. Hold each piece in place until set. Add a few dabs of glue between shells to anchor any gap fillers like pearls or glass chips.
- 5. Add ties and finishing touches: Secure short lengths of ribbon or elastic to the ends for extra hold and to disguise wire ends. Trim stray glue strings and touch up any visible glue with paint or additional embellishments.
- 6. Tie the sarong: Fold the sarong into a triangle for a strapless dress, wrap it around your torso and tie at the side or back. For a skirt, fold it lengthwise and tie at the hip. Use safety pins or small elastics to reinforce knots in windy conditions.
- 7. Final checks: Try the full outfit and move around to ensure the crown stays put and the sarong is secure. Keep a small emergency kit with extra safety pins and clear glue for quick fixes.
This look is easy to adapt — swap colors, skip the sealer for a raw beach vibe, or layer with light jewelry for extra sparkle while keeping the costume comfortable and beach-ready.
3. Wrap-Up: How to Keep Your Beach Halloween Costume Cute and Comfortable
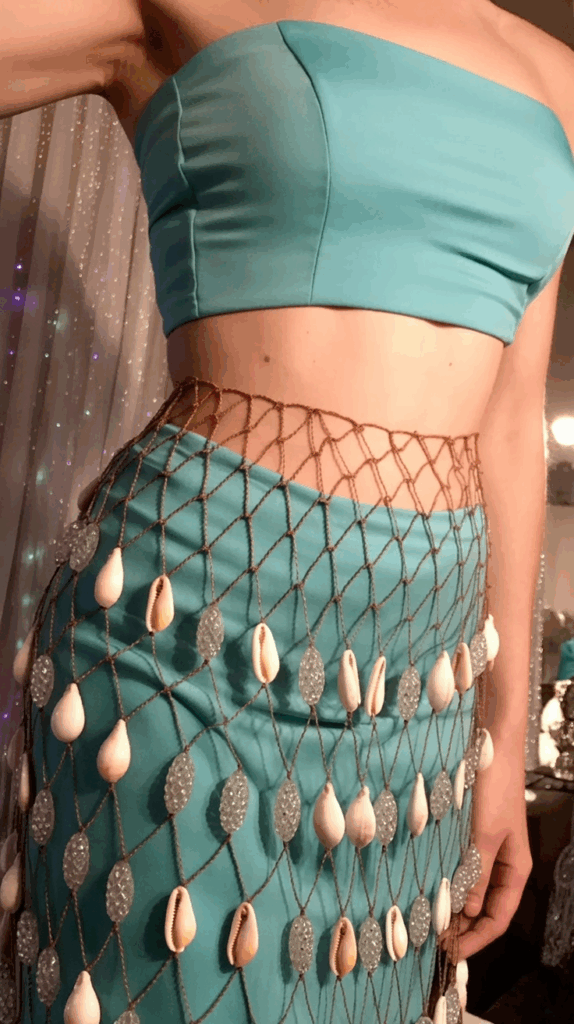
A beach Halloween should feel playful, light, and effortless. When choosing or building your look, prioritize fabrics and silhouettes that breathe and move with you—think loose skirts, airy wraps, and quick-dry pieces. The goal is a costume that looks intentional without slowing you down: you want to laugh, dance, chase waves, or stroll the boardwalk without worrying about heat, sand, or wardrobe malfunctions.
Personal touches make a simple outfit unforgettable. Add one or two themed accessories—like a shell necklace, a painted compact mirror, or a sun-faded bandana—to keep the costume distinctive without adding bulk. Think in layers you can put on or peel off as the evening cools: a lightweight sarong, a cropped denim jacket, or a tied button-up shirt instantly changes a look while doubling as warmth and modesty when needed.
Practical prep saves the night. Pack a tiny repair-and-comfort kit so a slipped strap or smeared makeup doesn’t derail the fun. Choose waterproof or sweat-resistant cosmetics and secure loose pieces with fashion tape, clear elastic, or discreet safety pins. For night events, consider a few subtle reflective accents or glow-friendly accessories so you stay visible without sacrificing style. Finally, keep shoes and accessories beach-appropriate—sand-gripping sandals, sturdy espadrilles, or barefoot-friendly charms work better than heels or heavy boots near the shore.
Materials
- – Small sewing kit (needle, thread matching costume colors)
- – Clear fashion tape and a few safety pins
- – Clear elastic or small hair elastics for quick fixes
- – Mini bottle of fabric-safe stain remover or spray
- – Travel-size sunscreen and waterproof makeup (eyeliner or mascara)
- – Zip-top plastic bags for electronics and wet items
- – Foldable tote or mesh bag for sandy pieces
- – Lightweight sarong or wrap
- – A few battery tea lights or clip-on glow accents (optional)
- – Sand-friendly sandals or shoe bags
Steps
- 1. Lay out your costume and test movement: sit, bend, and walk to reveal any weak spots that need reinforcing.
- 2. Reinforce straps and hems with a few stitches or clear elastic before you leave home.
- 3. Use fashion tape to secure necklines or open laps, and tuck small loose elements into a zip bag.
- 4. Apply waterproof makeup and carry a compact for quick touch-ups; store extra in a zip-top bag to keep it sand-free.
- 5. Pack the sarong or light wrap at the top of your bag for easy access when the breeze picks up.
- 6. Keep electronics in a sealed bag and bring spare batteries or portable lights if you’ll be out after dark.
- 7. If rain or a splash happens, blot immediately with a clean cloth and apply spot remover when possible.
- 8. At the end of the night, shake out sand before packing and rinse delicate pieces at home to extend their life.
With a few thoughtful preparations, you’ll stay comfortable, confident, and ready to enjoy every coastal Halloween moment.
4. Choosing a Beach-Friendly Halloween Costume

Dressing for a beach Halloween means balancing creativity with the realities of sand, sun, and wind. Start with a comfortable base — swimwear, a lightweight dress, or linen separates — so you can move, sit, and dance without fuss. Prioritize fabrics that dry quickly and breathe, and avoid bulky or heat-trapping layers. Aim for a look that reads as festive from a distance but stays easy to manage up close: think bold accessories, a playful prop that won’t be ruined by a breeze, and clothing that layers simply for changing temperatures.
Think ahead about durability and convenience. Choose waterproof or long-wear cosmetics and pick accessories that can handle salt and sand — coated metals, resin, or well-sealed shells are safer than delicate chains and glued embellishments. Keep footwear functional: flat sandals, water-friendly slides, or decorative barefoot sandals keep you grounded and comfortable on shifting sand. Finally, plan a compact repair and comfort kit (safety pins, clear elastic, sunscreen, and hair ties) so small mishaps won’t derail your night.
Materials
- – Lightweight, quick-dry base (swimsuit, linen dress, or jersey top)
- – Sheer or open-weave cover-up (sarong, kimono, or gauze shirt)
- – Waterproof makeup essentials (mascara, eyeliner, setting spray)
- – Low-profile, water-resistant footwear (sandals or barefoot sandals)
- – Sturdy accessories (coated metal, resin, or sealed shell pieces)
- – Small repair kit (safety pins, fabric tape, clear elastic/thread)
- – Sun protection (reef-safe sunscreen, wide-brim hat or light scarf)
- – Small waterproof pouch for phone and keys
Steps
- 1. Choose your base layer first: pick a swimsuit or lightweight outfit you’re comfortable wearing all day and that fits your costume theme.
- 2. Add a quick-dry cover-up that enhances the look and can be removed easily if you get warm — a sarong or sheer kimono works well.
- 3. Select accessories that read clearly from a distance but are made from durable materials so they won’t tarnish or fall apart in sand or salt.
- 4. Opt for waterproof and long-wear makeup; apply a light primer and finish with a setting spray to lock everything in place.
- 5. Pick shoes that keep you stable on sand and won’t soak up water; break them in a few days before the event to avoid blisters.
- 6. Test any props or headpieces in a windy spot to ensure they stay secure; use discreet ties or hairpins when needed.
- 7. Pack your repair kit and essentials in a small bag so you can fix straps, reattach trim, or reapply sunscreen quickly.
- 8. Have a weather plan: a lightweight wrap or packable poncho can save the look if the temperature drops or it sprinkles.
With thoughtful fabric choices, secure accents, and a tiny emergency kit, your beach Halloween costume will be both stunning and beach-ready.
5. Best Places to Source Beachy Costume Accessories (Plus an Easy DIY Shell Crown)

Finding the right finishing pieces for a beach Halloween look is about balancing style with practicality. Seek lightweight, sand-friendly items and prioritize pieces that won’t blow away or become uncomfortable in humid, salty air. Look beyond obvious costume aisles — think thrift shops for vintage scarves, craft stores for faux seashells and pearls, and hardware stores for mesh or netting that can be repurposed into dramatic overlays.
When buying or making accessories, plan for how you’ll wear and secure them. Choose elastic or adjustable fittings for comfortable, all-night wear; use clear fishing line or elastic cord for invisible joins; and opt for faux shells and sealed embellishments that won’t degrade if they get damp. If you’re attending an outdoor event, test your accessories while moving around to make sure nothing rattles, droops, or rubs uncomfortably.
Materials
- – Faux seashells (various sizes)
- – String of faux pearls or bead garland
- – Thin elastic cord or ribbon
- – Wide headband or metal hairband base
- – Lightweight felt or fabric scraps (for backing)
- – Strong fabric glue and/or hot glue gun with low-temp glue sticks
- – Clear fishing line or fine nylon thread
- – Small bobby pins and flat-back hair clips
- – Scissors and needle (optional)
Steps
- 1. Lay out your design: arrange shells and pearls on a flat surface to plan the crown shape. Group by size so larger shells sit at the center and smaller ones taper toward the sides.
- 2. Prepare backing pieces: cut small rectangles of felt to match the backs of each shell. This protects the headband and gives glue something to grip.
- 3. Attach shells to felt: use a dab of strong fabric glue or low-temp hot glue to affix each shell to its felt backing. Let them dry completely before handling.
- 4. Secure to the headband: glue the felt-backed shells to the top of your headband base, overlapping slightly for stability. Press firmly and allow to set according to glue instructions.
- 5. Add beads and pearls: use clear fishing line or nylon thread to stitch or tie pearl strands between shells, creating a draped, oceanic look. Anchor ends under the felt pieces with glue.
- 6. Reinforce with bobby pins: for extra hold, slide small bobby pins beneath the felt edges and into the hair when wearing the crown, preventing slip on windy nights.
- 7. Weatherproof small areas: if you expect humidity or mist, brush a thin layer of clear sealant or fabric-safe finish over glued joins to minimize loosening.
- 8. Final test: wear the crown while walking and sitting to check comfort and balance; trim any excess thread and tuck rough edges under felt.
This simple DIY gives you a durable, beach-ready accessory that pairs well with swimsuits, cover-ups, or coastal-inspired costumes, and it’s easy to adapt to different color schemes and themes.
Final Thoughts
Coastal costumes are all about effortless style and sensible choices — a few smart adjustments can keep you comfortable while you celebrate. Prioritize breathable layers, adjustable pieces, and secure footwear, and fasten accessories with stitches, snaps, or small weights so crowns and draped sarongs stay put. Scout local markets, thrift shops, and craft aisles for shells, woven hats, and rope belts, or make a simple shell crown from a lightweight base and glue. With minimal fuss and a little planning, you can create a beach-ready Halloween outfit that’s playful, practical, and perfectly suited to autumn nights near the water.